An Open Letter to My Unborn Child

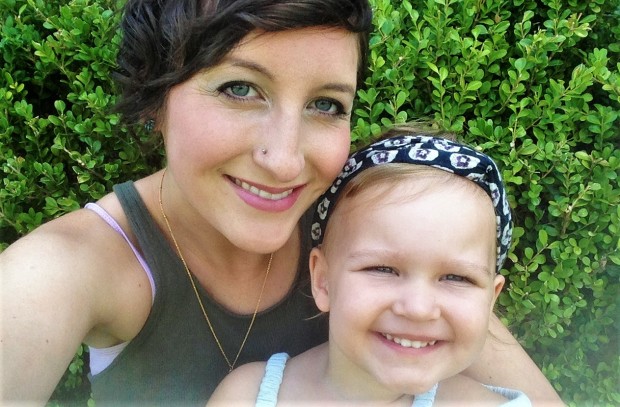
This is Bethany here, and I wrote this letter to my son, Oliver.

I start the third trimester of my pregnancy next week! My husband, Denver, and I (that’s our family above) are so excited for him to arrive. This is a sentiment close to my heart, and I welcome you to peek inside our little family.
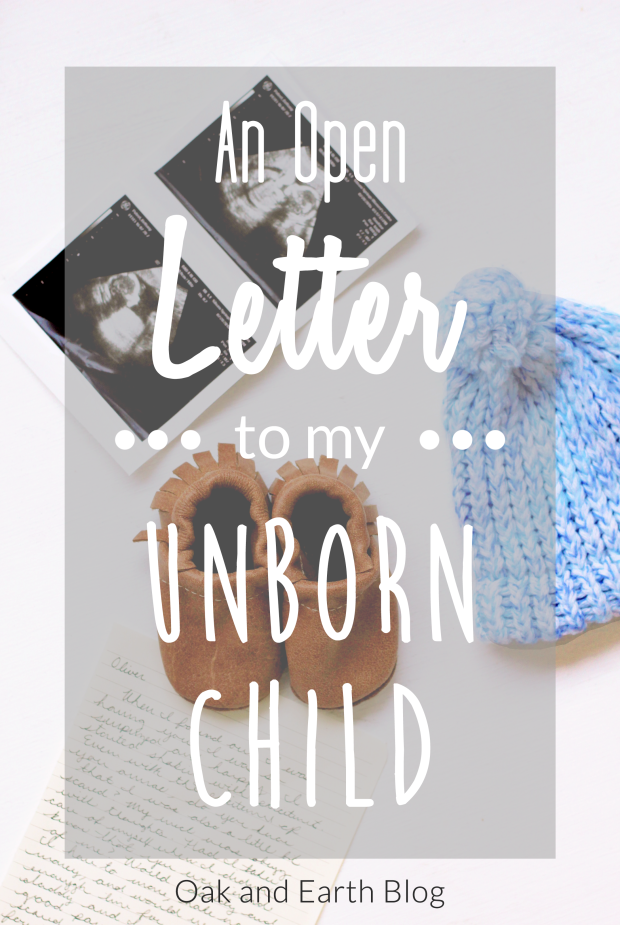
Final_Pinterest2.png

Pin this image!

Oliver,

As I sit down to write this letter, I’m overwhelmed with the thought that you have been in my tummy for almost 7 months. Even though there are times when you knock the wind out of me, my heart swells with so many wonderful emotions. When I found out I was having you, I was so surprised and happy! Even though I was excited, I was also a little bit scared.

My mind was abuzz with thoughts. Had I taken care of myself when I didn’t know that you were inside of me? Would daddy and I have to move, make more money, and would we be able to shuffle our busy lives to make enough time for you? As I looked at the positive pregnancy test, I realized that all of these little questions could be wrapped up into one heavy one. Would daddy and I really make good parents?

With these questions looming, I still had to do one important thing — tell the love of my life that we made you!

When I told your daddy that we are having you, he hugged me and cried. He was so surprised and so beautifully happy! This is one of our favorite days. What a special memory you made for us, Oliver. We made an appointment to see the doctor. You know, the guy you’re always shy around! As the doctor was searching for you in my tummy, all of those scary questions started flooding back.

Then we saw you.

You were nothing but a white speck in a sea of black. As small as you were, we saw the flash of your precious heartbeat. Oh my son, I will never forget that moment. Do you know what I found out? You are a strong and perfectly healthy baby. This made me realize that the love we already have for you overshadows all the worry! God is so good to remind us of how blessed we are to have you in our lives.

I want you to know a few things about your daddy. As soon as he found out about you, he started praying for you every day. I am always so grateful for how much he does for us. Daddy and I work really hard so that we can have a happy home, but daddy works especially hard. Aren’t you proud of him? He brings us food when we are hungry, and he even eats ice cream before bed because he thinks it helps you! That’s your silly daddy. He kisses you goodnight, and he waits by my side to feel you kick and roll.

He held my hand so tight when we went to a big check up to see how you’re growing. On this day, God gave us peace about you. Your daddy lit up when he saw your face and features in 3D for the first time! You were just 22 weeks old! He thinks you have my nose, and when you wake up from a comfortable sleep, I think you scrunch up your forehead just like he does! We got your picture taken, and he took it to the office and showed all his coworkers. He’s already so proud of you.

Most of all, I want you to know how much your daddy and I love and respect each other. In fact, we love each other so much that we asked God to bring you into our lives! When God said yes, He let us learn so much about you.

This is what we know about you so far — You like to roll around my tummy at work and hide away when we visit the doctor. You love it when I rest, and when I sing and play my guitar. The only time I feel you take naps is when I exercise! I even know a few things you don’t like. You don’t like spicy food at all. Don’t worry, your daddy doesn’t like it either. You must not like it when I try and bend over to tie my shoes or paint my toenails, because you stick your little feet in my ribs when I try. It makes me grunt and laugh. You sure are a stinker. You’re so active, and I love it when you circle around my tummy and play.

Do you want to know my favorite thing about you? You’re so sweet and loving to us! When I am sad, you dance around. When I am tired, you kick me and remind me that you’re there for me. And when daddy and I are overwhelmed with how busy we are, we pull out the pictures of your face and you remind us to slow down and to count our blessings. Thank you for all of that, little one!

Although your room isn’t all the way put together yet, and we aren’t rolling in a big pile of money, all that really matters is the love and time we share together as a family. We have to wait a little bit longer to share this time together. You’re due to be here very soon after Christmas! Don’t worry little one. Whenever you decide to come, we will make your day so special. I know right now you think somersaults are fun, but you should see all of the wonderful and colorful things of the world! Your dad and I like to draw, play music, hike around, and see friends. Some people have told us that we can’t do these things when you get here. But we will find a way to make our own special and fun memories with you by our side. We can’t wait to share all of this with you!

Oliver, whenever this day arrives, I want you to know the world you’re coming into. Not everyone in this world has peace in their hearts, and this world can be a scary place. Despite all of that, know that God is always holding you in His hands. I have a few important promises I’m making to you. I want you to remember them when the world seems too much to bear.

I promise to show you love and understanding. I promise to guide you when you’re unsure of what to do, and I promise to listen to what you have to say. I can also promise you that I will make mistakes. Some days will be hard, and on those days you might not like me very much. So when those days come (and they will come), know I still love you because you are my son.

Do you know how I can promise you this? You have already helped us know a kind of love we never knew we could feel.

We still have so much to learn about you, but we can’t do this until we meet you face to face! All of your cousins, aunts and uncles, and grandparents are so excited to see you too! Some of your little cousins have been practicing your name. So be sure you answer to the name of “Obbaler” when you come out so that you don’t hurt their feelings.

Daddy and I are ready for the sleepless nights and for our world to be turned upside down. Because that means that you have arrived.

I can’t wait to meet you, son.

Mom

Thank you so much for reading! I enjoyed opening up my heart to my son, and to you as well. You can follow our family journey on Instagram @BethanyMPoteet.

-Bethany

3 Trendy Hair Styles for Fall 2016

This post is written in partnership with Megaphone Influence and Soapbox Insights + Influence on behalf of their client, Thermaluxe, by Remington. All opinions are 100% our own.

Hello Oak and Earth readers, it’s Bethany and Tera here, and we are getting so excited about the Fall season! What’s not to love? Pumpkin Spice Lattes (oh so typical), changing leaves, cooler weather, yummy candles, and new fashion. We want it to hurry up and get here already! All of us girls at Oak & Earth love Fall hair and fashion.

It’s always fun to see the newest Fall fashion trends, and we did our best to research and find some of the cutest Fall 2016 hair trends (before they overtake our Pinterest pages and our favorite magazines) so that we could share some of them with you! A big thank you to Thermaluxe, by Remington for aiding us in selecting some great hot tools to get #RemReady for these Fall looks!

Trendy hair styles for fall 2016

Pin this image!

← T E X T U R E D   S T Y L E →

Textured hair is in for Fall, and we couldn’t be happier about it. Whether it’s straight, wavy, short, or long, all hair types can be textured! Even better, this look takes almost no time at all. To achieve texture, you can use a small curling wand for short hair, and a larger wand or a straightener for longer hair! Lightly wave a few chunks or pieces and leave the others how they are naturally! Another fun way to create texture for medium to long hair is to keep the ends straight and blunt while tousling or waving the rest. The final touch for this look is to add some sea salt spray or dry shampoo. This creates tackiness to your hair so that you can kind of rough it up for your free style! For shorter hair, use a little bit of hair paste to create a fun, tousled look, and a finishing spray to make it last all day! Check out the captions to see what hot tools we used to create texture!

We used a 1” slim Thermaluxe straightener on Bethany’s mid length hair for blunt ends.

We used a 3/4”-1” Thermaluxe wand on Tera’s short hair to give it body.

← K N O T   I T   U P  →

Who doesn’t love a good knot in the Fall? This can be a top knot, mid knot, or even a half knot! If you wear your hair textured the day before, throw it up the next day into a knot of your choice! These knots pair amazingly with a big fall sweater and a scarf. A fun little Oak and Earth tip is to create the textured style on day one, do a half knot on day two, and a top knot on day three! This gives you three different looks, and only one day of using hot tools on your hair! Even better, all of these looks align with the Fall 2016 hair trends.

← B I G  W A V E S →

Big waves are on trend for a Fall look! You can use a curling wand or a straightener to create big waves. Because of the high heat, wands allow you to do a wrap-and-go technique. This gives you a loose and natural wave without having to rest your hair on a hot tool for an extended amount of time. Instead of curling it to perfection, run your fingers through it to give it a more natural wave! Short hair is so fun to play with on this look! You can create a soft, beachy wave for a more natural look, or create a bigger curl for a more dramatic ‘do’! Check out our captions to see which hot tools we used for our waves.

Tera and Bethany waved their hair with the 3/4”-1” barrel Thermaluxe curling wand. You can use the larger 1”-1 and ½” barrel for longer hair or bigger waves!

◊◊◊◊◊◊◊◊◊◊◊◊◊◊◊◊◊◊◊◊◊◊◊◊◊◊

What are our favorite brands and products to use to achieve each of these looks?

Since us girls of Oak and Earth are real women with very real budgets, every product we mention in this post can be purchased at Wal-Mart and on Walmart.com!

Texture Spray

Getting your hair to be tacky is imperative for your textured look! We both use Not Your Mother’s Sea Salt Spray. We love the texture it gives without weighing your hair down, and the bottle lasts such a long time! If you’re wanting that textured look, this is such an easy and inexpensive way to achieve it. For a pixie, a waxy hair paste is a great way to create the same tackiness that the sea salt spray makes, making it easy to use for almost every style. Here is a brand that has some great reviews!

Hot Tools

As mentioned before, we used a few hot tools to achieve these styles. If you’re going to use hot tools on your hair, we highly recommend products that focus on keeping the integrity of your hair! This is what we love about the Termaluxe tools. We loved that the tools were so smooth on our hair, making the styling process easy and quick! With the curling wand, the base of the iron is hotter than the tip. This keeps volume at the root of your hair where you need it without frying your ends! We also love that there are different sizes of each tool, giving variety for different hair type and length. Since the Thermaluxe tools reach high heat, you only have to do a one pass wave over your hair. The high heat also lets your style last longer and can be used fewer times throughout the week. Spray your day old waves with your favorite dry shampoo or texture spray, and your hair is just as trendy and cute as the day before!

Dry Shampoo

Not washing your hair every day helps retain hair health and moisture. But what about the excess oil and flat texture it leaves behind? Dry shampoo allows you to go a couple days without washing your hair, and also gives you root volume and texture! Since these particular Fall looks will be able to last a couple days, skipping a few washes also keeps down the damage! Here are a few dry shampoos that we have found work well for us: Dove, Refresh + Care Dry Shampoo and Not Your Mothers Dry Shampoo.

Which one of these Fall 2016 looks are you looking forward to the most?! If you try any of these looks, we want you to share it with us! Tag us on Instagram @OakAndEarth! We’ll be using the hashtags #OakAndEarthBlog and #RemReady for these posts, so be sure you’re following along on our social media accounts! You can find these on the side bar or in the footer. We would also love to see you following on our personal Instagram accounts at @BethanyMPoteet and @TeraPianalto. Now to go snatch a Pumpkin Spice Latte in hopes that drinking one will make the humidity drop and the cool weather roll in! Makes perfect sense, right?

Happy Fall, yall!

Bethany and Tera

photo-sep-14-6-25-05-pm


Our New Normal

As my second pregnancy comes to the finish line–nearly 36 weeks and counting–I suddenly feel the reality hitting me of going from a family of three to a family of four. I anxiously and excitedly prepare for and await the arrival of our second daughter, and though I daydream about how incredible it will be to watch our little girls growing up together and the bond that we pray and hope they will share, tears come to my eyes at the thought of our sweet Norah going from our baby to our oldest daughter as we welcome our newest little one into the family. So many blessings that await our nearly family of four, yet such a bittersweet-ness to saying goodbye to our budding family of three.

These thoughts that have been on my heart recently have me truly soaking up every bit of my Norah that I can before our new love is here. Not because I feel I am losing anything by adding a sweet new blessing, but because I know that my care, my time, my attention, my energy are all about to soon be divided.

shutterstock_424191577

Soaking up even the long, hard days of raising a sassy toddler because I know that soon, the moments of just Norah and mama will be a rarer thing. Our every day routine will be shared with our new baby. Though I know this will bring even more special moments with my girls, my heart clings a little bit longer to Norah’s hugs. I will myself to remember the  special and tender moments of holding my first girl, the countless times I’ve read “Where are You Going, Smitty Baby?” as she sat on my lap begging for just one more book, and the undivided attention that allowed me to cave in (most times). The endless hours I’ve sat on the floor with her and played with her dolls, and the extra time (mostly from saying: “the dishes can wait”) that I had to sit and marvel at how creative and sweet she was (is) as she plays with her toys and brings them to life. The extra snuggles at night that make my heart swell as I listen to her say her sweet and innocent prayers, and sings her favorite songs. I want to cherish these times more than ever before because I know these last few weeks of just she and I will be fleeting, and they’ll all feel like just a few moments.

I know these moments won’t be totally lost on me; I’ll make time for my oldest treasure, and she and I will continue to have special memories together. But another part of me realizes that these moments will have to be fought for. That our new little love will become a part of our new normal, a part of our story time and our play time, a part of our nighttime prayers. Life with two babies will be a whole new ballpark and learning experience for me, and Norah’s role will go from being our only baby, to being an older sister. My heart bursts with anticipation and pride as I picture this new normal, though I realize the changes and adjustments that Norah and I will have to make may not be as easy for a while. I am so excited to grow our family and begin a new journey, but also so nervous about this transition.

shutterstock_229273192

I look at Norah, and I picture how big she will look standing next to our newborn, but also how much of a baby she really still is. How dependent on her mama she still is, and how I hope (and to be transparent, worry a tad) that she never feels like she can’t depend on me. How she was entrusted to me by the One who gave her life, and how much I rely on Him to help me raise her (and our next) with grace. During my last few weeks of pregnancy, I’m seeing how God is doubling my love. How much love I have for my sweet Norah, and already the love I have for our unborn daughter. How I would do anything for Norah, and already could say the same for our littlest. Though there are moments with my first born that I will miss, there is nothing that I anticipate and look forward to more than becoming a family of four. The bittersweet-ness it is to say goodbye to one season that holds so many memories so near and dear to my heart, and to trade it in for even more love and more precious memories to be shared together.

I am so thankful to God that He extends His love and grace to us so that we can give it. Multiplying the love of a mother so that though her life may look different by adding a new baby to the mix, she doesn’t have to divide her heart and her love for them. Giving mama’s of multiples the energy to get through a sleepless night with one baby, and still do the ‘mama thing’ with the kiddos the next day and with a thankful heart. I am thankful that God has painted a picture of our family and that His picture includes both of our sweet babies.

My time with Norah as my only baby is coming to an end, and it is a precious season that I am thankful to have gotten with her. And though I will miss these moments with her, I am so blessed and grateful to begin our new normal.

-xo,

Tera

IMG_7727.jpeg

My sassy, yet oh so sweet Norah 🙂

D.I.Y. No-Sew Pillow Covers

Hello Oak and Earth readers! It’s Bethany here on the blog this week. It’s been a crazy couple of weeks for us Oak and Earth gals. In the midst of all this craziness, Denver and I have been doing a few home projects (more on this later), and I have decided to show you one that I did recently!

This project came about because we had finally decided to purchase a real couch. Now, when I say real couch, I mean not a passed down (but very comfortable) love seat that we’ve had since we were married. In fact, almost all of our furniture has been passed down to us. We have been so thankful for it, but it’s time for a furniture face lift! Most of it we have been painting or re-inventing.

Ain’t nobody got money for all new furniture (except for Kimye).

A new couch, however, is something we have wanted for a long time and felt the investment was worth it. We found one that we love, and it came with throw pillows! The throw pillows weren’t awful, but they weren’t anything I would have chosen. Instead of tossing them or putting them in a garage sale, I decided to re-invent these too!

I had remembered seeing a video on how to do no-sew slip covers for pillows, and this sounded like a perfect project for a busy girl like me. I had two of these pillows, and I chose a different fabric for each. Why do this project? Simple — all (yes all) throw pillows are expensive, and the fabric I chose is not. I also love that if we change our style later down the road, all I have to do is go grab a new set of fabrics! Win and win. Let’s check it out.

pinterest2

Pin this image!

STEP 1: Pick out fabric for your pillows. I was covering two pillows and chose one yard of white fabric, and one yard of navy fabric with white arrows (as pictured). I found mine at Hobby Lobby.

STEP 2: Lay your fabric pattern face down, and measure it into a square. Fold up excess fabric.

STEP 3: Rotate your fabric into a diamond shape.
STEP 4:
Fold the bottom corner onto the pillow.

STEP 5: While holding the corner of fabric on the pillow (see above), roll the pillow into the middle of the fabric.
STEP 6:
Grab the top corner of the fabric.

STEP 7: Pull that corner over the pillow.
STEP 8: Tuck the corner under so that it makes a straight edge.

STEP 9: Tuck the edges of the fabric in like you’re wrapping a present. This just straightens the edges.
STEP 10: Pull the two sides together in preparation to tie them. As you do this, make sure your fabric is pulled tight and crisp.

STEP 11: Tie the edges into a double knot.
STEP 12: Tuck the excess fabric into the side folds to hide them.

Once these steps are done, you can either display the knotted side, or the flat side (both options are pictured below). The white pillow displayed below is also a cover done the exact same way!

I enjoy having these on my couch or on my bed. Let’s take a look!

nosewpillowcover7nosewpillowcover4nosewpillowcover011nosewpillowcover6

◊◊◊◊◊◊◊◊◊◊◊◊◊◊◊◊◊◊◊◊◊◊◊◊◊◊◊◊◊◊◊◊◊◊◊◊◊◊

This was a really quick and easy D.I.Y.! I am so glad I decided to keep the original pillows and turn them into something I can use in multiple rooms of my house. Being the D.I.Y. loving woman that I am, I can’t wait to experience (and possibly blog about) our next set of home projects! In the mean time, you can keep up with me on Instagram @bethanympoteet, and with our Oak and Earth accounts located in the side bar or footer.

Happy last couple weeks of summer!

❤ Bethany

Whole 30 Approved Sweet Potato Toast

How would you like a Whole30 sweet potato toast or two?

SP toast pin (1)

Pin this image!

Hello Oak and Earthers. So nice to meet you! I’m Lyndi, and I work with the wonderful Shelby who invited me to stop by and say hi.

Hi.

Like any good guest, I thought it only proper I bring along a treat or two. It had to be extra special since this is an extra special site. Their photos and stories are inspiring, aren’t they? And… to be honest… a little bit intimidating. I follow their Instagram feed religiously and swoon over the gorgeous photos and the mood that is set. No way could I just bring you a bowl of eggs or a regular old cup of java.

No way. Today I wanted to do something extra special for you and for the Oak and Earth gals.

So, two things.

One, have you heard about the sweet potato toast craze? I’m seeing it all over the internet. Which really means Pinterest.

Two, did you know that the Oak and Earth gals are going #whole30 this month?

If you have been intrigued by either of these two areas, I can help with the first one. And I can actually help with the second one since these recipes for sweet potato toasts are both #whole30 compliant.

Please help me in deciding which one tastes better. I am at a loss. They are both over-the-top INSANELY DELICIOUS and I may or may not have taken bites back and forth trying to decide. Help, please?

sweet potato toast - sweet (c)nwafoodie

Sweet??

SWEET POTATO TOAST = SWEET STYLE

Makes 2 slices

Ingredients:

  • 1 medium sweet potato
  • 10 pistachios, coarsely crushed
  • 3 cardamom pods
  • ½ teaspoon coconut oil
  • 1 tablespoon almond butter
  • ½ banana
  • pinch of ground cinnamon
  • pinch of sea salt flakes

Instructions

  1. Cut sweet potato ¼” thick. If you go with a large sweet potato, you will have enough slices for both this sweet version and the savory version.
  2. Bake sweet potato in a 350 degree oven for 15 minutes.
  3. Toast the sweet potatoes in a toaster oven or toaster on next to highest level to brown the toast.
  4. Remove cardamom shell and crush seeds to a medium-fine consistency and set aside.sweet potato toast - cardamon crush
  5. Remove toast from oven and butter two slices with coconut oil.
  6. Spread almond butter over toast.
  7. Slice banana and place on almond butter.
  8. Sprinkle toast with cinnamon, cardamom, pistachios, and sea salt flakes.
  9. Serve and enjoy!

sweet potato toast - savory (c)nwafoodie

Or Savory???

SWEET POTATO TOAST = SAVORY STYLE

Makes 2 slices

Ingredients:

  • 1 medium sweet potato
  • 1 avocado
  • lime juice
  • ½ garlic, minced
  • pinch of ground cumin
  • pinch of dried cilantro
  • ½ teaspoon extra virgin olive oil
  • pinch of crushed red pepper flakes
  • pinch of sea salt flakes

Instructions:

  1. Cut sweet potato ¼” thick. If you go with a large sweet potato, you will have enough slices for both this sweet version and the savory version.
  2. Bake sweet potato in a 350 degree oven for 15 minutes.
  3. Toast the sweet potatoes in a toaster oven or toaster on next to highest level to brown the toast.
  4. Remove the meat from the avocado and mash coarsely with a fork.
  5. Remove toast from oven and spread avocado mash.
  6. Lightly sprinkle lime juice and evenly spread out minced garlic over avocado.
  7. Sprinkle toast with cumin and cilantro.
  8. Drizzle olive oil over toast and top with crushed pepper and sea salt flakes.
  9. Serve and enjoy!

So what do you think? Sweet or Savory? Let me know in the comments below, and thanks for reading!

Eat well, my friends.

Lyndi Fultz


Arkansas Women Blogger member Lyndi Fultz writes about living and eating well inspired by life in beautiful Northwest Arkansas at nwafoodie. Much of her blogging inspiration comes from this gem of a place, which she refers to as the proverbial land of milk-and-honey. She doesn’t think you have to live in the big city to be a foodie. All you have to do is explore your own backyard. Light-hearted and approachable, nwafoodie is conversational with a healthy and simplistic approach to eating well. You can also find her on Instagram.


http://nwafoodie.com


D.I.Y. Pom Sandals

Hey, readers! I hope you’ve all been enjoying the warm summer sunshine! My family and I have had a crazy busy few weeks, but we’ve managed to hit the water park a couple of times, and we’ve indulged in quite a few milkshake nights…it’s how we like to roll. If you follow my personal instagram or Oak and Earth’s instagram page, you may have seen that us girls of O&E have recently started participating in the Whole 30 meal plan (basically a diet eliminating grains, dairy, and legumes and of course any processed foods). We plan to share with you guys how each of our Whole 30 experience goes, but so far I can tell you it’s been a challenge on my end! I am keeping some dairy and tiny bit of grain in for pregnancy purposes, but for the most part, those things are not in my diet. I’m a lover of bread and pasta and cheese, so this has not been an easy feat! Aside from this lifestyle change, we have some big house news going on that I’ll share after things settle down a bit, AND not to mention we are on the homeward stretch to meeting baby girl (10 weeks left) EEK! Starting to feel a little bit of stress and a lot a bit of crazy, but we are trucking through. Nothing a fun little DIY project can’t distract me from for a bit anyway!

I’ve been so excited to share this post with you because I really love how these sandals turned out! It’s such a fun accessory to add to your summer wardrobe. These pom sandals are super trendy this season and they’re all over Pinterest and Etsy. It plays up any outfit, so you can be comfy in your boyfriend shorts and a tank, and slap these puppies on, and BAM! You’ve gone from comfy casual to super adorable in .5 seconds! The best part? If you go online to buy these pom sandals, you’ll see that many of them are selling for $100+…I was able to buy my supplies and shoes all for around $30! You can look super cute and trendy without it costing you an arm and a leg, which is always my kind of style!

These did take me a full day to whip up, mostly because it’s a bit of trial and error–especially for the first sandal you assemble. So this makes a perfect summer weekend DIY where you can either spend a Saturday creating them, or split it up over two days!

IMG_8005

Okay, now for the fun part! To make your own pom sandals, you’ll need:

  • Sandals  (Here are some similar ones to mine)
  • Pom Poms
  • Wooden Beads
  • Mini Tassels (if wanted)
  • Thread/Needle*
  • Scissors

* I chose to stitch my materials on to the sandals to make them a little sturdier, but there are some great Pinterest DIY’s for these that just use a hot glue gun!

IMG_8036

To assemble these, I started with trying the sandals on in front of a mirror and placing poms (with a sewing pin) in the desired areas. This part took some trial and error to get them where I wanted them! You can leave sewing pins in place or just make tiny marks with a pen to remember where you want them. Once you have an idea of where you want your poms, unlace the sandals and before making the poms permanently attached, string the wood beads along the sandal straps in desired places. I tried my sandals on during this process a few times to see where I wanted beads once the sandals were actually wrapped around my leg. It helps to do this so that you can see where the pom poms are, and where you’ll have some naked space on the straps! Here is a photo of mine about midway through my second sandal: (You can see I had the beads strung in place and the poms are temporarily pinned with sewing pins)

IMG_8028

After the beads are placed along the straps, then you can begin stitching or gluing your poms into their permanent place! I just did a couple simple stitches to secure them to the sandal, and voila! It was the easiest part of the process. For the strap around the toes, I bought some pom pom trim (from Hobby Lobby), measured across, cut, and stitched. Other than figuring out placement for the poms and beads, it was the most time consuming part of the project. I think hot gluing would do just fine for this part and would save you a good chunk of time!

The last thing I did was assemble the mini tassels to the ends of the straps for a cute added touch. I just looped them on the end of the strap and stitched them to make sure they were secured.

After this was done, I had some super adorable and colorful sandals! They look super cute gladiator style, which is how I wore them here, but they also looked super cute wrapped and bunched closer together! I deemed this to be a very successful DIY and can’t wait to wear them around town!

This was such a fun and cute DIY for summertime, and for the steal of a price, I’d do it all over again! I’m obsessed over this look right now!! We can’t wait to hear what you all think of these pom sandals!

Keep up with us by following our social media pages, and stay up to date with all Oak and Earth happenings! Until our next summery post, stay cool and eat ice cream!


Peace and Love,

Tera -xo

DIY: Summer Popsicles

Hello, everyone! It’s Bethany here, and I can’t wait to dive into today’s blog post. Mostly because it has to do with two of my favorite things – summer and ice treats. Once again, Pinterest scrolling has inspired this week’s post (also a touch of pregnancy cravings). I’m not a huge dessert person, but I cannot resist icy treats! My mom used to pour lemonade into our ice trays and add a toothpick for frozen little popsicles. You know, the 90’s kid way. As a child, I just thought that was coolest thing. With my pregnancy, I have found myself thinking about those ice treats all the time!

Why not make my own?!

popsicle_pinterest.png

If you know me, you know my love of DIY’s. What I love about the making your own popsicles is knowing exactly what’s going in them! I found so many on Pinterest that I wanted to try. To narrow it down, I ended up trying one sweet and a one sour. They turned out so deliciously, and they definitely have my family’s stamp of approval!

Let’s take a look.

Lemon-Lime Popsicles:

Photo Jul 11, 5 40 50 PMPhoto Jul 11, 5 41 04 PMPhoto Jul 11, 5 40 44 PM

I found a lot of lemonade/mojito popsicle recipes on Pinterest, but I kind of wanted to scale it back for this one and nod to my mom’s classic little lemonade pops. This one is so simple and refreshing.

What you’ll need:

  • Popsicle molds **Note: I got my popsicle molds from Bed, Bath and Beyond. I researched what type of molds had good reviews. I also wanted to get the flat classic shape, so I went with these. They can be found HERE.
  • Lemonade
  • One lime
  • Mint leaves if desired

What to do:

I made a small batch of lemonade, and filled my popsicle molds half way. See my notes above to find out more about where I found my popsicle molds. I cut thin slices of lime (you can add mint leaves here if desired) and placed them in the middle of the molds. I then poured the rest of my lemonade into the molds, up to the fill line. The popsicle mold instructions said to freeze for 8 hours. I didn’t feel like mine were fully frozen, so I just left them in over night. Once they are frozen, run warm water over the molds for about 30 seconds. Then they are ready to eat!

Roasted Berry Greek Yogurt Popsicles:

Now that I had fulfilled my sour, I wanted to try some sweet! I absolutely love Greek Yogurt and berries! Why not try a recipe that incorporates both into a yummy frozen treat? I was so excited when I found this recipe, and it did NOT disappoint. I would rave about these all day long if I could! I found this recipe through Pinterest, and I couldn’t be happier with how mine turned out!

Photo Jul 11, 5 47 32 PMPhoto Jul 11, 5 47 55 PMPhoto Jul 11, 5 49 28 PM

Before I link this recipe, I want to note a few beginners tips.  Although the recipe says 4 hours for freezing time, mine took over night to freeze. This might be because of the materials of my molds (plastic). Be sure to run warm water over your molds for 30 seconds before taking the popsicles out.

What you need:

  • Popsicle molds
  • 16 oz vanilla Greek yogurt
  • 1 cup fresh blueberries
  • 1 cup fresh strawberries
  • 1 lemon

The recipe and cooking instructions are linked HERE . This recipe was created and written by the awesome food blogger, Sprinkled With Jules. You’ll have to check her out!

◊◊◊◊◊◊◊◊◊◊◊◊◊◊◊◊◊◊◊◊◊◊◊◊◊◊◊◊◊◊◊◊◊◊◊◊

Photo Jul 11, 5 50 55 PM

I absolutely loved both of these popsicles, and I already have materials to make them again. They were a hit with my family, and a few gasps and heart eye emojis came out when everyone tried the berry ones! Please let me know if you make these recipes, or if you have any questions at all! You can keep up with me on Instagram @bethanympoteet, and the rest of us Oak and Earth gals on our social media links in the side bar or footer.

Happy, summer!

Bethany ❤


Berry Delicious Summer Treats: Ps – They’re Gluten Free!

With temperatures reaching closer and closer to the triple digits, it is finally, truly, feeling like summer. And what goes better with summer than perfectly sun-ripened berries? Answer: nothing.

If you have Celiac Disease, or are gluten intolerant, baked goods can seem like a far-off dream, and gluten-free desserts can often leave something to be desired, but it doesn’t have to be that way! So grab a fork, put on a pot of coffee, and prepare to dig in to these berry delicious, gluten-free, summer treats!

berry delicious

Pin this image!


Mixed Berry Cobbler

This recipe is originally from Bake or Break, but it wasn’t originally gluten-free. However, it was delicious! I had picked a bunch of fresh blackberries from my garden and wanted to make a cobbler, but couldn’t find a gluten-free one to suit me. I modified this recipe by using gluten-free all purpose King Arthur flour, and a little bit of extra butter, because gluten-free flour tends to be crumbly and drier than regular varieties. It turned out wonderfully!

I used a combination of blackberries, strawberries, and blueberries, but you can make it with any combination that suits your fancy! (Next time I’m adding raspberries!)


Prep Time: 15 minutes

Bake Time: 30 minutes

Yield: 4 to 5 servings

Ingredients:

  • 3 cups assorted berries
  • 1/2 tablespoon lemon juice
  • 1 cup all-purpose, gluten-free flour
  • 1/2 teaspoon baking powder
  • 1/2 teaspoon salt
  • 1/2 cup unsalted butter, softened 
  • 3/4 cup packed light brown sugar
    1 teaspoon vanilla extract

Directions:

  1. Preheat oven to 375°F. Grease a 9”x 6” rectangular or 8” round baking dish.
  2. Place the berries in prepared pan. Drizzle with the lemon juice.
  3. Whisk together the flour, baking powder, and salt. Set aside.
  4. In a medium bowl, beat the butter, brown sugar, and vanilla until well-blended. Mix in the dry ingredients until mixture resembles crumbs. Drop the dough evenly on top of berries.
  5. Bake for 30 minutes, or until the top is lightly browned and fruit is bubbly.

Notes:

If you use any larger berries, such as strawberries, I recommend chopping them to blueberry-sized pieces.

For feeding a crowd, this recipe is easily doubled to be made in a 9”x 13” dish.

CR77K0B3GO


Strawberry Shortcake

For some reason, I always feel like having strawberry shortcake on the 4th of July. The two are just inextricably linked to my mind. I guess it helps that strawberries are my absolute favorite fruit.

This recipe from King Arthur Flour was an easy way to satisfy my craving, and was already gluten-free, but unfortunately when I made it I didn’t happen to have any King Arthur Flour on hand! I couldn’t wait the 30 minutes it would have required to run to the store and back, so I substituted with Better Body gluten-free organic coconut flour! I have an obsession with all things coconut (any guesses what my next post is about?) so naturally I loved how this turned out; it complimented the strawberries perfectly! And coconut just seems summery, doesn’t it?

If you do use coconut flour, just remember to add a little coconut milk to balance the dryness I mentioned above.


Prep Time: 5 mins.

Bake Time: 10 mins. to 12 mins.

Yield: 8 to 10 shortcakes

Ingredients:
  • 1 1/2 cups King Arthur Gluten-Free Multi-Purpose Flour, OR Coconut Flour 
  • 2 3/4 teaspoons baking powder
  • 1/4 teaspoon salt
  • 2 tablespoons sugar
  • 3/4 cup heavy or whipping cream
  • 1 large egg

Directions:

  1. Preheat the oven to 450°F. Line a baking sheet with parchment paper and set it aside.
  2. Mix the flour, baking powder, salt, and sugar together in a large bowl.
  3. In a separate bowl, beat together the cream and egg. Pour the wet ingredients into the dry ingredients and mix to form a cohesive dough.
  4. Scoop the dough in 1 1/2-ounce balls onto the baking sheet. Use the palm of your hand to gently flatten each to about 2″ to 2 1/2″ diameter.
  5. Brush the tops of the shortcakes with cream, and sprinkle with coarse white sparkling sugar.
  6. Bake the shortcakes for 10 to 12 minutes, until they’re risen and baked all the way through; break one open to make sure.
  7. Remove the shortcakes from the oven, split, and top with berries and whipped cream. Store, well-wrapped, at room temperature for several days; freeze for longer storage.

Notes:

This took me quite a bit longer than expected; approximately 30-45 minutes.

Don’t forget to add extra liquid, such as coconut milk, to balance with the coconut flour.


Processed with VSCO with a6 preset

Yum! Homemade whipped cream is the best!


What are some of your favorite summer treats? We want to hear about them, as well as what you guys have been up to this summer.  We would love for you to be apart of this Oak & Earth community.

Join us on our social media for more of our adventures in the kitchen, in the community, abroad, and everywhere in between.

Processed with VSCO with a6 preset

Fresh from the garden…

As always, live healthy, and love hard.

-Shelby


5 Ways to Know You and Your Tot are Totally BFFS

Hey, readers! Self proclaimed nap time writer is back at it this week (it’s me, Tera). When I’m not drowning in last night’s dishes and days of laundry, I love getting to use Norah’s nap time to squeeze in a little down time for myself, and let’s be honest, sometimes a nap of my own (second trimester insomnia has me dragging these days)! Today’s nap time is consisting of a few of my favorite things: a bowl of fresh raspberries (all to myself), burning the best candle ever made (Capri Blue’s Volcano…mmmm), and this–blogging!

Since motherhood is one of the biggest roles in my life, I love getting to share little snippets of my everyday happenings and experiences, mom fails, and mom successes! This week, I wanted to share something light-hearted and something that all moms of toddlers (maybe even more specifically, moms of little diva tots) can relate to. We mom’s need to give ourselves a break every now and then from the pressures we feel with doing this mom thing the “right way,” and just have a good laugh. Motherhood is messy, tiring, never ending (I mean like 24/7 all day, everyday, whether you work or stay home), humbling, and completely wonderful! Now, have I done research and created this compilation based on facts? Yeah, basically. No better way than living it first hand, #amiright?

So, with that, I share with you my list of 5 Ways to Know You and Your Tot are  (Totally) BFF’s

Mother and daughter

  1. You’re Attached at the Hip

You and your tot go everywhere together. You’re the inseparable duo, two peas in a pod. You’re the peanut butter to their jelly, the glaze on their donut, the cheese to their macaroni–catchin’ my drift? So much so, they want to go everywhere with you. Literally. You wanna just run and pee really quick? Not without the ying to your yang you don’t! Thinking about taking a nice bubble bath to soothe your sore muscles at the end of your day? Funny you should think that, because that’s exactly what your tot would like to do–and look! You’ve got it all set up and everything…how convenient! Wanna make a quick run to the s-t-o-r-e for a few to grab a couple groceries? They see that glance over to your spouse. Spelling the words don’t help, they know that glance, and they “pobby need to come get sum snacks too, tay?” In true best friend fashion, you two are attached at the hip; many times, very literally. They don’t want to be separated from your actual hip. If this sounds anything like you and your tot, this could mean that you two are BFF’s.

2.  You Tell Them Everything

Here’s the thing: it’s not a true BFF unless you tell them everything. You tell your tot the things you never imagined telling anyone! I mean it. You don’t tell just any friend not to eat your family dog’s dog food, or to please not pick up said family dog’s poo from the yard to bring inside to show you that said family dog did indeed poo in the yard. No, this is BFF level talk. I’m fairly confident you wouldn’t inform just anybody that yes, panties are a must when walking out of the garage, and no, wearing them on top of your head is not an acceptable form. “Get down,” and “don’t jump off of that!” and “no, we don’t poo in the yard like the family dog,” might not be things you’d say to the average Joe of a friend, but BFF’s get down to the nitty gritty. You’ll tell each other the things that no one else will. Is your tot an actual good secret keeper? Negative. She’ll tell every stranger at Walmart that she saw mom’s boobies today (speaking from experience). BUT, you can expect some real honest talk moments–like, “Let’s not talk about mom’s boobies to people, ok?” If you tell your tot things you don’t tell anyone else in the world, you might just be BFF’s.

3. You Share All the Things

Best friends share the motto, “what’s yours is mine, and what’s mine is yours.” Mom’s food tastes better. No, it doesn’t matter that it’s the exact same thing…it might taste completely different on mom’s plate than it does on theirs. Or, that last cookie you hoped to enjoy to yourself…it won’t matter that you’ve already given your tot 2 cookies to eat, they will still give you the sad begging puppy eyes and ask “petty peas, jus one more bite?” until you give in, and it’ll be a bite the size of a large mouthed bass. That warm bubble bath we mentioned earlier? Your tot will insist that it’s more enjoyable if they join you. I mean you could run a separate bath for them, but it just isn’t the same as the one you currently have waiting for you; no, yours is way better and bubblier and the perfect amount of water. Your ice water is what your tot prefers. Not their ice water, not their juice. Your ice water. “I hab some of your dink, mom. Iss perfec’ for me,” they’ll tell you. In the early am when your tot sneaks in to your bed for some morning cuddles, your pillow becomes 3/4 their pillow. No need for them to bring their own pillow; your pillow will suit them just fine. You share potty time together, movie time together, you toot together and laugh together, all day. Have you been an excellent sharer lately? I’m sensing some BFF action–sharing is caring.

4. They Wanna Be Just Like You

Monkey see, monkey do. There is no greater role model in your toddler’s life than you, mom. You’re the bee’s knees, the cat’s pajamas. Whatever you do, wherever you go, your tot wants to do and go also. When you leave your bathroom with a fresh face of makeup, little tot will sneak in and apply that bright red lipstick on her lips (and let’s be real, her cheeks and forehead). She’ll layer her neck with half a dozen of your blingiest necklaces, because she wants to be a superstar like mom. Your tot sees the strange contraption you wear across your chest, and they want in on this action. You’ll need to find a nearly identical bra and assemble it for them, and yes, it’ll be a fight to get it off when you need to leave the house because, “mom wears her bra!” If you’re leaving the house in your sandals, your tot won’t leave until they change out of their sneakers, and into (you guessed it) their own sandals. Are you wearing your sunnies? Well, then I hope you brought a spare! And when you say a phrase that is deemed the funniest phrase ever spoken (by your tot of course), be prepared to hear that phrase for the rest of the day, from them. You’re a rockstar, mom! If only we could get our tots to copy cat us when we ate all of our veggies at mealtime (sigh). If you have a little mini me at your heels all day, then I’d say you’ve found yourself a little BFF.

beautiful young mother daughter smiling each other summer green grass


5. You Could Talk for Hours

A sure sign of a BFF: you two never run out of words. Best friends never shut up (I mean this in the nicest but most sincere way possible). From the moment they wake up, to the moment their eyes close for the night, words are spewing out of your tot’s mouths. If your tot could text, you’d have 56 unread messages by 7 a.m. Questions of “what’s dat,’ ‘what happened,’ ‘what you sayin’ about,’ and ‘why?” are oh so commonly asked by your tot, many, many times in a day. You’re even graced with the occasional 3 a.m. wake up call from the monitor with: “Mom, I wake up!” and an hour’s worth of conversation that follows. No matter if you’re in the bathroom peeing or showering, there is never a short in small talk with your tot; they do not run low on exhaust. Cows, princesses, toots, boogers, feet, raisins…do you see what I’m getting at here? The conversation is endless. Throw in 500 questions in the mix of small talk, and you have a whole 27 hours worth of words exchanged! What’s that you say? There are only 24 hours in a day? If you’re close to losing your voice and your eyes are nearly crossed at the end of the day from all the question answering, pretend phone call taking, and smorgasbord of conversation, you and your tot may just be best friends forever status.


There’s no one that loves you, looks up to you, wants to be like you, and who’s always by your side like your BFF.

IMG_7809 (3)

Me and my BFF

Thanks for reading! We are excited to share some fun summer DIY’s, recipes, and more, so keep an eye out for more posts! Follow our insta page @oakandearth or my personal handle @terapianalto for updates, and more!


XO,

Tera

Pinterest Project Fun: DIY Yarn Hangers

Pinterest_1

Hello, everyone! It’s Bethany here today, and I am so excited to be writing on Oak & Earth  as my favorite season has arrived – summer! During the warmer months, I find myself day dreaming and scrolling through my Pinterest page frequently. With so many fun project ideas available at my fingertips, I decided to take a risk and try one that I’ve been swooning over for a while. DIY Yarn Hangers!

While you can go on Etsy and snag something similar, I prefer DIY’s because you can add personal touches and really make it your own. I also found that the materials to make these hangers are very cost efficient. Once I gathered the materials, I threw on some music and simply tied the evening away. This would be a really fun project to do with some girlfriends!

I chose this yarn hanger DIY in particular because they fit the minimal vibe that I love, the metal rings added a fun touch I hadn’t seen in other yarn hangers, and I thought the user friendly instructions were perfect for a busy girl like me! It turns out, this project wasn’t a Pinterest fail at all (we’ve all had them). I’m absolutely in love, and I think they fit so well with my style and my home.

Here’s how they turned out!

diy4diy6Processed with VSCO with m5 preset

Making the Yarn Hangers

← P R E P A R E 

Because I wanted to hang my pieces in a wide blank space, I decided to make my yarn hangers a little larger than the measurements provided in the DIY. I simply multiplied the measurements to my liking. I found every single material item at Hobby Lobby! Remember that you can choose your own color of yarn, length, texture, tying styles, etc., and that personal choices are part of the fun of doing a DIY!

← M A T E R I A L S →

  • Yarn of choice
  • Scissors
  • Ruler or tape measure
  • Cardboard piece at least 14”
  • Metal rings **Note: The size of ring depends on how large you would like your hanging pieces. The DIY demonstration calls for 1.5” and 3” rings, while I upped the size a touch. There are many sizes to choose from at Hobby Lobby. 
  • Krazy glue
  • Round wood dowel **Note: DIY instructions called for 7. 5″, I chose 12”

← C R A F T →

I followed the instructions in the DIY Yarn Hanger post found HERE. This DIY project was created by the wonderful blogger, Amy, of HomeyOhMy. Her blog is great for minimal and modern home décor ideas and projects, so be sure to check her out!


We are so excited to share all the fun recipes, DIYS, and experiences that we have planned this summer! Please let us know if you try this project, and be sure to suggest some posts you would like to see in the future! You can keep up with me on Instagram @bethanympoteet, as well as our Oak & Earth social media links located in our side bar or footer.

Happy summer, and happy pinning!

Bethany

diy7