D.I.Y. No-Sew Pillow Covers

Hello Oak and Earth readers! It’s Bethany here on the blog this week. It’s been a crazy couple of weeks for us Oak and Earth gals. In the midst of all this craziness, Denver and I have been doing a few home projects (more on this later), and I have decided to show you one that I did recently!

This project came about because we had finally decided to purchase a real couch. Now, when I say real couch, I mean not a passed down (but very comfortable) love seat that we’ve had since we were married. In fact, almost all of our furniture has been passed down to us. We have been so thankful for it, but it’s time for a furniture face lift! Most of it we have been painting or re-inventing.

Ain’t nobody got money for all new furniture (except for Kimye).

A new couch, however, is something we have wanted for a long time and felt the investment was worth it. We found one that we love, and it came with throw pillows! The throw pillows weren’t awful, but they weren’t anything I would have chosen. Instead of tossing them or putting them in a garage sale, I decided to re-invent these too!

I had remembered seeing a video on how to do no-sew slip covers for pillows, and this sounded like a perfect project for a busy girl like me. I had two of these pillows, and I chose a different fabric for each. Why do this project? Simple — all (yes all) throw pillows are expensive, and the fabric I chose is not. I also love that if we change our style later down the road, all I have to do is go grab a new set of fabrics! Win and win. Let’s check it out.

pinterest2

Pin this image!

STEP 1: Pick out fabric for your pillows. I was covering two pillows and chose one yard of white fabric, and one yard of navy fabric with white arrows (as pictured). I found mine at Hobby Lobby.

STEP 2: Lay your fabric pattern face down, and measure it into a square. Fold up excess fabric.

STEP 3: Rotate your fabric into a diamond shape.
STEP 4:
Fold the bottom corner onto the pillow.

STEP 5: While holding the corner of fabric on the pillow (see above), roll the pillow into the middle of the fabric.
STEP 6:
Grab the top corner of the fabric.

STEP 7: Pull that corner over the pillow.
STEP 8: Tuck the corner under so that it makes a straight edge.

STEP 9: Tuck the edges of the fabric in like you’re wrapping a present. This just straightens the edges.
STEP 10: Pull the two sides together in preparation to tie them. As you do this, make sure your fabric is pulled tight and crisp.

STEP 11: Tie the edges into a double knot.
STEP 12: Tuck the excess fabric into the side folds to hide them.

Once these steps are done, you can either display the knotted side, or the flat side (both options are pictured below). The white pillow displayed below is also a cover done the exact same way!

I enjoy having these on my couch or on my bed. Let’s take a look!

nosewpillowcover7nosewpillowcover4nosewpillowcover011nosewpillowcover6

◊◊◊◊◊◊◊◊◊◊◊◊◊◊◊◊◊◊◊◊◊◊◊◊◊◊◊◊◊◊◊◊◊◊◊◊◊◊

This was a really quick and easy D.I.Y.! I am so glad I decided to keep the original pillows and turn them into something I can use in multiple rooms of my house. Being the D.I.Y. loving woman that I am, I can’t wait to experience (and possibly blog about) our next set of home projects! In the mean time, you can keep up with me on Instagram @bethanympoteet, and with our Oak and Earth accounts located in the side bar or footer.

Happy last couple weeks of summer!

❤ Bethany

D.I.Y. Pom Sandals

Hey, readers! I hope you’ve all been enjoying the warm summer sunshine! My family and I have had a crazy busy few weeks, but we’ve managed to hit the water park a couple of times, and we’ve indulged in quite a few milkshake nights…it’s how we like to roll. If you follow my personal instagram or Oak and Earth’s instagram page, you may have seen that us girls of O&E have recently started participating in the Whole 30 meal plan (basically a diet eliminating grains, dairy, and legumes and of course any processed foods). We plan to share with you guys how each of our Whole 30 experience goes, but so far I can tell you it’s been a challenge on my end! I am keeping some dairy and tiny bit of grain in for pregnancy purposes, but for the most part, those things are not in my diet. I’m a lover of bread and pasta and cheese, so this has not been an easy feat! Aside from this lifestyle change, we have some big house news going on that I’ll share after things settle down a bit, AND not to mention we are on the homeward stretch to meeting baby girl (10 weeks left) EEK! Starting to feel a little bit of stress and a lot a bit of crazy, but we are trucking through. Nothing a fun little DIY project can’t distract me from for a bit anyway!

I’ve been so excited to share this post with you because I really love how these sandals turned out! It’s such a fun accessory to add to your summer wardrobe. These pom sandals are super trendy this season and they’re all over Pinterest and Etsy. It plays up any outfit, so you can be comfy in your boyfriend shorts and a tank, and slap these puppies on, and BAM! You’ve gone from comfy casual to super adorable in .5 seconds! The best part? If you go online to buy these pom sandals, you’ll see that many of them are selling for $100+…I was able to buy my supplies and shoes all for around $30! You can look super cute and trendy without it costing you an arm and a leg, which is always my kind of style!

These did take me a full day to whip up, mostly because it’s a bit of trial and error–especially for the first sandal you assemble. So this makes a perfect summer weekend DIY where you can either spend a Saturday creating them, or split it up over two days!

IMG_8005

Okay, now for the fun part! To make your own pom sandals, you’ll need:

  • Sandals  (Here are some similar ones to mine)
  • Pom Poms
  • Wooden Beads
  • Mini Tassels (if wanted)
  • Thread/Needle*
  • Scissors

* I chose to stitch my materials on to the sandals to make them a little sturdier, but there are some great Pinterest DIY’s for these that just use a hot glue gun!

IMG_8036

To assemble these, I started with trying the sandals on in front of a mirror and placing poms (with a sewing pin) in the desired areas. This part took some trial and error to get them where I wanted them! You can leave sewing pins in place or just make tiny marks with a pen to remember where you want them. Once you have an idea of where you want your poms, unlace the sandals and before making the poms permanently attached, string the wood beads along the sandal straps in desired places. I tried my sandals on during this process a few times to see where I wanted beads once the sandals were actually wrapped around my leg. It helps to do this so that you can see where the pom poms are, and where you’ll have some naked space on the straps! Here is a photo of mine about midway through my second sandal: (You can see I had the beads strung in place and the poms are temporarily pinned with sewing pins)

IMG_8028

After the beads are placed along the straps, then you can begin stitching or gluing your poms into their permanent place! I just did a couple simple stitches to secure them to the sandal, and voila! It was the easiest part of the process. For the strap around the toes, I bought some pom pom trim (from Hobby Lobby), measured across, cut, and stitched. Other than figuring out placement for the poms and beads, it was the most time consuming part of the project. I think hot gluing would do just fine for this part and would save you a good chunk of time!

The last thing I did was assemble the mini tassels to the ends of the straps for a cute added touch. I just looped them on the end of the strap and stitched them to make sure they were secured.

After this was done, I had some super adorable and colorful sandals! They look super cute gladiator style, which is how I wore them here, but they also looked super cute wrapped and bunched closer together! I deemed this to be a very successful DIY and can’t wait to wear them around town!

This was such a fun and cute DIY for summertime, and for the steal of a price, I’d do it all over again! I’m obsessed over this look right now!! We can’t wait to hear what you all think of these pom sandals!

Keep up with us by following our social media pages, and stay up to date with all Oak and Earth happenings! Until our next summery post, stay cool and eat ice cream!


Peace and Love,

Tera -xo

DIY: Summer Popsicles

Hello, everyone! It’s Bethany here, and I can’t wait to dive into today’s blog post. Mostly because it has to do with two of my favorite things – summer and ice treats. Once again, Pinterest scrolling has inspired this week’s post (also a touch of pregnancy cravings). I’m not a huge dessert person, but I cannot resist icy treats! My mom used to pour lemonade into our ice trays and add a toothpick for frozen little popsicles. You know, the 90’s kid way. As a child, I just thought that was coolest thing. With my pregnancy, I have found myself thinking about those ice treats all the time!

Why not make my own?!

popsicle_pinterest.png

If you know me, you know my love of DIY’s. What I love about the making your own popsicles is knowing exactly what’s going in them! I found so many on Pinterest that I wanted to try. To narrow it down, I ended up trying one sweet and a one sour. They turned out so deliciously, and they definitely have my family’s stamp of approval!

Let’s take a look.

Lemon-Lime Popsicles:

Photo Jul 11, 5 40 50 PMPhoto Jul 11, 5 41 04 PMPhoto Jul 11, 5 40 44 PM

I found a lot of lemonade/mojito popsicle recipes on Pinterest, but I kind of wanted to scale it back for this one and nod to my mom’s classic little lemonade pops. This one is so simple and refreshing.

What you’ll need:

  • Popsicle molds **Note: I got my popsicle molds from Bed, Bath and Beyond. I researched what type of molds had good reviews. I also wanted to get the flat classic shape, so I went with these. They can be found HERE.
  • Lemonade
  • One lime
  • Mint leaves if desired

What to do:

I made a small batch of lemonade, and filled my popsicle molds half way. See my notes above to find out more about where I found my popsicle molds. I cut thin slices of lime (you can add mint leaves here if desired) and placed them in the middle of the molds. I then poured the rest of my lemonade into the molds, up to the fill line. The popsicle mold instructions said to freeze for 8 hours. I didn’t feel like mine were fully frozen, so I just left them in over night. Once they are frozen, run warm water over the molds for about 30 seconds. Then they are ready to eat!

Roasted Berry Greek Yogurt Popsicles:

Now that I had fulfilled my sour, I wanted to try some sweet! I absolutely love Greek Yogurt and berries! Why not try a recipe that incorporates both into a yummy frozen treat? I was so excited when I found this recipe, and it did NOT disappoint. I would rave about these all day long if I could! I found this recipe through Pinterest, and I couldn’t be happier with how mine turned out!

Photo Jul 11, 5 47 32 PMPhoto Jul 11, 5 47 55 PMPhoto Jul 11, 5 49 28 PM

Before I link this recipe, I want to note a few beginners tips.  Although the recipe says 4 hours for freezing time, mine took over night to freeze. This might be because of the materials of my molds (plastic). Be sure to run warm water over your molds for 30 seconds before taking the popsicles out.

What you need:

  • Popsicle molds
  • 16 oz vanilla Greek yogurt
  • 1 cup fresh blueberries
  • 1 cup fresh strawberries
  • 1 lemon

The recipe and cooking instructions are linked HERE . This recipe was created and written by the awesome food blogger, Sprinkled With Jules. You’ll have to check her out!

◊◊◊◊◊◊◊◊◊◊◊◊◊◊◊◊◊◊◊◊◊◊◊◊◊◊◊◊◊◊◊◊◊◊◊◊

Photo Jul 11, 5 50 55 PM

I absolutely loved both of these popsicles, and I already have materials to make them again. They were a hit with my family, and a few gasps and heart eye emojis came out when everyone tried the berry ones! Please let me know if you make these recipes, or if you have any questions at all! You can keep up with me on Instagram @bethanympoteet, and the rest of us Oak and Earth gals on our social media links in the side bar or footer.

Happy, summer!

Bethany ❤


Pinterest Project Fun: DIY Yarn Hangers

Pinterest_1

Hello, everyone! It’s Bethany here today, and I am so excited to be writing on Oak & Earth  as my favorite season has arrived – summer! During the warmer months, I find myself day dreaming and scrolling through my Pinterest page frequently. With so many fun project ideas available at my fingertips, I decided to take a risk and try one that I’ve been swooning over for a while. DIY Yarn Hangers!

While you can go on Etsy and snag something similar, I prefer DIY’s because you can add personal touches and really make it your own. I also found that the materials to make these hangers are very cost efficient. Once I gathered the materials, I threw on some music and simply tied the evening away. This would be a really fun project to do with some girlfriends!

I chose this yarn hanger DIY in particular because they fit the minimal vibe that I love, the metal rings added a fun touch I hadn’t seen in other yarn hangers, and I thought the user friendly instructions were perfect for a busy girl like me! It turns out, this project wasn’t a Pinterest fail at all (we’ve all had them). I’m absolutely in love, and I think they fit so well with my style and my home.

Here’s how they turned out!

diy4diy6Processed with VSCO with m5 preset

Making the Yarn Hangers

← P R E P A R E 

Because I wanted to hang my pieces in a wide blank space, I decided to make my yarn hangers a little larger than the measurements provided in the DIY. I simply multiplied the measurements to my liking. I found every single material item at Hobby Lobby! Remember that you can choose your own color of yarn, length, texture, tying styles, etc., and that personal choices are part of the fun of doing a DIY!

← M A T E R I A L S →

  • Yarn of choice
  • Scissors
  • Ruler or tape measure
  • Cardboard piece at least 14”
  • Metal rings **Note: The size of ring depends on how large you would like your hanging pieces. The DIY demonstration calls for 1.5” and 3” rings, while I upped the size a touch. There are many sizes to choose from at Hobby Lobby. 
  • Krazy glue
  • Round wood dowel **Note: DIY instructions called for 7. 5″, I chose 12”

← C R A F T →

I followed the instructions in the DIY Yarn Hanger post found HERE. This DIY project was created by the wonderful blogger, Amy, of HomeyOhMy. Her blog is great for minimal and modern home décor ideas and projects, so be sure to check her out!


We are so excited to share all the fun recipes, DIYS, and experiences that we have planned this summer! Please let us know if you try this project, and be sure to suggest some posts you would like to see in the future! You can keep up with me on Instagram @bethanympoteet, as well as our Oak & Earth social media links located in our side bar or footer.

Happy summer, and happy pinning!

Bethany

diy7

HERBventure is Out There: Starting an Indoor Herb Garden

Hello, readers. It’s Bethany here on Oak and Earth today, and I’m so excited to be writing during a time as wonderful as this—Spring.

Being 25 years old, I’ve been living in various apartments and duplexes for about seven years now. While I am completely enamored by the idea of owning my own home, I don’t hate living in an apartment or duplex either! I mean, simple spaces, low utility bills, convenient amenities at your fingertips etc., there’s really a lot to love. But there’s one thing that is always keeping my apartment from having that homey vibe I long for—not having my own garden! When I was little, Spring time meant dirt on my knees, tilling the soil, and eating grapes with my mom as we showered the garden bed with colorful flowers. I even grew my own corn! I miss this so much. If I were to walk outside of my place right now and grow a little garden, the lawn service would mow over it in five minutes flat. Not ideal.

As I have spent years sulking because I can’t grow a full garden, I had never thought about growing one indoors! Thank you, Pinterest, for giving me gardening hope. Instead of waiting for that perfect little starter home, I decided to start one right in my little duplex window sill! I love cooking with fresh herbs, especially in the spring and summer, so I have been thrilled at the thought of my own little indoor herb garden.

Herb2Below, I have listed some questions that I found to be helpful while starting this process:

Purchasing
»
What herbs will I use regularly?
»How many herbs am I comfortable starting out with?
»How obtainable are these herbs for beginners?
»Where can I purchase these herbs and my gardening tools?
»What kind of container will I need for proper growth?

Care
»
How much light do they need?
»Do I have the proper windows for this light? (South facing)
»What type of soil will I need?
»How often do I water them?

Harvesting
»
How will I know when to harvest?
»How do I prep them for cooking?

I found many sites and blogs that answered many of these questions and more, but here are a few sites that I found particularly helpful in my research:

← H E R B V E N T U R E →

I have never planted herbs before, so this herb-venture is completely new to me, and I am fully aware that I could kill them. Whether they thrive or die, I thought we could go on this journey together!

Choosing My Herbs

Prior to purchasing my herbs, I did a lot of thorough research. Besides the links above, I also asked my girls of Oak and Earth about their experiences! We all have been in a planting mood lately, so it’s been really fun chatting about what works and what doesn’t. Instead of starting from seeds, which can be very challenging, I decided to get the herbs from the garden section at Lowe’s. I chose to plant Italian Oregano, Spearmint, and Cilantro. Cilantro in my fresh salsa, mint in that refreshing Mojito, and oregano in a tossed summer pasta? That’s the goal! If you’re not sure what herbs to start with, both of the sites I linked above give a great list of herbs that are able to thrive indoors!

Potting My Herbs

Finding the proper pots is imperative to growth, and I wanted to make sure mine had a good draining hole (be sure to read up on this). They’re going to be a part of your home, so you also want to make sure they fit your style profile! There are a ton of ideas for different potting, shelving, and re-purposing indoor plants on Pinterest. Should they do well, I’m excited to try some of them. I wanted to keep it simple to start out, so I decided to paint my own terracotta pots! Painting them allows you to add your personal touch, and it made for a really fun project. I really love how they turned out, and they fit perfectly in my South facing window.

As I watered them today, I was wondering what their story will be this summer. Do they flourish? Do they die? Do they almost die but I swoop in to nurse them back to health? My hope is that they flourish enough to harvest! I have eaten my home grown corn on the cob as a child, and I am more than excited to cook with my fresh herbs as an adult. Either way, I am just giddy at the thought of taking care of my little herb babies.

Come summer, I’ll be sure to do an updated post about my herbs (dead or alive). I really hope that this gives you fellow apartment-living folk some great ideas! If you enjoyed reading this, you might also want to check out Shelby’s beginners guide to planting succulents here. Please feel free to keep up with our stories a little bit easier by following us on social media! You can follow me on Instagram @BethanyMPoteet. If you like the “Let Your Love Grow Tall” banner in the background of my photos, I got it from our friend Sarah’s shop @PinAndThreadCo. You should definitely check her out, she has some adorable home decor! We have a lot of fun Spring-themed posts in store, so be sure to keep visiting Oak and Earth! In a home big or small, gardening is for all. Thanks for reading!

Happy Spring!

-Bethany

The Lost Art of Letter Writing

When was the last time you received a handwritten letter in your mail box? Do you remember a time when you had to wait weeks instead of seconds to hear from someone? With the advent of email, texting, and instant messaging came the swift decline of what is now affectionately (for me anyway) referred to as “snail mail”. While modern forms of communication and social media undeniably have their perks, there is something about old fashioned mail that is incomparable.

Mailing a letter is the next best thing to showing up at someone’s door. You pick out the stationary or card and pen. You spend time writing out your thoughts and questions, stories and sentiments. You touch the paper with your hands. You seal the envelope. You place it in your mail box, and they retrieve it from theirs. They open the letter you sealed. They touch the same paper. They read the words you wrote by hand. There is an intimacy there that texting can never come close to.

Photo Mar 02, 8 03 52 PM

Photo Mar 02, 9 03 24 PM

I picked up this stationary, dip pen, and wax seal kit at a little shop in Florence, Italy

For those of you who have been following along with us for awhile, you might recall that I have a pen-pal, Becca, whom I have been corresponding with for the past 15 years. In fact, the last piece of mail I’ve received was a “Save-the-Date” to her wedding. Becca and I started writing when we were in 5th grade, but didn’t meet until we were 21. I was studying abroad in Scotland at the time, and she came to visit me from her home in New England. Becca and I have both experienced and been through so much since we began writing all those years ago, and she has been such a blessing to me. I never would have had the pleasure of knowing her, had it not been for handwritten letters. (Becca is also an amazingly talented illustrator and you should definitely check out her work here!)

Another thing I love about letters is that they are a legacy. They don’t disappear with the click of a button. They are a written history to be treasured and passed down through generations. I have letters from my great grandparents and grandparents, many of whom have now passed, and I deeply treasure the words they left behind. Seeing the handwriting of someone you can no longer speak to is almost like them being there with you for a moment as you read.

Photo Mar 02, 7 52 17 PM

In the fast-paced world of 2016, NOW is the time to slow down… and start writing letters. To help you get started, I’ve created this Pinterest board with lots of letter writing/snail mail inspiration! I also encourage you to go out and buy some stationary! Letter writing is an art, and writing on beautiful stationary is an easy way to “pretty up” your missives. Some of my favorite places to pick up something special are Rifle Paper Co., Studio Oh!, and locally, Shindig Paperie!

Photo Mar 02, 9 43 29 PM

Some of the stationary I’ve amassed

Do you love letters? Are you passionate about snail mail? Comment below and tell us why! Share memories of your favorite letter-writing/receiving experiences. We can’t wait to connect with you! Maybe you’ll even wind up with your own pen-pal.

As always, live healthy and love hard!

-Shelby

Photo Mar 02, 7 51 44 PM


Make Christmas Memorable for Your Family While Keeping it Simple

Merry Christmas season, readers! It’s Tera here on Oak and Earth today. This time of year is by far my favorite, for so many reasons! It is a time for family, a time of giving, a whole season of yummy foods, a time for Christmas lights and hot chocolate, and most of all a time to celebrate and remember the true reason for the season: the birth of our Lord and Savior! I have the most special memories of the holidays from my childhood years, and the excitement and fun my family had during the Christmas season has most certainly carried on in me into adulthood!

 I was reflecting recently on Christmas time and my own little family, and I tried to think of ways to make this a memorable time of year for Norah (and us), while keeping our main focus on the true meaning of Christmas and not getting wrapped up in the common mindset of, “more is more.” I want to instill meaningful and treasured memories into Norah’s core for Christmas time that teach her what principles are important to have and to pass down, and that will tug her heart strings (in a good way) for years to come. Simple moments that create a lifelong impact. So, I have created a list of some simple things you can do as a family that will make great memories, give quality time, and can respect even the most frugal holiday budget. I’m sharing my list below, and I hope you can be inspired for your family by some of these ideas! ‘Tis the season!

1.   Christmas Lights Outing  

Photo Dec 06, 2 25 00 AM

Downtown Siloam Springs, AR

This is an easy way for you and yours to have some fun during the Christmas season! My family would do this every year after our Christmas Eve service, but this is something you could do any time during December! Many of your local neighborhoods will have some fun light displays, or your downtown square (for us NWA folk, the Fayetteville square, for example). Some houses even connect their light displays with one of your local radio stations, and it’s really fun to see the lights flickering to the rhythm of the music! Your kids would love it if you all dressed in your comfy, festive Christmas pj’s, whipped up some hot chocolate, and hopped in your car together for a ride around town to see the pretty lights! It’s a nearly free activity (minus a little gas), and the kids will love starting this tradition with you!

 2.  Trim the Tree as a Family 

Photo Dec 08, 6 53 12 AM

Photo Dec 08, 6 52 04 AM

My Christmas mantle in my pretty new house!!

Another fun memory I have from my childhood is helping my mom and siblings decorate our Christmas tree together each year! We would all get a new hallmark ornament every year to add to the collection. My own Christmas tree now is full of all of these ornaments (plus Jeremy’s and now Norah’s). There is something super special about those homemade ornaments and little hallmark collectibles that make a Christmas tree so sentimental and nostalgic! Pick a day where the whole family can be a part of this; and if you want to make a whole afternoon of it, visit a local tree nursery and choose a real tree to take home and decorate! The prices are usually very reasonable and it’s a fun and neat experience for the family. Set your tree up, stick some cookies in the oven, and choose a favorite Christmas movie to watch while you all have fun decorating (our tradition is The Polar Express). Let your little ones have a role in making the tree pretty! You can “touch up” some bare spots after they go to bed and disperse the ornaments that are stringing around the bottom half of your tree up and throughout (they’ll never know the difference), but, in the meantime, let them feel special and like they have an important part of this Christmas tradition! They’ll grow to love it, and their decorating skills should improve over the years ;). For the teeny tots who are still trying to grasp what a Christmas tree is, and from whom you’d like to spare some of your favorite glass ornaments from the game, “throw it on the floor,” try purchasing a mini tree and some plastic ornaments and set it up next to the big tree. We did this for Norah and let her decorate her special tree while we did the big tree and she loved it, (and we purchased her tree for $8)! Until they can better understand the concept of the ornaments and the tree, this is another way to get the littlest tots involved, and they’ll have their own special tree to decorate!

3.  Do an Advent Series Together 

Make some time during the month of December  for everyone to reflect on the ‘reason for the season’ by doing an advent series together. There is nothing more important that you can instill into your children’s hearts (or your own for that matter) than the love of Christ. Make sure in the hustle and bustle that your family stays grounded and that you make some quality time for this! I realize we are already part way through December, but this is something so important that I am adding it anyway to encourage you to do! You can play a little catch up, or just pick up where you are! It will help your whole family remember what matters most during Christmas, and you will instill this most important thing into your kids’ lives–and this is something you can’t put a price tag on! I am linking a great advent series for the whole family to partake in HERE. If you want to save money for budget purposes, there are some great online resources to pull verses and stories from to read each night as a family. Try doing this at a time where everyone is always together, like at the dinner table either before or after a meal (while everyone is still gathered). Making a routine like this is a good way to keep from having to try and squeeze it in at the end of the night while kids are dispersing to bed, or forgetting to do it altogether! After a long day at work or school, this is a great way to end each evening this month and will be so impactive on your kids’ hearts!

Photo Dec 06, 12 24 08 PM

My sweet little family at our church; New Life Church, Fayetteville

Free online resources:

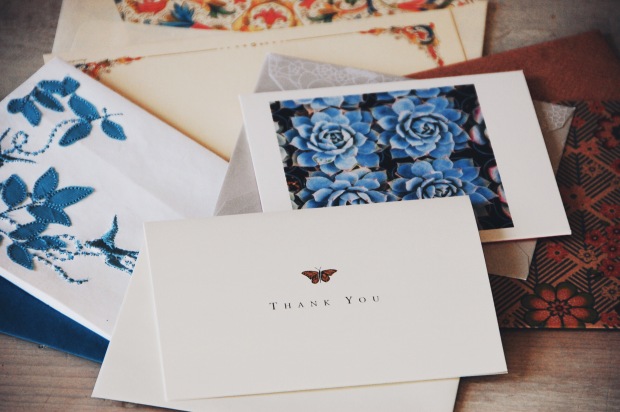
4.  Christmas Cookie Decorating 

You can’t go wrong with a fun day of baking and decorating (and eating)! Tune in on your favorite Christmas pandora station, and you have a festive party right in your own kitchen! Google or Pinterest some easy sugar cookie recipes, pull the sprinkles from your pantry, and check Target’s Christmas aisles for some adorable (and cheap) Christmas cookie cutters! This is something you can do whether you have two or twelve people, and have fun doing it without breaking the bank! Take it to the next level on your baking day by trying a salt dough recipe and making some homemade ornaments that the kids can decorate and hang on the tree! This is a low stress, low cost way to get festive and celebrate the holidays, and will be a fun tradition the whole bunch can look forward to each year.

Fun cookie cutter set HERE ; Delicious sugar cookie recipe found HERE ; adorable and easy salt dough ornament recipe HERE !

5.  Christmas Caroling            

This is an outing to get your extended family and friends involved in! Take a big group around the neighborhood and sing some popular and well-known Christmas songs together! My family has not ever done this, but I think it sounds like a super fun way to spend an afternoon, and would love incorporating this into our yearly festivities! The more the merrier for this activity, so a little planning may be required to get the group together, but it would be well worth the effort, and would create fun memories for the whole family! End the night with some hot chocolate and a nice fire (because you can’t go wrong with hot chocolate)! This is a free way to lift people’s spirits and put a smile on their faces. If you want to go the extra mile this season, look into caroling at your local nursing home and share some love and Christmas cheer with our beloved elders…no one would love and appreciate it more! This is a totally free and fun way to get the whole family involved in some fun times together, and share some great memories!

6.   Gingerbread House Contest

  Nothing like some friendly competition to make for a fun night! You can purchase gingerbread house kits for fairly cheap at the store; why not buy two and make a friendly contest of boys vs. girls and have some fun?! You can have as small or as big of teams as you want, and that makes this activity super universal and accommodating to any family size! Spend the evening dressing your gingerbread houses up, and have some friends be the judge (without them knowing whose is whose). Let the winners choose the next Christmas movie for movie night, or spice it up with a bigger incentive for the winners! This is a tradition that your kids will want to repeat next year, and they’ll cherish their memories!

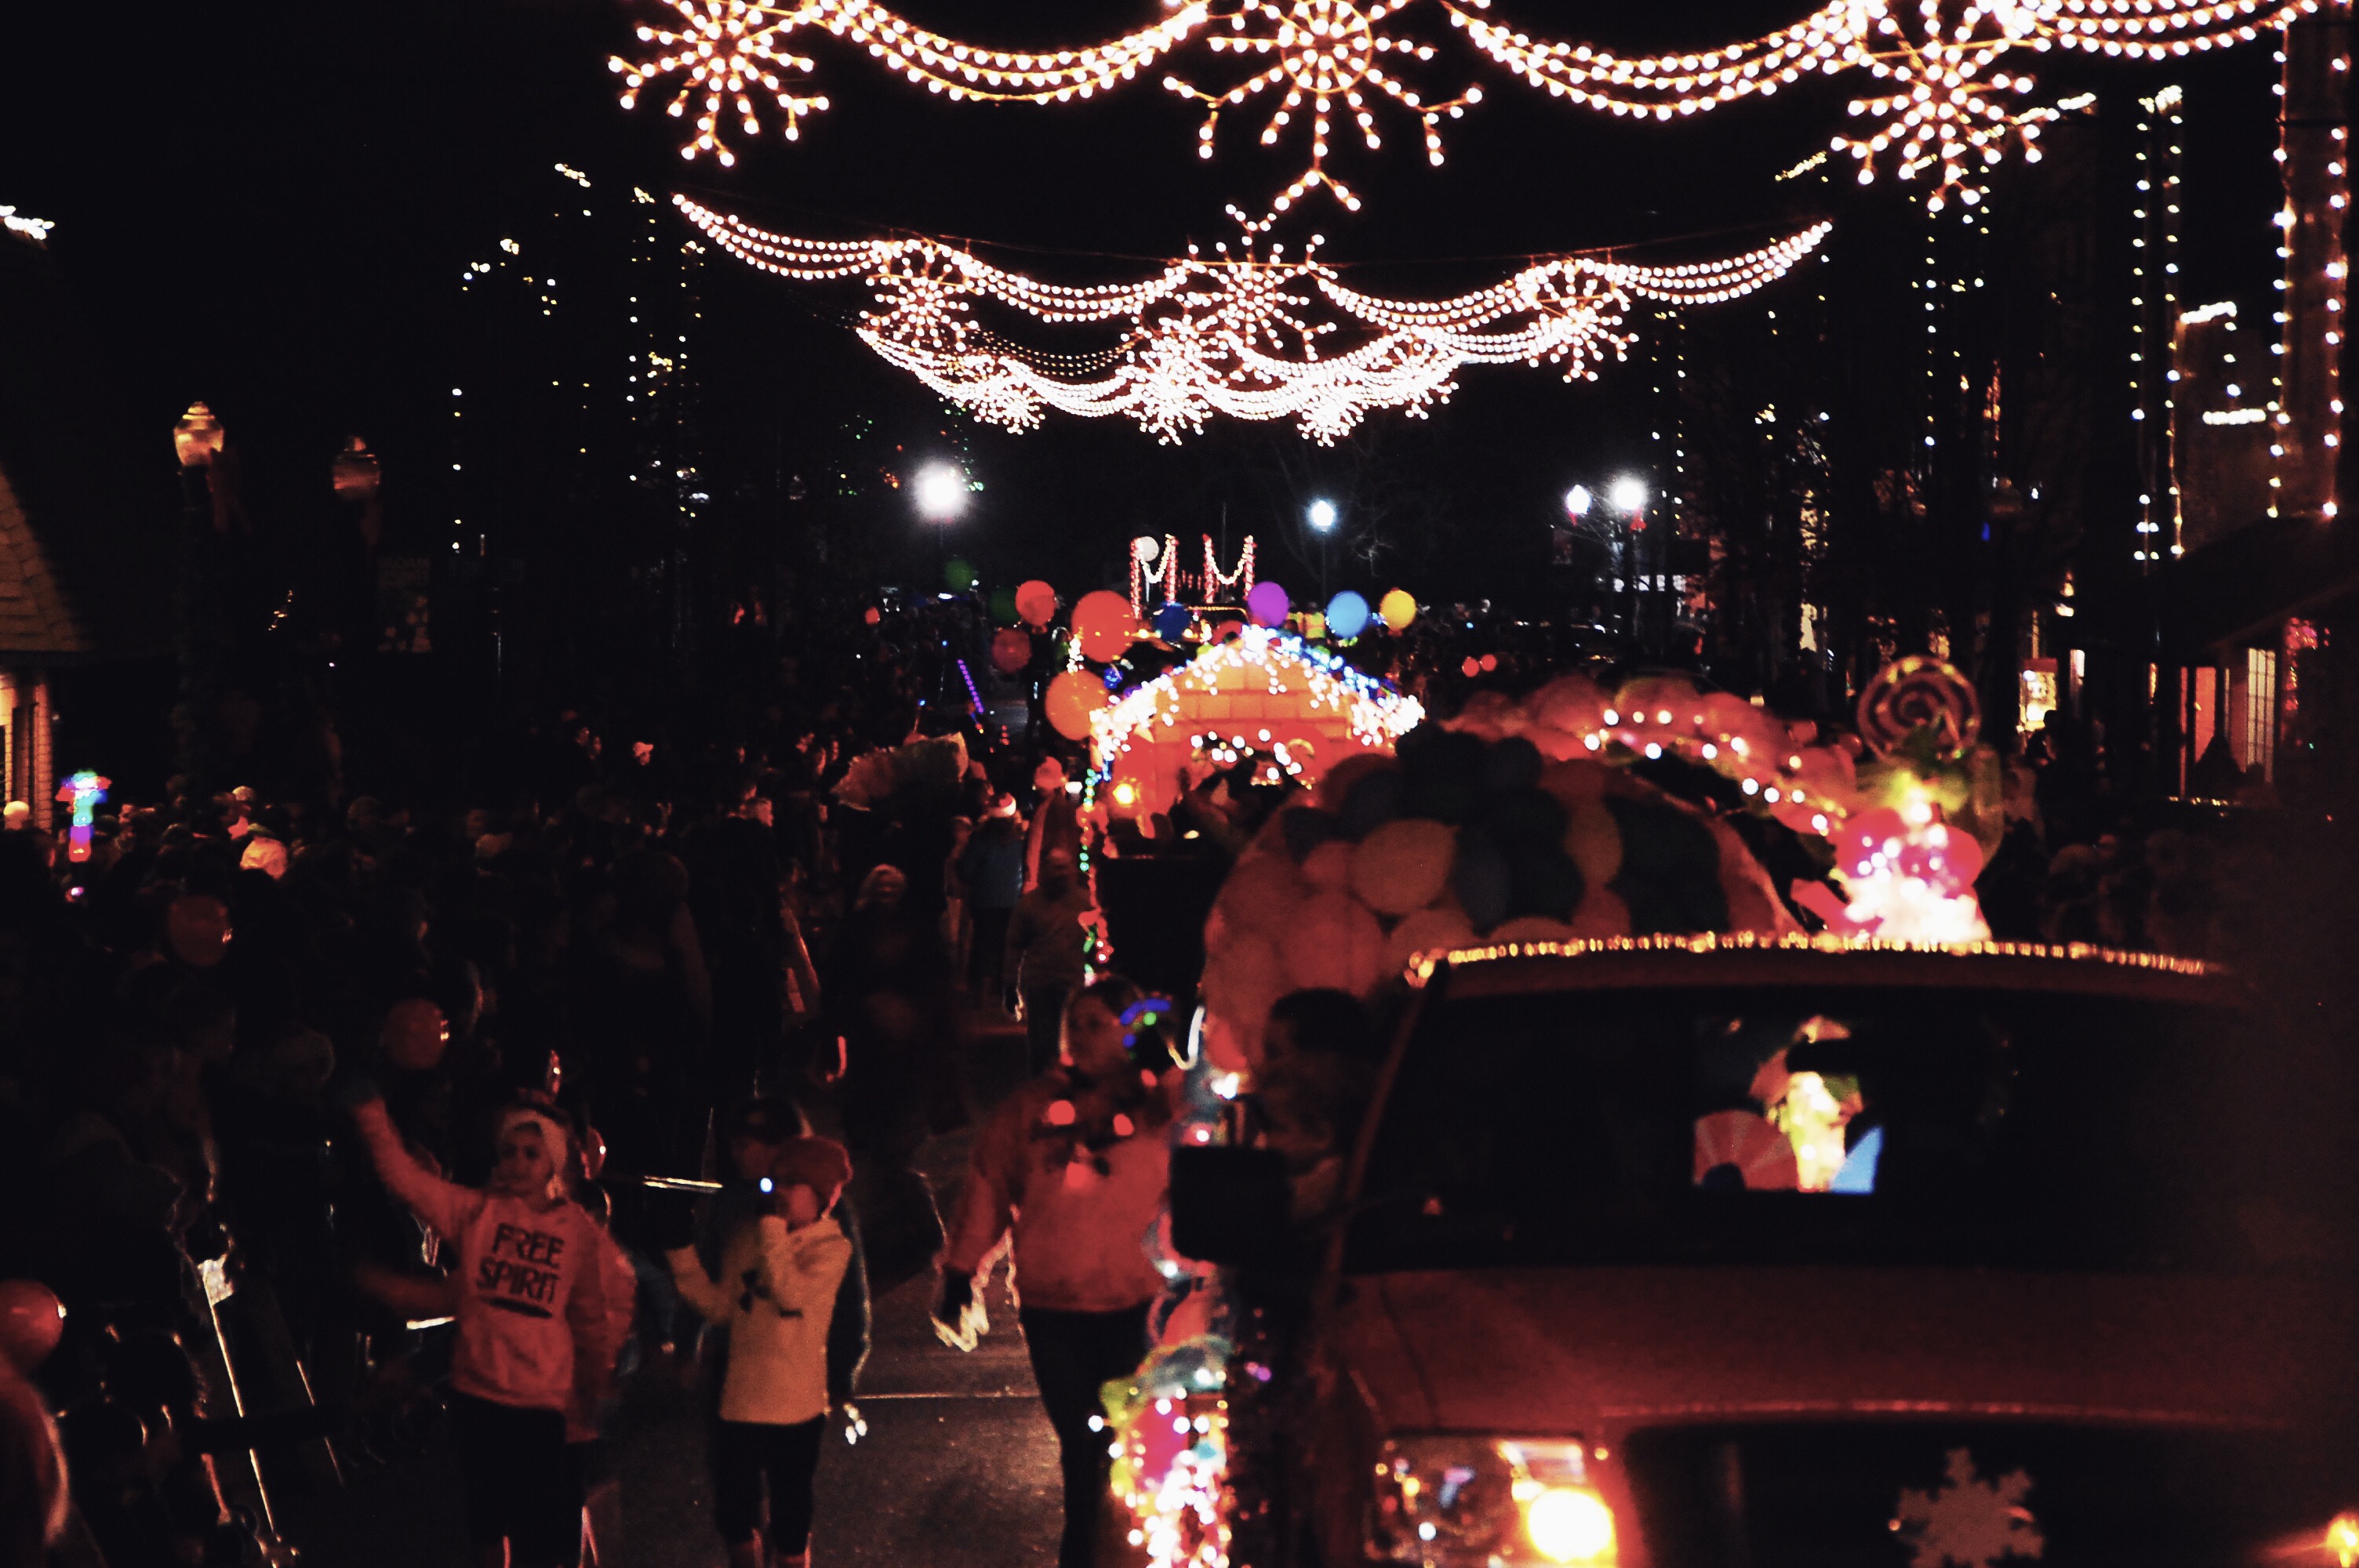
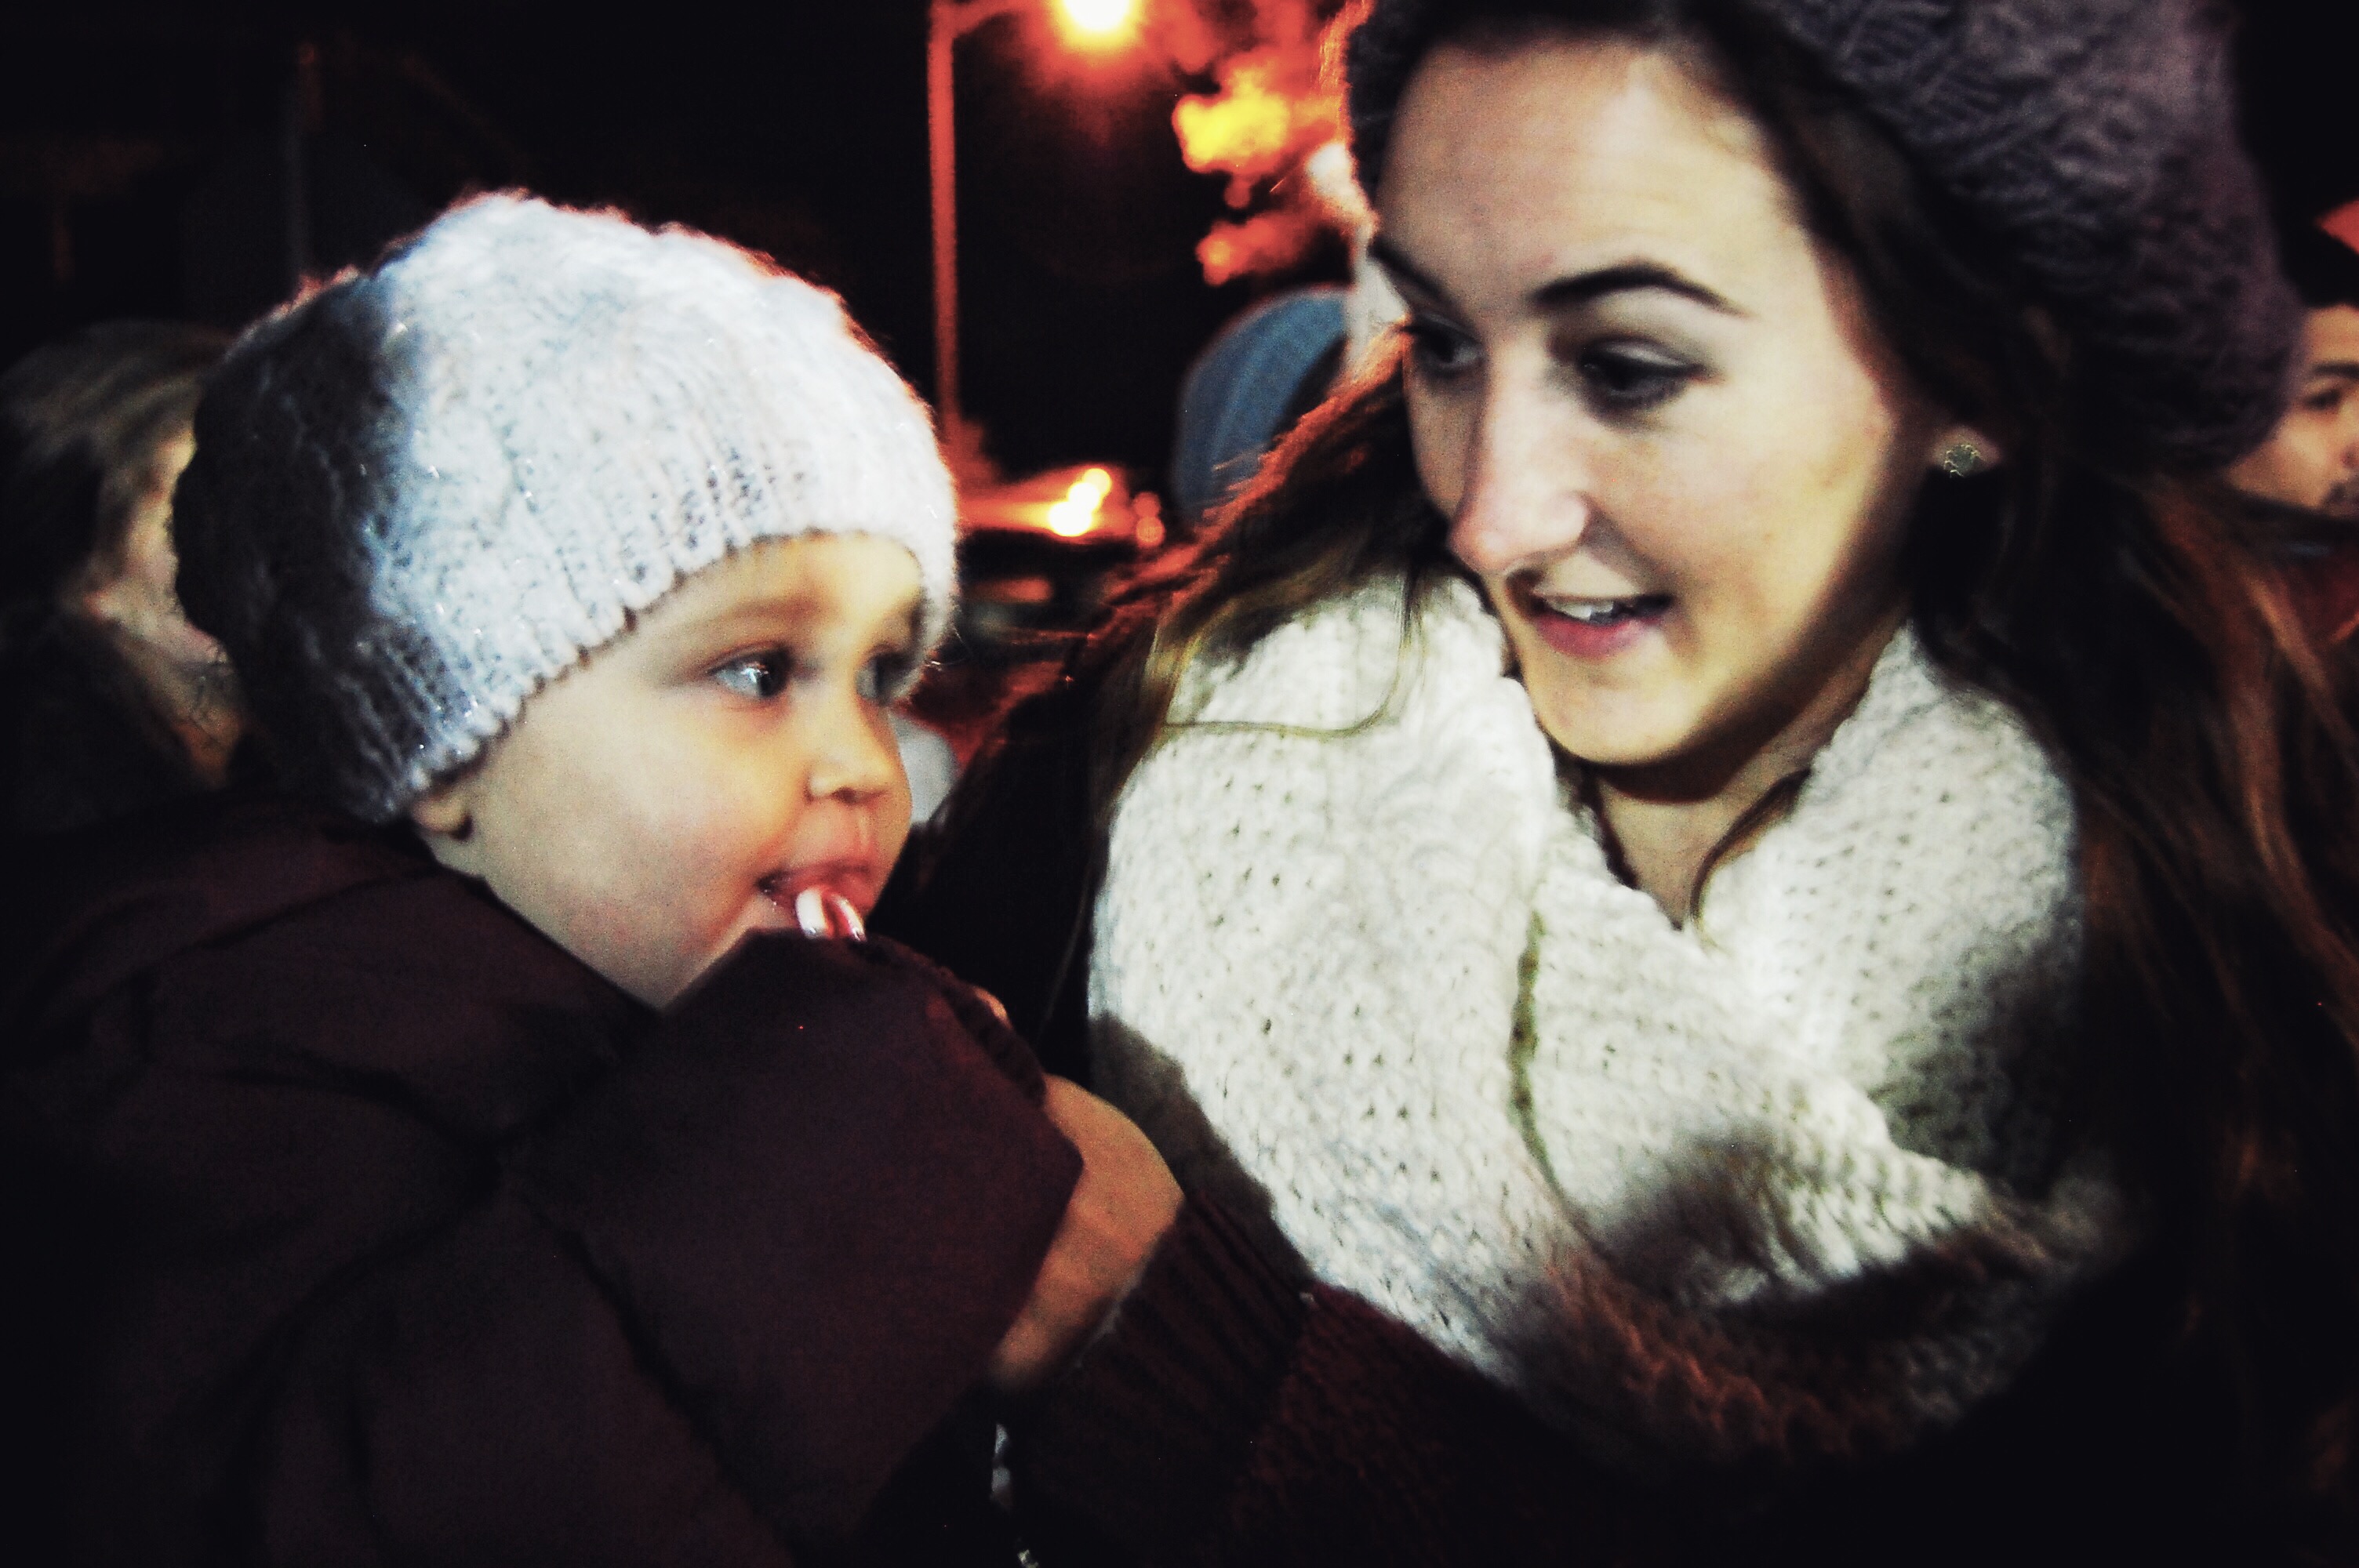
7.  Downtown Parade (or your town’s Christmas festivities)             

Photo Dec 06, 2 43 00 AM

Photo Dec 06, 3 14 40 AM

Photo Dec 06, 2 56 52 AM

Photo Dec 06, 3 15 40 AM

Aren’t my besties totally adorable holding children?? 😉 We were able to enjoy the downtown parade together this year!

Going to our annual downtown Christmas parade is a tradition my family has held for years. It’s always a fun night of warm bundles, a hot drink in hand, and lots of pretty Christmas floats! Check your calendars for your town’s holiday festivities and make it a family affair! Bundle up, grab some extra blankets and a warm beverage (you know what would be great for this? Hot chocolate), and share some laughs together. If you missed this year’s, make it a goal to try it next year and start a new tradition together!

8.  “Christmas” Game Night

IMG_6382

“Louie” themed socks and hot cocoa are my secret to winning 😉

Here’s another fun idea for the entire family and even some of your friends to join in on! For the last few years, my husband’s side has done a fun game night together for our Christmas tradition, and it has been a huge hit! You can find some Christmas themed minute -to -win it games for your inspiration on Pinterest, or even google, and most of them look super fun! Get the group together, share some yummy snacks (and maybe some hot chocolate), split into teams, and let the laughs begin! What’s nice about these games, is that any supplies you may need can most always be found at the dollar store, so you can stretch your dollar and enjoy lots of games. Make your prizes as big or small as you want, or nix them all together and play just for the fun of it. There will be guaranteed a ton of laughs, and with or without the prizes, everyone will look forward to next year’s annual game night! Here are a few links to some very fun minute to win it ideas you can try:  Here , here , and here !

9.  Christmas Angels

Teach your kids the importance of giving during this holiday season. Magnify this and make it a higher priority than being on the receiving end. If we are honest, most of our kiddos who live in a warm and safe home do not really need much for Christmas! I’m not saying our kids don’t deserve gifts, or that we shouldn’t let them receive any. It’s so fun to watch Norah open her gifts and seeing her face light up! But, the more important thing we can give them is to teach them selfless love and share what we have with those who go without. Go to your nearest Christmas Angel tree and choose a couple angels to give a nice Christmas. Let your kids have a big part in choosing the Angels and the gifts. It’s important to show our kids that there are some big needs in our communities, and that they can have a part in making Christmas special for someone who otherwise wouldn’t have the same experience. Partake as a family in spreading love this season, and make it a tradition to give to others in a very tangible way every Christmas! If you don’t have Christmas Angel trees in your area, research some places that you can donate items and help make Christmas special for someone else!

IMG_6183

Here is our littlest angel, to give you all the feels!! *sigh*

10.  Wise Men Gifts

One principle we really want to keep incorporated into our Christmas as a family is simplicity. The excessiveness that is so common during this time of year we believe takes away from the specialness and “sacredness” that simplicity holds. Keep your gift giving simple with your kiddos this year by trying the Wise Men Gift method. This is a concept I first heard from Oak and Earth’s Bethany, whose family started doing this several years ago. Whether your budget is $3,000 or $300, this is a concept that you can easily incorporate into your family’s traditions. It’s very simple: each kid (and/or spouse) would receive just three gifts, and their stockings. You can arrange them however you choose; two smaller gifts and one big gift, three small gifts, one “Santa” gift, and two from you–there’s no method to it other than keeping the number simple with 3. We loved the idea and decided to start this tradition with Norah! It’s an awesome way to keep the sweetness of Christmas time by not drowning our kids (and our finances) in “more.” Our little ones will expect only what they are used to when it comes to gifts, so why not start this tradition now and keep your gift giving sweet and simple. 

If you want more ideas for gift giving methods, here are a few others you can try:

  • Do the “4 gifts” (something they want, something they need, something to wear, something to read)
  • For older kids (this is what we do for my husband’s side), draw names and each person gets one person a gift or two.
  • Sock exchange (buy your kids some christmas socks and fill them up with goodies, much like a stocking), or just their stockings!
  • Encourage your kids to read and grow their imaginations by giving books for gifts!
  • If you are opting for “no gifts” this year, try donating to a charity in honor of each of your children. It’s a great way to give back and will be a special way to honor your kids.

I absolutely love getting to start new traditions with Norah, and I’m excited to start with some of these ideas together as a family! Keeping our holidays sweet and simple by focusing more on the memories and fun, and less on the “things” will hopefully create a special place in Norah’s heart for this time of year, much like it did for me! I hope I have given you some ideas that you can start incorporating into your family festivities each year too! No matter how you choose to spend the holidays, try to do some fun things as a family that will make it memorable for everyone!  If you want some fun and creative date ideas to do with your special someone, make sure to check back in a couple days for Bethany’s “12 Dates of Christmas” post coming soon! Also be sure to keep up with Oak and Earth this month, as we have several holiday inspired posts that we can’t wait to show you!! Follow me on Instagram @terapianalto if you don’t already, so you can stay informed on all of our blog happenings, and make sure to hashtag any Oak and Earth experiences you have with #OakandEarthBlog. We love your feedback and would love to know what you would like to see us write about on here! We’ll do our best to try out your ideas! Wishing you the sweetest and merriest Christmas yet!


Photo Dec 08, 6 56 32 AM

Happy Month of December, and Holiday’s best,

Tera (with Jeremy and Norah, and Louie)   -xo

The Braid Games: A Katniss Inspired Hair Tutorial

I don’t know about you guys, but the past few weeks have been insane for me.  My family has been going through a lot – grandparents in the hospital, cousins having babies, big changes happening at work – It’s been a really hard time. In addition to that, a little over a week ago I had an interview for admission to medical school, which as I’m sure you can imagine was terrifying! I spent a ridiculous amount of time researching anything they could possibly ask me and making sure my outfit (a very grown-up suit) and hair (my version of a sophisticated top knot) were just perfect… but right before my interview, I went to see the midnight premiere of Mockingjay, part 2. I know – I’m so professional. I have to say, I was pleasantly surprised by the film adaption of the final installment in the series, but one thing that made me crazy was the lack of braids! If you’ve read the books you know that the braid is as strongly tied to Katniss as her bow. The entire movie I kept whispering things to Jeff like, “Why is her hair not braided?” “Who’s idea was this?” “Did these producers not read the books?” “Everyone around her has braided hair! Are they trying to hide the fact that she doesn’t?!” Dating me must be so much fun.

So, in honor of The Hunger Games heroine, I will be giving you brief tutorials on three of my favorite braids, in addition to my take on the “Katniss” braid.

  1. The Waterfall Braid

Photo Dec 02, 1 18 02 AMPhoto Dec 04, 1 01 05 AM

  •  Pick three sections of hair near your temple (I usually start on the right because I am right handed) and begin braiding as if you were doing a French braid – adding a bit of hair in each time you cross over (I usually cross over six times before starting to drop strands, as explained in the next step).
  • Once you cross the top section of your hair over (the second time), drop that piece so it hangs.
  • Pick up another piece of hair from the bottom to replace the dropped section.
  • Continue adding hair to the top section as well, as you would add to a French braid.
  • Finish by pinning hair, or continuing braid down and tying off with an elastic. (I like to loosen the braid up, pulling at the top of the hair for a little volume and pulling at the braid itself for a softer look).
  • Fix with a flexible hold hairspray.

Photo Dec 02, 1 18 28 AM

*Notes* The key to this braid is remembering to add to the top, and drop from the bottom. The trickiest part, as wold be expected, is the back because you are doing it by feel. It takes a little practice, but once you get it down it is a great braid to have in your arsenal! It is so versatile! You can leave it down for a soft romantic look, add flowers or other hair ornaments, or throw in a low bun for a more dressed up feel. I have done some version of this braid on many of my friends for weddings. Try here for a more in depth video.

2.  Fishtail Half-Up, Half-Down (with a twist)

Photo Dec 04, 12 58 30 AM

  • Section off the top half of your hair and pin it up.
  • Section off the bottom layer of your hair and pull to the side – this will be combined with the braids.
  • Un-pin the top section and separate hair into two, leaving some loose near the face on either side.
  • Pull hair to either side (I chose the left side this time), and Fishtail the first half of the section, then braid the second half (just a regular easy braid), tying both off with elastics.
  • Wrap the loose pieces of hair around the braids and tuck them behind the braid, pinning with bobby pins (this hides the tops of the braids).
  • Lay the two braids on top of the bottom layer of hair and tie off with an elastic, then wrap a loose piece of hair around the elastic to hide it, tucking back into the elastic to hold (this contributes to the messy, romantic vibe).
  • Fix with a flexible hold hairspray.

IMG_1366 Photo Dec 04, 1 03 52 AM

*Notes* I will be the first to admit, this is not an easy one. I was inspired by Blake Lively’s hair from some event, and just tried my best to recreate it! It doesn’t have to be perfect, and if you have to change it up a bit to make it work for you, do it! I do this style for special events just because it is so time consuming and isn’t something I feel you can get away with every day. Have fun with this one, and be creative!

3.  The “Shelby Bun”

Photo Dec 02, 1 36 07 AM

  • Pick three sections of hair near your temple and begin a Dutch braid – a Dutch braid is exactly like a French braid only in reverse – crossing under instead of over.
  • Continue to the point where your head begins to curve toward the back, continuing a normal braid (not adding additional hair in).
  • Gather your remaining hair with the braid and pull into a ponytail.
  • At this point, pull gently on the braid and the top of your head to create volume for a softer, less Russian ballerina look.
  • Separate the pony tail into a top and bottom half.
  • Tuck the top half over itself, securing back into the hair tie, and do the same to the bottom.
  • Adjust the bun to hide any gaps, the bobby pin in place.
  • Fix with a flexible hold hairspray.

Photo Dec 04, 1 01 50 AM Photo Dec 02, 1 35 21 AM

*Notes* Named by my college roommates, this is my go-to hairstyle because its easy and so versatile! Growing out bangs? No problem – they are held in place by the braid! Don’t like buns? No problem – stop at the pony tail step and finish by wrapping a piece of hair around the elastic to hide it! Can’t master the Dutch braid? No problem – do a French braid! This is another one I do all the time for weddings. It looks great on bridesmaids and brides alike because it can be dressed up or down for any occasion. This is also how you begin the “Katniss” braid.

4.  The “Katniss” Braid

Photo Dec 03, 12 36 59 AM

  • Pick three sections of hair near your temple and begin Dutch (or French! – Movie Katniss does Dutch) braiding your hair, creating a good thick foundation, making sure the braid hugs the side of your head.
  • Pick up pieces as you go, pulling hair into the braid. As you are braiding, pull the sections on the top side tighter – this will create tension and help “lead” the braid so that it curves around the head.
  • Once you get to your opposite ear, begin pulling in the loose front sections of your hair. Here you basically have to switch directions to keep the braid looking like one fluid style, rather than disjointed and piece-y. So if you were braiding under, switch to over, and vice-versa.
  • Finish braiding the hair, securing with an elastic.
  • Gently pull apart the braid to thicken and soften it, creating a messier texture.
  • Fix with a flexible hold hairspray.

Photo Dec 03, 12 36 18 AM

*Notes* As stated above, this braid begins exactly like the “Shelby bun”. Once again, super versatile style! And once again, trickiest in the back. I don’t know about other people, but I always have to switch my grip when braiding the back of my head which can get a little tricky. Practice makes perfect! Just like archery…


Questions? Comments? Other braids you want me to cover? I know this tutorial is brief and some aspects of braiding can be tricky! So please comment below! We love hearing feedback and interacting with our readers. For more on me and my braids checkout my Instagram handle @hopelesswanderer_sb and search the hashtag, #ShelbysBraids. You may or may not see the month of braids I did before the Catching Fire premiere a few years ago.

IMG_0187

As always, live healthy and love hard!

-Shelby

D.I.Y. Fourth of July Top

Hello again readers! It’s Bethany here, and I am bringing you a fun D.I.Y. project just before Independence Day! I have done quite a few D.I.Y. tank tops in the past, so I thought it would fun to try a different one for this special holiday. I am really happy with how it turned out!

July7

What I like about this dip dye project is that you can make personal choices along the way. This can be done on a tank, t-shirt, or a do it  yourself crop. I chose a t-shirt turned crop top! Let’s get started!

Materials:

  • White t-shirt or tank (make sure to check out my helpful hints for the best fabrics to dye)
  • Latex or cleaning gloves
  • Scissors
  • Rubber band
  • Tulip Powder Fabric Dye [Red]
  • Tulip Powder Fabric Dye [Royal Blue]
  • Salt
  • Access to stainless steel double sink OR two cleaning buckets (make sure the sink is stainless steel, otherwise you have the possibility of staining your sink).

INSTRUCTIONS:

Step 1) Pick a top

You will need to determine what kind of top you would like to dye. This year I wanted to do a modest t-shirt crop top with high wasted jean shorts. If you have a white shirt on hand you can use that, just be sure to check out my list of best dye-able materials below. I chose to buy a new white shirt so that I could form it to my liking. I bought a white cotton scoop neck t-shirt from Wal-Mart for $3.88.

Blog1

Choosing Fabrics:

  • 100% cotton, linen, silk, wool, ramie
  • Synthetics such as rayon and nylon
  •  Fiber blends with at least 60% cotton or other dye-able fiber (blends will tint evenly but will not achieve full color)
  • DO NOT use pure polyester, acrylic, nylon, or fabric with special finishes

Step 2) Cropping

Making a crop top from a t-shirt is very simple. To get the desired length,  I always put the shirt on and fold or measure it to where I feel most comfortable cropping it. Eye balling it on the floor or just hanging in front of you is not always the best idea, because it often comes out too short or not cropped enough. Once you have your desired length, cut along that line. On this top I decided to also cut the collar a bit wider.

Blog2Blog3

3) Prepare to dye! *draws sword*

For this step, you will need to decide where you want your stripes:

  • Vertical stripes: With options of red on left or red on right
  • Horizontal Stripes: With options of red on top or red on bottom

I chose to do vertical stripes with red on the left and blue on the right. Deciding where you want your color will determine how you role your shirt to dye it. If you want vertical stripes like I had, then you want to role your shirt starting with the collar and role down to the bottom of the shirt. If you want horizontal stripes, you will want to roll it from the right sleeve to left sleeve. Once you have rolled it like the picture on the left, go ahead and grab your rubber band. Gather it in the middle and rubber band it. This will leave you a white space in the center of your shirt.

Blog4Blog5

4) Dye

For this particular shirt, I used Tulip Fabric Dye (powder) of Royal Blue and Red. I found these in the craft section at my local Wal-Mart. These dye packets come with step by step instructions on the back, and I did not deviate at all. These are the steps on the back of the package:

  1. Fill bucket/stainless steel sink with one gallon of STEAMING HOT water.
  2. Stir in 1/4 cup (4 tbsp) salt
  3. Pour in dye packet and stir until dissolved.
  4. Submerge fabric in dye mixture
  5. Stir continually for 15 minutes, and then occasionally for 45 minutes.

Submerge each side in the sink or shallow bucket for almost an hour. Remember to make sure each side is dipped into the color you want for that part of the shirt.

Blog7Blog8

Blog9Blog010

5) Rinse, Wash, and Dry

Rinse fabric in cold water. The instructions on the dye package say to machine wash warm; dry per laundry instructions. So that any excess dye wouldn’t stain any surrounding clothes in the wash, I decided to hand wash mine in the bath tub with detergent. This was quick and effective. I then put it in the dryer with other clothes I had going.

Blog012Blog011

7) Work it! 

At this point, my shirt had turned out just as I had wanted it to! I love simple Fourth of July tops, and I am so excited to celebrate in my own style!

Blog013July7

July1

July6 July9

Now go out and make your own! This process was really simple and fun. Please do not hesitate to ask questions and comment! Feel free to keep up with me on Instagram at Bethno13. We hashtag all our posts with #OakAndEarthBlog and our travel adventures with #OakAndEarthRoutes. This is an easy way to keep up with our posts, and as always we love talking to you all! Happy Independence Day!

Peace, love, and Rocketships.

-Bethany

Homemade Baby Food Pouches

Hello, reader! It’s Tera again. This week, I thought I would share with you my experience with dabbling into the world of homemade baby food (in squeeze pouch form). The idea for this post was sparked by my sister in law, and fellow baby mama of a tot, as we visited about how we want to learn some good ways to incorporate healthy foods into our children’s diets, without having to pay Gerber (and other brands) the big bucks. Initially, $1.72 doesn’t sound too bad, but when I total up the cost of weekly pouches devoured, it nears the $30 mark…that’s a week’s worth! If I totaled that number for a whole month, it puts a dent into the grocery bill. But of course, toddlers tend to be a bit finicky, and this is no exception at our household. So getting them to try carrots, broccoli, spinach etcetera, is not an easy task. Having these pouches is so convenient for this very reason, and for many of you moms out there, it’s justifiable to spend the money to get your tots to eat veggies and love them (without them even realizing it)!

For me and anyone else out there who is on a budget, or who likes to find easy ways to save back some money each month, recreating these pouches at home was worth the try. I’ll admit, it was a bit intimidating and seemed like it would take forever and be more difficult than what it’s worth. And honestly, it was a bit of trial and error with a few of them. But, I am here to tell you what I did right (and wrong), and to tell you that it is actually quite easy!

closeuppouch pouches

So first in my process, I needed pouches to store the food in. I went with this brand from WalMart:

freshsqueezepacket

For the general process of filling and storing the food, this system works just fine, and for this starter kit, it was only $10. However, these pouches are not reusable, and a pack of 50 pouches is $15. Depending on how many pouches you go through a month, it may or may not be monetarily beneficial for you. They do make reusable pouches like these that I would probably choose to use for my future endeavors, just to be the most efficient.

For this post today, I’ll share with you four recipes that I tried and liked. The really nice thing about doing these at home, is you can be as creative as you want to with mixing different veggies and fruits. Most of the combos I did were some that I have bought before and knew Norah would like. But there are really endless possibilities of different combos!

Blueberry Banana Oatmeal

blueberryoatmeal

For this breakfast recipe, there are a few simple steps before pureeing. Here are the ingredients I used (roughly measured out for you):

  • 1/2 cup oatmeal
  • 1 cup blueberries
  • 2 bananas
  • 1/4 teaspoon cinnamon

bananacinnamon

You’ll want to cook your oatmeal first so that it is tender. I also steamed the blueberries for about 1 minute in the microwave to make them extra soft. Once these steps are done, add ingredients to a food processor or blender. If you steam blueberries, add some of the liquid steamed from them. Otherwise, you may need to add some water until you get your desired texture. When all the ingredients are blended and smooth, store fresh in these pouches, or freeze and use throughout the week/month! That’s the best part about making these yourself. I found it easiest to store in an ice cube tray, for what it’s worth, but find what works best for you! This recipe makes a yummy breakfast for your tots! Super easy, and toddler approved. You could also sneak some spinach in this recipe to add some healthy greens. Just make sure to steam the spinach beforehand!

Broccoli, Peas and Pear

broccolipearpea peas

This next recipe is also fairly easy. My tip for this (and any recipes with leafy greens, or harder veggies), would be that if you find you can’t get a smooth pureed texture from a food processor, to stick with a blender. Sometimes the blades blend this stuff up better. I have also heard that the Ninja, Nutribullet, and Baby Bullet work wonders for this kind of stuff…next investment?

Ingredients for this:

  • 1/2 cup peas
  • 3/4 cup broccoli (or spinach)
  • 1 whole pear

The most time consuming part about this process is steaming the fruits and veggies. Though it only takes a matter of minutes, the more ripe you can get your produce, the faster. Make sure you steam all of these ingredients to make them soft. If you’re making a few different recipes like I did, steaming a lot of your ingredients together saves time and saves you a step for each one.

steamvegggies steamedapples

After you steam the pears, broccoli and peas, and they are tender and soft, they are ready to be blended. If you have a food processor with a grater, it might be helpful to grate them before pureeing them, but it’s not necessary. This combo needed some added water to make it thinner. If you have water from steaming, try adding some of it! The steaming process brings a lot of vitamins and nutrients into the water, and adding that to your recipe gives your baby the most nutrients possible! When you have a smooth puree, store fresh in the pouches or freeze and save for later! Getting the system down? For this recipe you could also try spinach instead of broccoli, apple in place of a pear, or try adding a big spoonful of plain greek yogurt for added protein!

Avocado Banana

avocado avonana

This one is by far the easiest. There is no steaming involved, and takes no time to blend up!

You’ll just need:

  • 2 avocadoes
  • 2 bananas

Slice both and add the “meat” to your blender. You may need to add a little bit of water to thin it out. Once it’s done, store fresh or freeze for later. Since avocadoes brown quickly once they’ve been sliced, make sure you freeze if your little hasn’t eaten within 24 hours. Also try adding a pear or some greek yogurt for added protein and flavor!

Pumpkin Apple

pumpkinapple

This recipe is also very easy. I didn’t have a sweet potato for this combo, so I used some canned pumpkin!

You just need:

  • 1 can of pumpkin ( or a steamed sweet potato)
  • 2 apples
  • (optional) 1/4 teaspoon of cinnamon

Steam your apples beforehand until they are tender. And if you use sweet potato, it will need to be peeled and steamed too. Once this is done, add all of it to a food processor or blender and mix up! Also add some of the steam water until you get desired texture. Make sure it is well blended. Store fresh in pouches or freeze! This combo is great because you could easily mix it up. Use sweet potato or carrots (steam first) instead of pumpkin, or add some cooked oatmeal and cinnamon to make a healthy breakfast pouch! Just make sure if you use tougher veggies, that you blend them until smooth and a soft puree.

The process of making baby food seems much more intimidating than it really is! It was fun taste testing and mixing different combos. If you can dedicate 1-1.5 hours a week making and storing, your tot will have tons of fresh, healthy snacks that won’t break the bank! Try choosing a few ingredients to mix and match each week, and switch up ingredients the next. If you freeze and store, you’ll have all varieties to choose from. It also gives you a chance to ad-match and get weekly deals on different produce items so you can be cost efficient!

Here are a few more combos I’ll be trying next:

  • raspberry, banana, brown rice (greek yogurt)
  • blueberry, sweet potato, oats
  • avocado, fig, mango
  • green bean, pears, greek yogurt

berryrice spinach closepouch pears

What are some of your combos and tips from your experience?! Keep up with Oak and Earth through my instagram handle @terapianalto for weekly updates and posts, and hashtag your Oak and Earth experiences #OakandEarthBlog !

xo-

Tera