Three Years a Mama

One thing you hear a lot when you are expecting a baby is, “your whole world is about to change,” and it’s true. Nothing is ever the same after having your baby! I learned this myself after having our first daughter, Norah. A month and a half ago, we welcomed our second daughter, Elsie, into our family, and again I say, our world has forever been changed. Of course I mean this in the best way possible! She has been such a treasure to get to know and love, and we are all smitten–especially her older sister!

img_0180

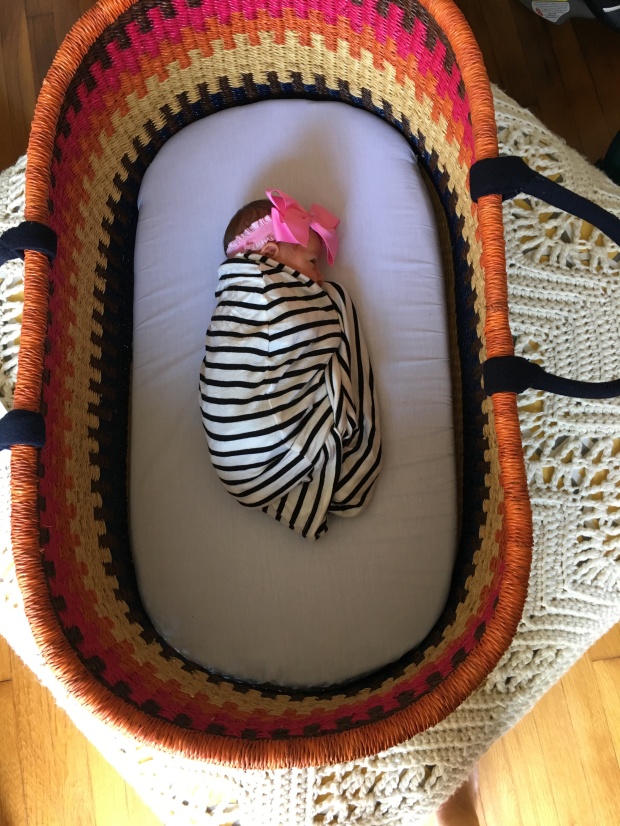
Elsie Jo Pianalto:: sweetest little pumpkin

Along with the life changing experience of becoming a mother, and then again recently for the second time, I’ve learned some life lessons for myself and my fellow mama friends who may be reading this. So with this being my first post up since Elsie’s arrival, I felt it appropriate to compile that list on here today!

First, I’ve learned that no matter what stage or season of motherhood you are in, you’re a mama! Whether it’s the first week of baby’s conception, or your last week of pregnancy, you’re a mama to that sweet life inside you. Whether you only carried your baby for a short while here on earth, you are a mama. Whether you are an adoptive parent, a foster parent, or are still waiting for that call, you are a mama. This is something to take pride in.

I’ve learned that your heart triples in size when you have your first baby, and that a mother’s love is rooted so deeply into your soul that nothing here on earth can quite compare to it. When you welcome your second (or fifth) baby, your heart triples again, and that unconditional love is equally felt for them.

I’ve learned that no two pregnancies are the same. Not your pregnancy and your friend’s pregnancy. Not your first pregnancy and your second. Stop comparing your beautiful preggo baby body and be thankful to have a baby body.

I’ve learned that no two babies are the same. Don’t place expectations on your baby to match your first baby or your friends’ babies; they wont meet those expectations! Enjoy getting to know your baby, enjoy watching your baby meet his/her own milestones, and soak it all in.

I’ve learned that when it comes between a nap and a meal, many times, a nap wins.

I’ve learned that when it comes down to having that nice shower you were hoping to get, and lying on the bed with your baby because it’s the only way she’ll sleep right now, you decide that your shower can wait.

I’ve learned that your baby body will linger, and that’s okay. Those extra pounds and stretch marks won’t go away over night (or in two months). Your post baby body is a beautiful representation of being a mother…it’s part of it. Allow yourself some grace to give it time to heal!

With this, I’ve learned that when your baby pounds do come off, your body really won’t ever be the same. Sure, you may fit into your old jeans and bras, but you’ll notice your boobs have taken a new shape, and your hips maybe changed ever slightly. You’ll take on a new woman’s body, and it’ll never be what it was before children. It’s okay; it’s beautiful, it’s sexy, it’s a new you.

I’ve learned that breastfeeding comes easily to some women, and to others, like myself, it is a huge obstacle. It hurts, you bleed, your supply isn’t overly abundant, your baby doesn’t latch to you, it puts you into a depression. Or, it works. No matter what end of the spectrum you are on, that’s okay.

Along with this, I’ve learned that fed really is best. There is no right or wrong for you, mama. Is your baby happy, and growing? If so, it does not matter what route you take. Don’t cause yourself so much stress and angst over this–your beautiful baby will be absolutely okay.

I’ve learned that you just can’t compare yourself to other mamas. Be inspired? Sure. Be encouraged? Yes. Ask advice? Okay. Learn from? Absolutely. But you can’t compare. Stop comparing.

I’ve learned that sometimes, the days seem never-ending, but I promise when you blink an eye you’ll be staring at your once tiny newborn who now is a beautiful, spunky, witty little girl. During those midnight feeds when your tired body and brain are tempted to wish for the day she sleeps through the night, try, try to remember this, and soak in every last hour with your sweet baby. Every day they are growing to need mama a little bit less, and someday, you’ll wish these days back.

I’ve learned not to sweat the small stuff. It’s okay if you can’t get your picky toddler to eat anything but a pouch and a hot dog for lunch one day. Tomorrow, they won’t even like hot dogs! It’s okay that you napped with baby instead of doing that load of laundry today. Soak all that cuddle time you can get; laundry will be there tonight.

I’ve learned that it’s okay to say no to some things. If you aren’t the mom type who has a Pinterest home, goes to social gatherings every day, runs a small business, has a homemade meal in the oven every night, spends quality time with your kiddos and saves an extra hour for a bubble bath and a book, I deem you normal. It’s okay to say yes to some things and not feel guilty to say no to others! Say yes to the things that are Kingdom work, and say no to the things that aren’t purposeful and intentional.

I’ve learned that you are watched every minute of every day. Be intentional with what you watch, listen to, say, how you treat others, how you react to things. Our kids’ minds are soaking it in and learning from our actions.

I’ve learned that children are the easiest way to bring us to our knees in prayer. It is a blessing and a privilege to be a mother, and we need to be in constant prayer for those sweet babies.

I’ve learned that our children are our biggest and most important ministry.

I’ve learned that raising children is the best way to grow yourself; in patience, in character, in wisdom, in love, in creativity, in discipline, and on a spiritual realm. Norah and Elsie bring out the best and the worst in me, but they also make me want to be better!

I won’t tell you I’ve mastered all of these life lessons, but I am thankful for all that my girls have taught me so far! Being a mama to Norah and Elsie has truly been my biggest blessing, and the greatest adventure that my hubs and I have ventured on together! To my fellow mamas out there: what are some of the most important things you have learned on your motherhood journey? I’d love to connect with you and hear!

I don’t know about you, but Oak and Earth is super excited for the upcoming holidays! Keep an eye out for some fun holiday inspired posts that will be coming your way really soon! Follow @oakandearth on instagram, and my personal handle @terapianalto for blog updates and my every day snippets!

img_0954


Peace and Love,

Tera -xo

5 Inexpensive Ways to Style Pumpkins All Fall

Do you have all the desire to decorate for the entire fall season, and little money to do so? Yeah, me too.

Every time Halloween ends, I toss out our rotted pumpkins and I feel like I toss out heaps of my money right along with them. Not only that, but I’m left with little to no decorations on my porch for Thanksgiving! Now, if you haven’t noticed the massive expense of fall decorating, take out cash the next time you go to purchase real pumpkins and everything that goes with them. Your pocket book will drain faster than you can say PSL!

I could buy fake pumpkins, but one of my favorite parts of fall is romping around the pumpkin patch in search of the perfect ones! In addition to that, I prefer the natural look of the real pumpkins, especially for the front porch.  This leaves quite the predicament. And I have the feeling I’m not alone in this. Do I prefer a barren and sad little porch, or wasted money?

Fortunately, there’s always a way to work with your budget. A little innovation and a pinch of creativity can provide you with all the fall fun no wasted money.

Here are some inexpensive ways to make your (real) pumpkin arrangements last from October through Thanksgiving!

pinterest_img

Pin this image!


1.Preserve your pumpkins.

One of the best ways to have your natural arrangements last is to prep your pumpkins ahead of time. Once you preserve them, most can last at least a couple of months. With this technique, you can pick out the best pumpkins and keep them around through Thanksgiving! This alone will save you a lot of money. Here are few links I found that will help guide you in the preservation process. Try HERE or HERE.

blog024

2. Purchase neutral shades.

Not only have these neutral pumpkins been on trend, but their muted pallet makes it easier to create different combinations for the entire fall season. I think they’re gorgeous! When picking yours out, choose different shades to mix and match. I chose whites, sage greens, and pale orange winter squash. I used vibrant mums (an inexpensive choice) to brighten up the space. Have fun with it! The more neutrals you have, the easier it is to play around with your accessories.

3. Rotate your pumpkins.

This one might sounds a bit odd at first, but it makes total sense! Once you’ve gathered your favorite bunch of neutral pumpkins, you can easily rotate the different colors and shades in and out of your arrangements. It takes minimal effort, and helps you feel like you constantly have a brand new arrangement. This is especially helpful when you want to inexpensively transition from an October arrangement to a November arrangement. Check out my example below. I took this arrangement from October to November by substituting my winter squash for my sage pumpkin, yellow mums for burgundy, and swapping out my dried accessories — all of which were a part of my original haul.

4. Style small pumpkins.

While investing in the beautiful large pumpkins is so fun (and necessary to fill large spaces), I find that the small ones are just as useful. It’s very inexpensive to buy a large bundle or two of the small pumpkins. I found mine at Wal-Mart. I use the small ones to fill in the empty nooks in my house, and it automatically feels more festive and inviting. Check out these simple ways to style the small white pumpkins throughout spaces you might not think of, like your bedroom or office space.

blog3blog011blog4blog6blog8

5. Mix and match dried accessories.

For those of you who love the natural look like I do, using dried accessories helps obtain that style while keeping expenses down. Try using dried plants and flowers, pine cones, and maize. All of these dried pieces look great with the pumpkins, and can be preserved or for many fall seasons. In looking at my arrangements, you can see hints of dried accessories all throughout.

blog021blog010blog017

◊◊◊◊◊◊◊◊◊◊◊◊◊◊◊◊◊◊◊◊◊◊◊◊◊◊◊◊◊◊◊◊◊◊◊◊◊◊◊◊◊

I hope you enjoyed these styling tips! I would love to hear about some of your favorite arrangements you’ve seen this fall. Are you an over the top decorator? Do you prefer the natural decorations? I love to see both! Let’s keep the conversation going! Leave a comment below or follow me on my personal Instagram @BethanyMPoteet. We love to chat with you all.

Happy Fall, yall!

Bethany

5 Inexpensive Ways to Style Pumpkins All Fall


An Open Letter to My Unborn Child

This is Bethany here, and I wrote this letter to my son, Oliver.

I start the third trimester of my pregnancy next week! My husband, Denver, and I (that’s our family above) are so excited for him to arrive. This is a sentiment close to my heart, and I welcome you to peek inside our little family.

Final_Pinterest2.png

Pin this image!

Oliver,

As I sit down to write this letter, I’m overwhelmed with the thought that you have been in my tummy for almost 7 months. Even though there are times when you knock the wind out of me, my heart swells with so many wonderful emotions. When I found out I was having you, I was so surprised and happy! Even though I was excited, I was also a little bit scared.

My mind was abuzz with thoughts. Had I taken care of myself when I didn’t know that you were inside of me? Would daddy and I have to move, make more money, and would we be able to shuffle our busy lives to make enough time for you? As I looked at the positive pregnancy test, I realized that all of these little questions could be wrapped up into one heavy one. Would daddy and I really make good parents?

With these questions looming, I still had to do one important thing — tell the love of my life that we made you!

When I told your daddy that we are having you, he hugged me and cried. He was so surprised and so beautifully happy! This is one of our favorite days. What a special memory you made for us, Oliver. We made an appointment to see the doctor. You know, the guy you’re always shy around! As the doctor was searching for you in my tummy, all of those scary questions started flooding back.

Then we saw you.

You were nothing but a white speck in a sea of black. As small as you were, we saw the flash of your precious heartbeat. Oh my son, I will never forget that moment. Do you know what I found out? You are a strong and perfectly healthy baby. This made me realize that the love we already have for you overshadows all the worry! God is so good to remind us of how blessed we are to have you in our lives.

I want you to know a few things about your daddy. As soon as he found out about you, he started praying for you every day. I am always so grateful for how much he does for us. Daddy and I work really hard so that we can have a happy home, but daddy works especially hard. Aren’t you proud of him? He brings us food when we are hungry, and he even eats ice cream before bed because he thinks it helps you! That’s your silly daddy. He kisses you goodnight, and he waits by my side to feel you kick and roll.

He held my hand so tight when we went to a big check up to see how you’re growing. On this day, God gave us peace about you. Your daddy lit up when he saw your face and features in 3D for the first time! You were just 22 weeks old! He thinks you have my nose, and when you wake up from a comfortable sleep, I think you scrunch up your forehead just like he does! We got your picture taken, and he took it to the office and showed all his coworkers. He’s already so proud of you.

Most of all, I want you to know how much your daddy and I love and respect each other. In fact, we love each other so much that we asked God to bring you into our lives! When God said yes, He let us learn so much about you.

This is what we know about you so far — You like to roll around my tummy at work and hide away when we visit the doctor. You love it when I rest, and when I sing and play my guitar. The only time I feel you take naps is when I exercise! I even know a few things you don’t like. You don’t like spicy food at all. Don’t worry, your daddy doesn’t like it either. You must not like it when I try and bend over to tie my shoes or paint my toenails, because you stick your little feet in my ribs when I try. It makes me grunt and laugh. You sure are a stinker. You’re so active, and I love it when you circle around my tummy and play.

Do you want to know my favorite thing about you? You’re so sweet and loving to us! When I am sad, you dance around. When I am tired, you kick me and remind me that you’re there for me. And when daddy and I are overwhelmed with how busy we are, we pull out the pictures of your face and you remind us to slow down and to count our blessings. Thank you for all of that, little one!

Although your room isn’t all the way put together yet, and we aren’t rolling in a big pile of money, all that really matters is the love and time we share together as a family. We have to wait a little bit longer to share this time together. You’re due to be here very soon after Christmas! Don’t worry little one. Whenever you decide to come, we will make your day so special. I know right now you think somersaults are fun, but you should see all of the wonderful and colorful things of the world! Your dad and I like to draw, play music, hike around, and see friends. Some people have told us that we can’t do these things when you get here. But we will find a way to make our own special and fun memories with you by our side. We can’t wait to share all of this with you!

Oliver, whenever this day arrives, I want you to know the world you’re coming into. Not everyone in this world has peace in their hearts, and this world can be a scary place. Despite all of that, know that God is always holding you in His hands. I have a few important promises I’m making to you. I want you to remember them when the world seems too much to bear.

I promise to show you love and understanding. I promise to guide you when you’re unsure of what to do, and I promise to listen to what you have to say. I can also promise you that I will make mistakes. Some days will be hard, and on those days you might not like me very much. So when those days come (and they will come), know I still love you because you are my son.

Do you know how I can promise you this? You have already helped us know a kind of love we never knew we could feel.

We still have so much to learn about you, but we can’t do this until we meet you face to face! All of your cousins, aunts and uncles, and grandparents are so excited to see you too! Some of your little cousins have been practicing your name. So be sure you answer to the name of “Obbaler” when you come out so that you don’t hurt their feelings.

Daddy and I are ready for the sleepless nights and for our world to be turned upside down. Because that means that you have arrived.

I can’t wait to meet you, son.

Mom

Thank you so much for reading! I enjoyed opening up my heart to my son, and to you as well. You can follow our family journey on Instagram @BethanyMPoteet.

-Bethany

Our New Normal

As my second pregnancy comes to the finish line–nearly 36 weeks and counting–I suddenly feel the reality hitting me of going from a family of three to a family of four. I anxiously and excitedly prepare for and await the arrival of our second daughter, and though I daydream about how incredible it will be to watch our little girls growing up together and the bond that we pray and hope they will share, tears come to my eyes at the thought of our sweet Norah going from our baby to our oldest daughter as we welcome our newest little one into the family. So many blessings that await our nearly family of four, yet such a bittersweet-ness to saying goodbye to our budding family of three.

These thoughts that have been on my heart recently have me truly soaking up every bit of my Norah that I can before our new love is here. Not because I feel I am losing anything by adding a sweet new blessing, but because I know that my care, my time, my attention, my energy are all about to soon be divided.

shutterstock_424191577

Soaking up even the long, hard days of raising a sassy toddler because I know that soon, the moments of just Norah and mama will be a rarer thing. Our every day routine will be shared with our new baby. Though I know this will bring even more special moments with my girls, my heart clings a little bit longer to Norah’s hugs. I will myself to remember the  special and tender moments of holding my first girl, the countless times I’ve read “Where are You Going, Smitty Baby?” as she sat on my lap begging for just one more book, and the undivided attention that allowed me to cave in (most times). The endless hours I’ve sat on the floor with her and played with her dolls, and the extra time (mostly from saying: “the dishes can wait”) that I had to sit and marvel at how creative and sweet she was (is) as she plays with her toys and brings them to life. The extra snuggles at night that make my heart swell as I listen to her say her sweet and innocent prayers, and sings her favorite songs. I want to cherish these times more than ever before because I know these last few weeks of just she and I will be fleeting, and they’ll all feel like just a few moments.

I know these moments won’t be totally lost on me; I’ll make time for my oldest treasure, and she and I will continue to have special memories together. But another part of me realizes that these moments will have to be fought for. That our new little love will become a part of our new normal, a part of our story time and our play time, a part of our nighttime prayers. Life with two babies will be a whole new ballpark and learning experience for me, and Norah’s role will go from being our only baby, to being an older sister. My heart bursts with anticipation and pride as I picture this new normal, though I realize the changes and adjustments that Norah and I will have to make may not be as easy for a while. I am so excited to grow our family and begin a new journey, but also so nervous about this transition.

shutterstock_229273192

I look at Norah, and I picture how big she will look standing next to our newborn, but also how much of a baby she really still is. How dependent on her mama she still is, and how I hope (and to be transparent, worry a tad) that she never feels like she can’t depend on me. How she was entrusted to me by the One who gave her life, and how much I rely on Him to help me raise her (and our next) with grace. During my last few weeks of pregnancy, I’m seeing how God is doubling my love. How much love I have for my sweet Norah, and already the love I have for our unborn daughter. How I would do anything for Norah, and already could say the same for our littlest. Though there are moments with my first born that I will miss, there is nothing that I anticipate and look forward to more than becoming a family of four. The bittersweet-ness it is to say goodbye to one season that holds so many memories so near and dear to my heart, and to trade it in for even more love and more precious memories to be shared together.

I am so thankful to God that He extends His love and grace to us so that we can give it. Multiplying the love of a mother so that though her life may look different by adding a new baby to the mix, she doesn’t have to divide her heart and her love for them. Giving mama’s of multiples the energy to get through a sleepless night with one baby, and still do the ‘mama thing’ with the kiddos the next day and with a thankful heart. I am thankful that God has painted a picture of our family and that His picture includes both of our sweet babies.

My time with Norah as my only baby is coming to an end, and it is a precious season that I am thankful to have gotten with her. And though I will miss these moments with her, I am so blessed and grateful to begin our new normal.

-xo,

Tera

IMG_7727.jpeg

My sassy, yet oh so sweet Norah 🙂

Pinterest Project Fun: DIY Yarn Hangers

Pinterest_1

Hello, everyone! It’s Bethany here today, and I am so excited to be writing on Oak & Earth  as my favorite season has arrived – summer! During the warmer months, I find myself day dreaming and scrolling through my Pinterest page frequently. With so many fun project ideas available at my fingertips, I decided to take a risk and try one that I’ve been swooning over for a while. DIY Yarn Hangers!

While you can go on Etsy and snag something similar, I prefer DIY’s because you can add personal touches and really make it your own. I also found that the materials to make these hangers are very cost efficient. Once I gathered the materials, I threw on some music and simply tied the evening away. This would be a really fun project to do with some girlfriends!

I chose this yarn hanger DIY in particular because they fit the minimal vibe that I love, the metal rings added a fun touch I hadn’t seen in other yarn hangers, and I thought the user friendly instructions were perfect for a busy girl like me! It turns out, this project wasn’t a Pinterest fail at all (we’ve all had them). I’m absolutely in love, and I think they fit so well with my style and my home.

Here’s how they turned out!

diy4diy6Processed with VSCO with m5 preset

Making the Yarn Hangers

← P R E P A R E 

Because I wanted to hang my pieces in a wide blank space, I decided to make my yarn hangers a little larger than the measurements provided in the DIY. I simply multiplied the measurements to my liking. I found every single material item at Hobby Lobby! Remember that you can choose your own color of yarn, length, texture, tying styles, etc., and that personal choices are part of the fun of doing a DIY!

← M A T E R I A L S →

  • Yarn of choice
  • Scissors
  • Ruler or tape measure
  • Cardboard piece at least 14”
  • Metal rings **Note: The size of ring depends on how large you would like your hanging pieces. The DIY demonstration calls for 1.5” and 3” rings, while I upped the size a touch. There are many sizes to choose from at Hobby Lobby. 
  • Krazy glue
  • Round wood dowel **Note: DIY instructions called for 7. 5″, I chose 12”

← C R A F T →

I followed the instructions in the DIY Yarn Hanger post found HERE. This DIY project was created by the wonderful blogger, Amy, of HomeyOhMy. Her blog is great for minimal and modern home décor ideas and projects, so be sure to check her out!


We are so excited to share all the fun recipes, DIYS, and experiences that we have planned this summer! Please let us know if you try this project, and be sure to suggest some posts you would like to see in the future! You can keep up with me on Instagram @bethanympoteet, as well as our Oak & Earth social media links located in our side bar or footer.

Happy summer, and happy pinning!

Bethany

diy7

Down and Dirty Guide to: Essential Oils

A Beginners Guide To-

Pin this image!

Hello friends! Today I want to talk to you about essential oils.

About a year and a half ago, I became interested in learning more about essential oils after listening to several friends and acquaintances rave about them. What were they? Why was I just now hearing about them? Were they just a fad? Why would I want to incorporate them in my life? Were they hippy mumbo jumbo?

I set out on a quest to discover all of these things, and like any normal human, I turned to Google for answers. I immediately realized it was going to be very difficult to discern fact from fiction and to get the answers I was looking for about oils. There is just so much (often contradictory) info out there. I longed for a simple, broken-down, absolute beginner’s guide to oils.

And so a year and a half later, I’m writing one.

WHAT ARE ESSENTIAL OILS?

Essential oils have long been used for food preparation, beauty treatment, and health-care practices, as well as in aromatherapy. They are naturally occurring, volatile aromatic compounds found in plants. Some come from the seeds, others come from the flowers, roots, bark, etc. They are extracted through various methods, such as steam distillation and cold pressing, and in this potent form are much more powerful than the plants from which they were extracted.

Put simply – essential oils are highly concentrated plant extracts.

When I say they have “long been used…” I mean LONG. Although essential oils have only gained more popularity in the Western world recently, oils have been in use since (at least) the times of ancient Egypt. Essential oils were also popular in ancient Greece, Rome, and China. There is even mention of essential oils in the Bible.

So now that you have a basic understanding of what essential oils are. . .

WHY ESSENTIAL OILS?

I know what you’re thinking; if essential oils have been around for so long, why have they only become popular in the West recently?

I think it is fair to say that in the past decade there has been a definite push toward a more natural, toxin-free, and sustainable lifestyle. Being derived from plants, essential oils definitely fall into this category.

Oils are reputed to be a natural remedy for many common ailments such as headaches, inflammation, viruses, bacterial infection, skin issues, and much more, as well as boosting the immune system, digestive system, respiratory system, and more.

You can also clean with essential oils, and they smell amazing when diffused (more on this below!)

Photo Jun 12, 6 15 52 PM

HOW DO I USE ESSENTIAL OILS?

Now that we’ve covered the what and the why, how should you use essential oils starting out?

Some of the first oils I bought were:

  • lavender
  • lemon
  • rosemary
  • tea tree
  • eucalyptus

I had done a little research, and it seemed that these oils were used frequently in different recipes that caught my interest. When I say “recipes,” I simply mean combining different oils to suite different purposes. You can diffuse your oils, blend them with together for topical application, use them in steam inhalation, or put them to use in homemade face wash or cleaning products! There are so many possibilities.

After personally testing many different recipes, here are some of my favorite blends that I make in 10mL roller bottles. Other than diffusing, this is how I most often use my oils, and I would not hesitate in recommending these to beginners. When making these concoctions, you will need a carrier oil, which will vary based on what you are using it for and personal preference. For more on carrier oils, try here.

Headache/Pain Relief Roller

  • 10 drops copaiba
  • 10 drops panaway (blend)
  • 10 drops peppermint
  • 10 drops lavender
  • top up with carrier oil

Roll this on wherever the pain is. (You could also make this in a cream with coconut oil as the carrier oil – I love coconut oil.)

Seasonal Relief/Immunity Roller

  • 5 drops thieves (blend)
  • 10 drops lavender
  • 10 drops lemon
  • 10 drops peppermint
  • 5 drops R.C. (blend)
  • 5 drops frankincense
  • top up with carrier oil

Roll this on over your sinuses, on your chest, or on your feet for sweet relief.

Skin Blemish/Wound Salve/Anti-Aging

  • 5 drops lemon or purification (blend) or tea tree or copaiba*
  • 5 drops lavender
  • 5 drops frankincense
  • top up with carrier oil

If it has to do with your skin, this is your best friend. I’ve rolled this on everything from wrinkles to bug bites to scratches to blemishes. (* – I use a couple drops of each)

416_Orr_drying-500x333

Finally, I think my favorite use for essential oils is diffusing. Some of my personal favorite combinations are:

  1. Lavender + Cedarwood + Citrus — for sleeping
  2. Purification (blend) — for making my space smell enticingly clean and odor free
  3. R.C. (blend) — for breathing easily
  4. Tea Tree + Eucalyptus + Peppermint — for calming and focus
  5. Thieves (blend) + R.C. (blend) — for combating a cold/sinus congestion

One of the great thing about oils is that as you learn more about them, you begin to understand how they compliment one another, and what works and doesn’t work for you.

And there you have it! My down-and-dirty, absolute beginner’s guide to essential oils.

If you have questions, comments, essential oil recipes/uses, or anything else, please comment below! I would love to hear from you! (Even and especially if it is to correct me or make this post better!)

Keep up with me on Instagram, Twitter, and Pinterest and find me on Snapchat at shelby.briley!

Processed with VSCO with m5 preset

Photo by: Jeff Rose

As always, live healthy, and love hard!

-Shelby


Further reading:

The New American Herbal – Stephen Orr

Herbs; An A-Z Guide Gardening, Cooking & Health – Reader’s Digest

hello oils.


Simple Pleasures: D.I.Y. Minimalist Coasters

It’s Bethany here on Oak and Earth today, and I am thrilled to be sharing a few of my favorite simple pleasures and a fun D.I.Y!

Life often gets away from us. I was thinking about this a couple weeks ago. I was crawling into bed, and I realized I hadn’t been still for one moment. Sure I had sat down, but my mind was constantly working or running. Not to be too cliché, but I couldn’t think of a time that I had stopped to smell the roses (or the coffee in my case). That’s when I knew I needed set aside part of my week to enjoy some of my favorite simple pleasures. One of those pleasures being a warm cup of coffee.

coaster5

I have a cup of coffee every morning (more like a thermos because I’m always drinking it as I run out the door for work). Since this slowing down thing is a work in progress, my husband and I try to reserve a portion of the week to actually sit down and enjoy our coffee!  On Saturday mornings, we often have time to pour our coffee into mugs instead of thermoses. We can prop our feet up, stay in our jammies, and sip and enjoy it instead of guzzling it for energy. I love this little time at home. We also love to do fun activities together! So often we go out on the weekend and hit up one of the local coffee shops—another simple pleasure of mine.

While we are there, we set aside time to be still and do what we love! This includes simple things like writing, sketching, listening to music, or reading my favorite blogging magazine called Artful Blogging. If you’re a blogger and haven’t checked it out, it’s such a wonderful little magazine. A new edition comes out every three months, and it’s something I consider a treat and such an inspirational tool.

Sometimes I’ll bring headphones and listen to my favorite music. It sounds cheesy, but I often find myself getting emotional during this time. My head is filled with my favorite tunes, and all I can see around me is creativity. Our notebooks full of ideas, sketch books full of fun, magazines full of inspiration, my husband zoned in on his designs and sketches, a mocha filling me with warm energy, and people bustling all around me while I am still.

We always cap that time with one of my favorite simple pleasures ever created—conversation. Denver and I talk about our dreams, funny stories we didn’t get to share throughout the week, aspirations, and about our relationship. Most importantly, we laugh. I really enjoy being able to set aside time to go do this with my girlfriends as well. I love when we go out together. We often realize hours have passed by, simply because we’ve been enjoying each others company (shout out to my Oak and Earth girls who totally rock). These coffee dates are by far one of my favorite simple pleasures, and they only ever cost us whatever treat we bought at the coffee shop! I always leave feeling so refreshed and inspired. It’s such a nice time to reboot before more adventuring or going into our busy week ahead.

While I love these simple pleasures and experiences, I also love simple design! Minimalism in the home? Yes, please! On one of these coffee shop dates, I came across a D.I.Y for some simple color blocked wooden coasters. I have seen a lot of D.I.Y. coasters on Pinterest and other forums, but these are so simple that they easily became something I wanted to try for our home. I found this D.I.Y. on a fellow blogger’s site SimplyLivBlog. Olivia has such a cute family and blog, you must check it out (I’ll link more of her contact information at the end of this post). I told Olivia I was going to post my experience if I ended up doing the D.I.Y., and I am so excited to share how they turned out! I’ve already put these to use, and they look adorable in the home –a perfect match for our mugs on those slow and simple Saturday mornings. I am so grateful to Olivia for sharing this idea. I couldn’t believe how quick they are to make. Want to make some? Let’s get started!

What do I need?

  • 4” X 4” wooden squares **Note: You can pick up a 2 pack for $1.99 at Hobby Lobby.
  • Wood Stain **Note: Hobby Lobby has many choices so make them personalized to your home! If you like the color I chose, it’s called “Driftwood”. Don’t forget to use your 40 % off Hobby Lobby coupon on your most expensive item, in this case that’s the wood stain. Just google the Hobby Lobby 40% coupon and have the code pulled up at the cash register.
  • White paint
  • Painter’s tape
  • Old rag
  • Paint brush
  • Design stencil if desired

What do I do?

  • Stain your wood blocks:

I simply followed the wood stain directions on the can. I put one coat on each side and edge. After 1-2 minutes, you wipe off the excess stain with your rag. This is an important step to ensure that you will be able to see the wood grain. If you would like extra protection from water stains, use polyurethane as directed. Keep in mind that this might make your stain darker. I wood stained mine at night, and they were ready to go in the morning. I love the color!

  • Tape off your designs: 

I loved Olivia’s designs, so I went ahead and mostly did those. You can choose any simple design you like. I also got a very simple Aztec stencil from Hobby Lobby, and I used it on just a few of my coasters.

  • Paint: 

To keep with my simple designs, I chose white paint. You can choose whatever color you would like! Paint around your tape. After my main designs dried, I added the stencil detail on a couple of the coasters. I simply taped down the Aztec stencil and painted. This step is only necessary if you want that little detail. Let them dry until the paint is no longer tacky.

  • Enjoy: 

I can’t believe how little time they took. Now that I have all this stain and paint, I can’t wait to make more! Here’s a few pictures of how mine turned out.

coaster9coaster4

I am so thrilled that I came across Olivia’s D.I.Y! Now I have some minimalist coasters to go along with our simple coffee breaks at home. What are some of your favorite simple pleasures? Let’s keep the discussion going! You can follow me on Instagram (@bethanympoteet), or follow along with our hashtag #OakAndEarthBlog. Want to see more from Olivia? Check her out on Instagram (@simplylivblog), and follow along with her blog at SimplyLivBlog. I am so thankful that she posted this D.I.Y. Thanks so much for stopping in and sharing in some of my favorite simple pleasures. Because of your constant support, Oak and Earth is now updating bi-weekly! We have a little bit of page overhaul coming up with some ideas to make it easier for you to keep up with us. So be sure to stop in and check that out soon.

Cheers,

-Bethany