3 Free Activities for You and Your Besties

This post is written in partnership with Frieling USA . All opinions are 100% our own.

Hello, readers! It’s Bethany here on Oak and Earth today. 

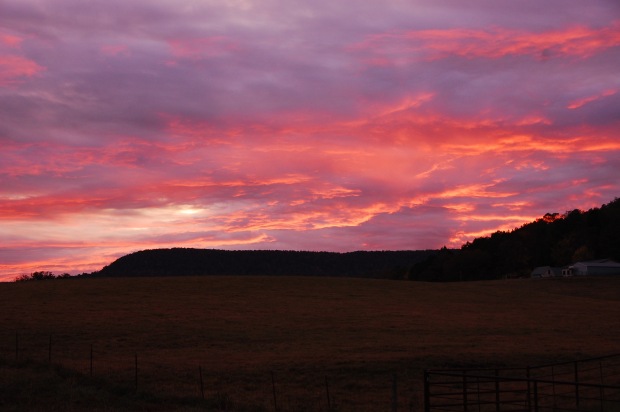
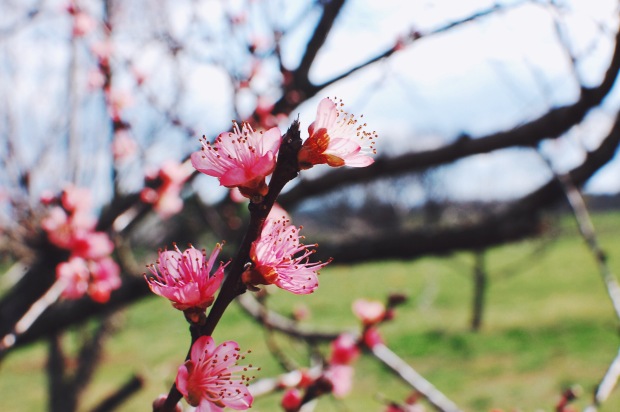
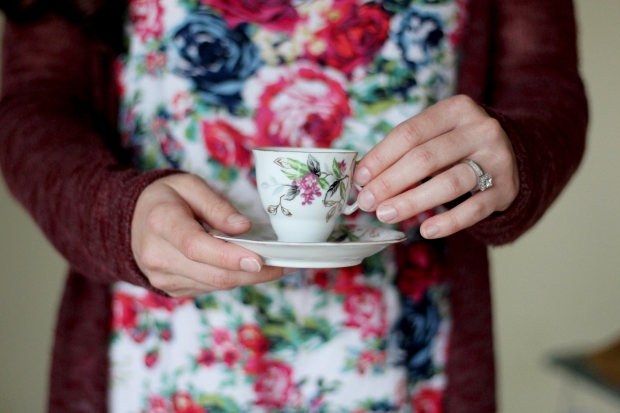
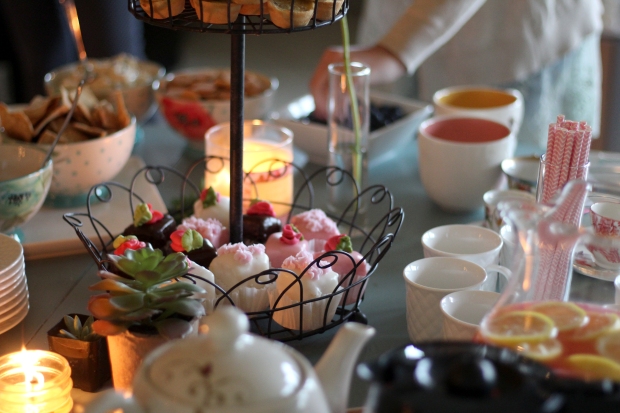
Us girls of Oak and Earth love our coffee. With the leaves finally changing, we love to work in a coffee date outside in the crisp air! Little get-togethers like this make us giddy. In fact, we’re already planning another coffee date to watch the Gilmore Girls reunion! Is anyone else losing sleep in anticipation for this event?! Yes, I’m calling it an event. We’re getting so excited to plan this simple  get-together that it got me thinking about other free activities that bring us so much joy. Here’s a little guide detailing a few ways to bond with your besties on a dime!

pinterest_coffee

Pin this image!

← G  A  T  H  E  R →

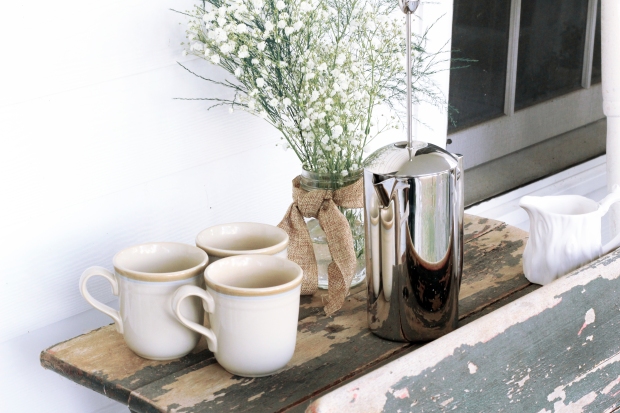
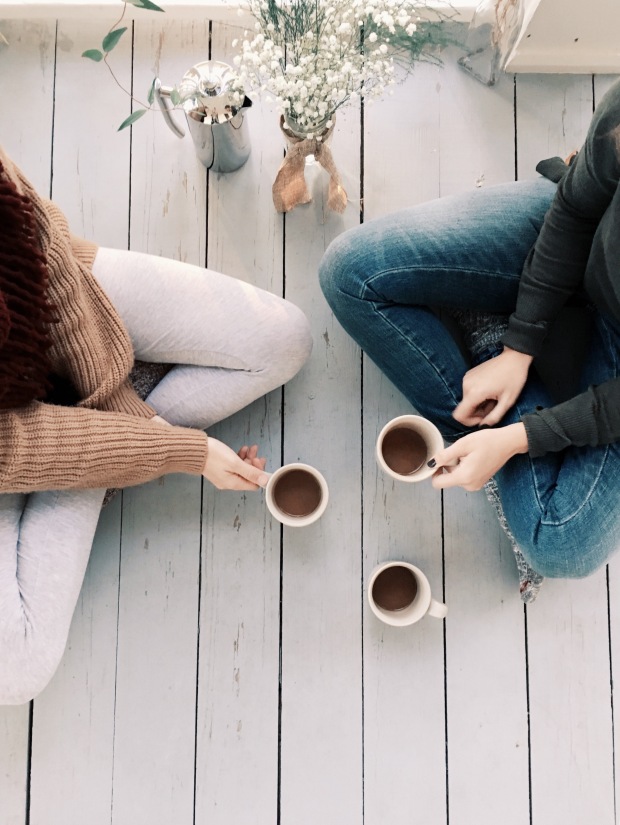
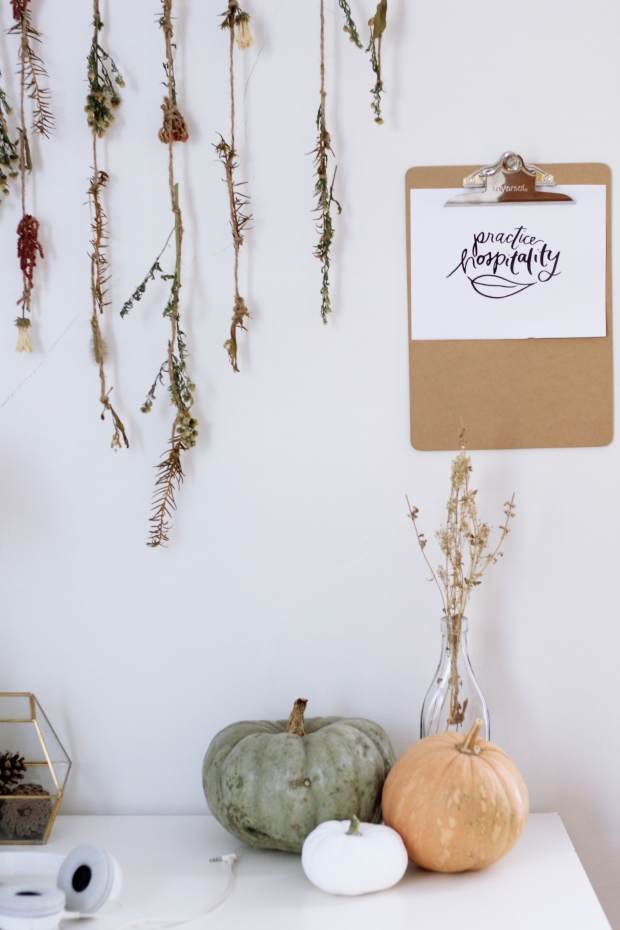
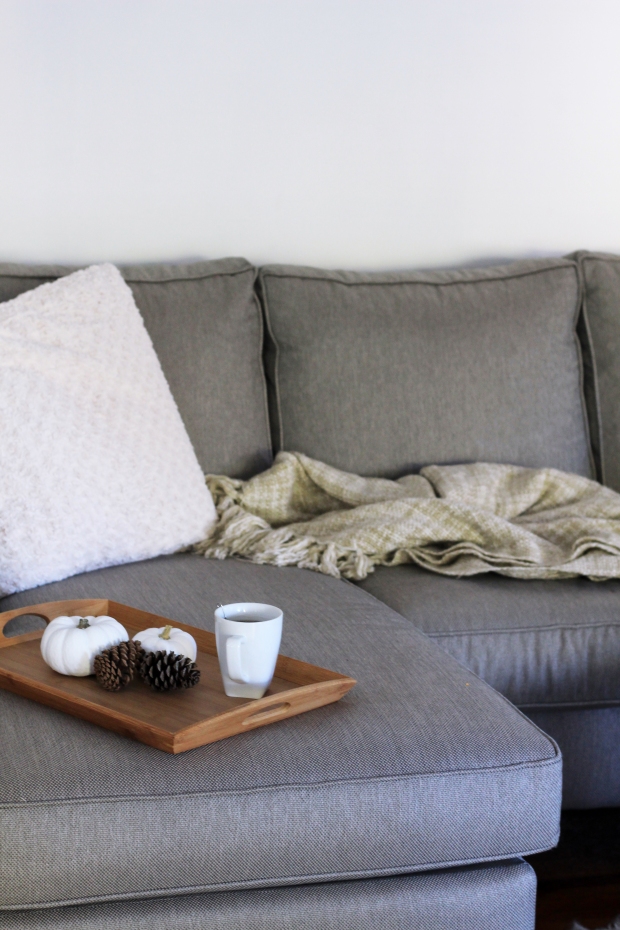
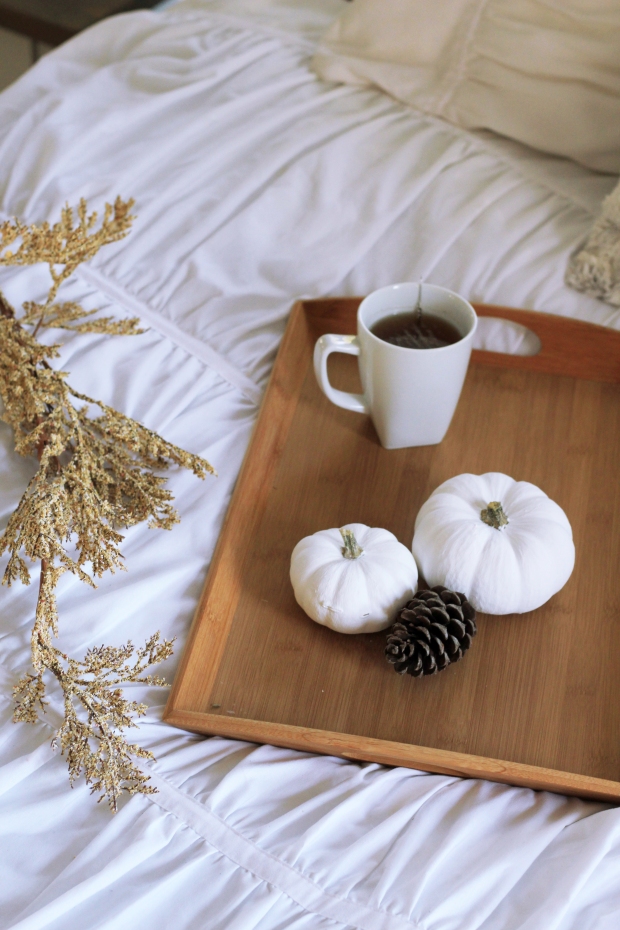
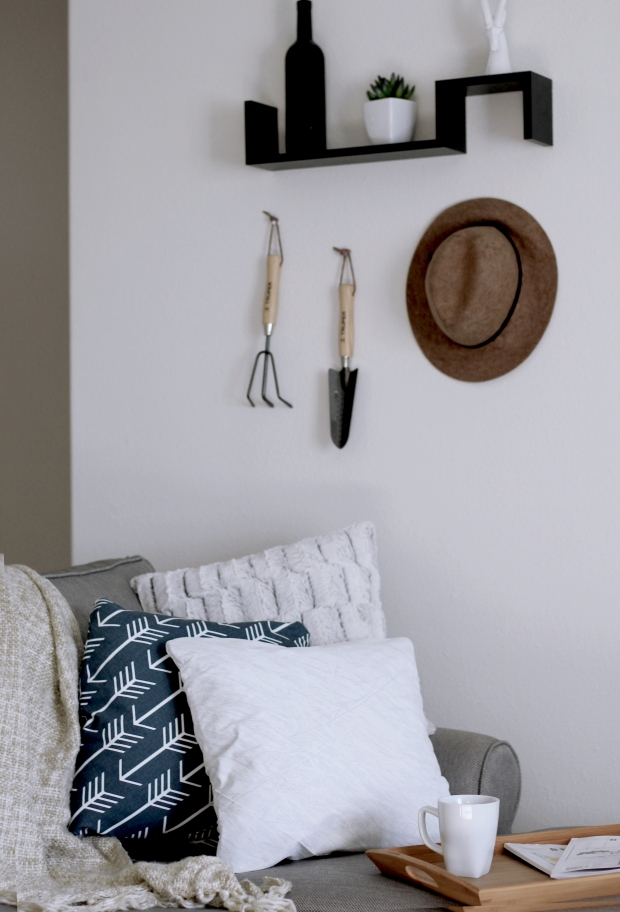
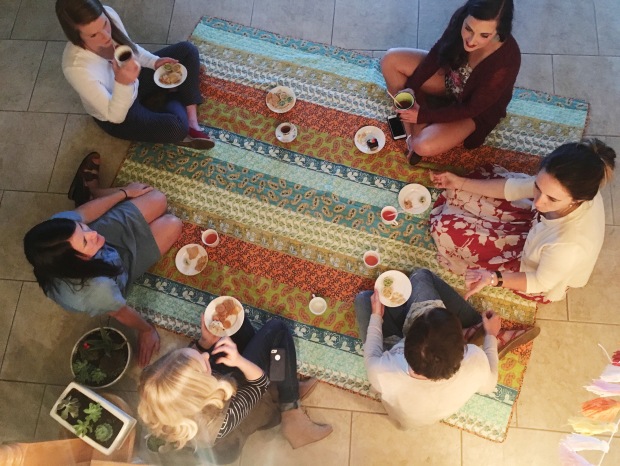
While coffee shop dates are a must have, we really enjoy gathering together outside of that! Try mixing it up and have your coffee at home on the porch, curled up in your living room, or even your bedroom! Wherever you gather, make it an intentional space. Create a fun atmosphere with pillows, music, string lights, magazines, or fresh air. We recently took to the front porch to chat in the gorgeous fall weather. To make it special, opt for French Press coffee like we did! Not only is this fun because it’s portable, but our Frieling French Press gives our coffee a really smooth and rich flavor perfect for our fall vibes. Just the way we like it! Setting aside time to talk and laugh and enjoy one another’s company is always what we need in the midst of all the craziness of the week. And trust us, coffee is even better when you can kick off your shoes and laugh as loud as you want.

coffee3photo-nov-14-5-43-06-pm

Processed with VSCO with g3 preset

← W A  N  D  E  R →

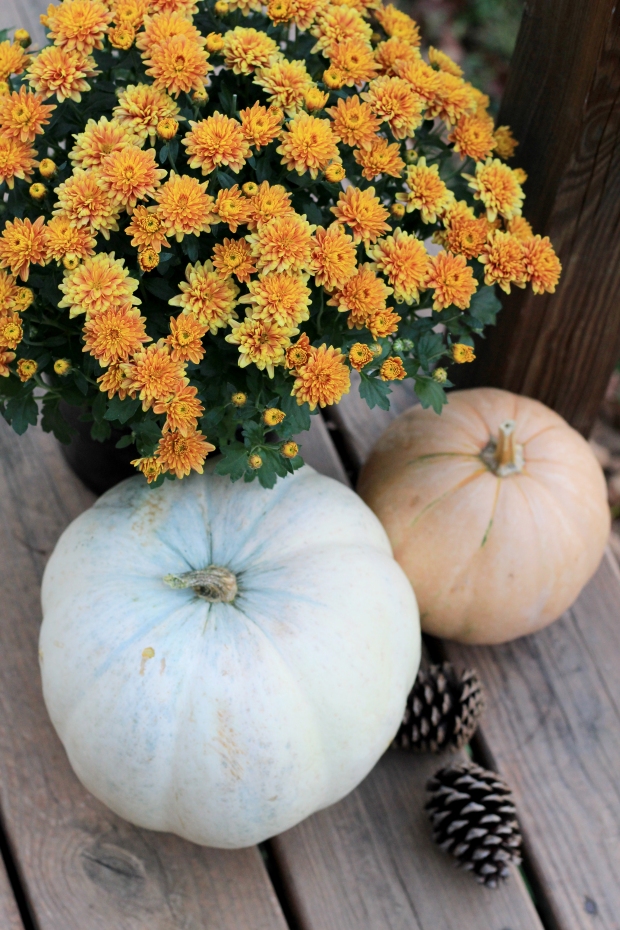
Being from the natural state, this is one of our favorite actvities. Whether it’s a five minute jaunt around the nearest lake, or an all day trip up the mountains, hiking is the perfect way to bond with your girlfriends! We love this time away from social media and technology to focus on our relationships! This allows you to get out of your head space and really relax.  An added bonus? Most hiking spots are free!

Processed with VSCO with m5 preset


← E  X  P  L  O  R  E →

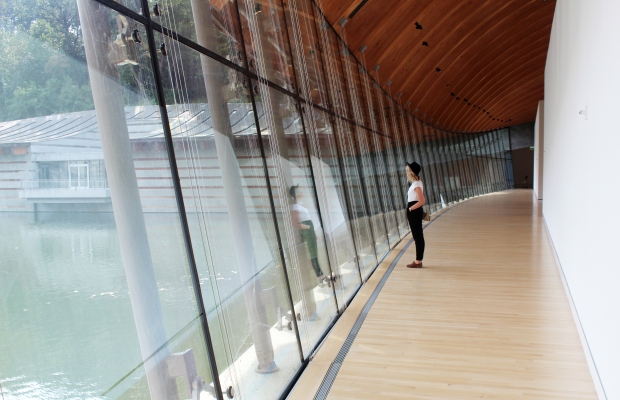
Get out and explore! We love museums. Art museums are a fun way to bring out your creative side and immerse yourselves in culture! We have a beautiful (and free) museum in Northwest Arkansas called Crystal Bridges. If you don’t have a free museum near you, there are many that offer free or inexpensive mini-exhibits and showings throughout the year. This a fun way to learn more about your girlfriends. What kind of art do they like? What’s their favorite way to express themselves? It’s amazing the bonds you can walk away with. And the views aren’t bad either.

img_5665

◊◊◊◊◊◊◊◊◊◊◊◊◊◊◊◊◊◊◊◊◊◊◊◊◊◊◊◊◊◊◊◊◊◊◊

Whether you’re lounging it up with your coffee, wandering up the mountains, or exploring the downtown culture, don’t limit yourselves to routine. What better way to get out of your comfort zone than with your besties! Did one of your favorite free activities not make our little guide? Tell us about it! Leave a comment below or keep the conversation going on @OakAndEarth or my personal Instagram, @BethanyMPoteet. We LOVE hearing from you all.  Now, excuse us while we go grab another coffee to survive the busy week!

Cheers!

-Bethany

5 Inexpensive Ways to Style Pumpkins All Fall

Do you have all the desire to decorate for the entire fall season, and little money to do so? Yeah, me too.

Every time Halloween ends, I toss out our rotted pumpkins and I feel like I toss out heaps of my money right along with them. Not only that, but I’m left with little to no decorations on my porch for Thanksgiving! Now, if you haven’t noticed the massive expense of fall decorating, take out cash the next time you go to purchase real pumpkins and everything that goes with them. Your pocket book will drain faster than you can say PSL!

I could buy fake pumpkins, but one of my favorite parts of fall is romping around the pumpkin patch in search of the perfect ones! In addition to that, I prefer the natural look of the real pumpkins, especially for the front porch.  This leaves quite the predicament. And I have the feeling I’m not alone in this. Do I prefer a barren and sad little porch, or wasted money?

Fortunately, there’s always a way to work with your budget. A little innovation and a pinch of creativity can provide you with all the fall fun no wasted money.

Here are some inexpensive ways to make your (real) pumpkin arrangements last from October through Thanksgiving!

pinterest_img

Pin this image!


1.Preserve your pumpkins.

One of the best ways to have your natural arrangements last is to prep your pumpkins ahead of time. Once you preserve them, most can last at least a couple of months. With this technique, you can pick out the best pumpkins and keep them around through Thanksgiving! This alone will save you a lot of money. Here are few links I found that will help guide you in the preservation process. Try HERE or HERE.

blog024

2. Purchase neutral shades.

Not only have these neutral pumpkins been on trend, but their muted pallet makes it easier to create different combinations for the entire fall season. I think they’re gorgeous! When picking yours out, choose different shades to mix and match. I chose whites, sage greens, and pale orange winter squash. I used vibrant mums (an inexpensive choice) to brighten up the space. Have fun with it! The more neutrals you have, the easier it is to play around with your accessories.

3. Rotate your pumpkins.

This one might sounds a bit odd at first, but it makes total sense! Once you’ve gathered your favorite bunch of neutral pumpkins, you can easily rotate the different colors and shades in and out of your arrangements. It takes minimal effort, and helps you feel like you constantly have a brand new arrangement. This is especially helpful when you want to inexpensively transition from an October arrangement to a November arrangement. Check out my example below. I took this arrangement from October to November by substituting my winter squash for my sage pumpkin, yellow mums for burgundy, and swapping out my dried accessories — all of which were a part of my original haul.

4. Style small pumpkins.

While investing in the beautiful large pumpkins is so fun (and necessary to fill large spaces), I find that the small ones are just as useful. It’s very inexpensive to buy a large bundle or two of the small pumpkins. I found mine at Wal-Mart. I use the small ones to fill in the empty nooks in my house, and it automatically feels more festive and inviting. Check out these simple ways to style the small white pumpkins throughout spaces you might not think of, like your bedroom or office space.

blog3blog011blog4blog6blog8

5. Mix and match dried accessories.

For those of you who love the natural look like I do, using dried accessories helps obtain that style while keeping expenses down. Try using dried plants and flowers, pine cones, and maize. All of these dried pieces look great with the pumpkins, and can be preserved or for many fall seasons. In looking at my arrangements, you can see hints of dried accessories all throughout.

blog021blog010blog017

◊◊◊◊◊◊◊◊◊◊◊◊◊◊◊◊◊◊◊◊◊◊◊◊◊◊◊◊◊◊◊◊◊◊◊◊◊◊◊◊◊

I hope you enjoyed these styling tips! I would love to hear about some of your favorite arrangements you’ve seen this fall. Are you an over the top decorator? Do you prefer the natural decorations? I love to see both! Let’s keep the conversation going! Leave a comment below or follow me on my personal Instagram @BethanyMPoteet. We love to chat with you all.

Happy Fall, yall!

Bethany

5 Inexpensive Ways to Style Pumpkins All Fall


An Open Letter to My Unborn Child

This is Bethany here, and I wrote this letter to my son, Oliver.

I start the third trimester of my pregnancy next week! My husband, Denver, and I (that’s our family above) are so excited for him to arrive. This is a sentiment close to my heart, and I welcome you to peek inside our little family.

Final_Pinterest2.png

Pin this image!

Oliver,

As I sit down to write this letter, I’m overwhelmed with the thought that you have been in my tummy for almost 7 months. Even though there are times when you knock the wind out of me, my heart swells with so many wonderful emotions. When I found out I was having you, I was so surprised and happy! Even though I was excited, I was also a little bit scared.

My mind was abuzz with thoughts. Had I taken care of myself when I didn’t know that you were inside of me? Would daddy and I have to move, make more money, and would we be able to shuffle our busy lives to make enough time for you? As I looked at the positive pregnancy test, I realized that all of these little questions could be wrapped up into one heavy one. Would daddy and I really make good parents?

With these questions looming, I still had to do one important thing — tell the love of my life that we made you!

When I told your daddy that we are having you, he hugged me and cried. He was so surprised and so beautifully happy! This is one of our favorite days. What a special memory you made for us, Oliver. We made an appointment to see the doctor. You know, the guy you’re always shy around! As the doctor was searching for you in my tummy, all of those scary questions started flooding back.

Then we saw you.

You were nothing but a white speck in a sea of black. As small as you were, we saw the flash of your precious heartbeat. Oh my son, I will never forget that moment. Do you know what I found out? You are a strong and perfectly healthy baby. This made me realize that the love we already have for you overshadows all the worry! God is so good to remind us of how blessed we are to have you in our lives.

I want you to know a few things about your daddy. As soon as he found out about you, he started praying for you every day. I am always so grateful for how much he does for us. Daddy and I work really hard so that we can have a happy home, but daddy works especially hard. Aren’t you proud of him? He brings us food when we are hungry, and he even eats ice cream before bed because he thinks it helps you! That’s your silly daddy. He kisses you goodnight, and he waits by my side to feel you kick and roll.

He held my hand so tight when we went to a big check up to see how you’re growing. On this day, God gave us peace about you. Your daddy lit up when he saw your face and features in 3D for the first time! You were just 22 weeks old! He thinks you have my nose, and when you wake up from a comfortable sleep, I think you scrunch up your forehead just like he does! We got your picture taken, and he took it to the office and showed all his coworkers. He’s already so proud of you.

Most of all, I want you to know how much your daddy and I love and respect each other. In fact, we love each other so much that we asked God to bring you into our lives! When God said yes, He let us learn so much about you.

This is what we know about you so far — You like to roll around my tummy at work and hide away when we visit the doctor. You love it when I rest, and when I sing and play my guitar. The only time I feel you take naps is when I exercise! I even know a few things you don’t like. You don’t like spicy food at all. Don’t worry, your daddy doesn’t like it either. You must not like it when I try and bend over to tie my shoes or paint my toenails, because you stick your little feet in my ribs when I try. It makes me grunt and laugh. You sure are a stinker. You’re so active, and I love it when you circle around my tummy and play.

Do you want to know my favorite thing about you? You’re so sweet and loving to us! When I am sad, you dance around. When I am tired, you kick me and remind me that you’re there for me. And when daddy and I are overwhelmed with how busy we are, we pull out the pictures of your face and you remind us to slow down and to count our blessings. Thank you for all of that, little one!

Although your room isn’t all the way put together yet, and we aren’t rolling in a big pile of money, all that really matters is the love and time we share together as a family. We have to wait a little bit longer to share this time together. You’re due to be here very soon after Christmas! Don’t worry little one. Whenever you decide to come, we will make your day so special. I know right now you think somersaults are fun, but you should see all of the wonderful and colorful things of the world! Your dad and I like to draw, play music, hike around, and see friends. Some people have told us that we can’t do these things when you get here. But we will find a way to make our own special and fun memories with you by our side. We can’t wait to share all of this with you!

Oliver, whenever this day arrives, I want you to know the world you’re coming into. Not everyone in this world has peace in their hearts, and this world can be a scary place. Despite all of that, know that God is always holding you in His hands. I have a few important promises I’m making to you. I want you to remember them when the world seems too much to bear.

I promise to show you love and understanding. I promise to guide you when you’re unsure of what to do, and I promise to listen to what you have to say. I can also promise you that I will make mistakes. Some days will be hard, and on those days you might not like me very much. So when those days come (and they will come), know I still love you because you are my son.

Do you know how I can promise you this? You have already helped us know a kind of love we never knew we could feel.

We still have so much to learn about you, but we can’t do this until we meet you face to face! All of your cousins, aunts and uncles, and grandparents are so excited to see you too! Some of your little cousins have been practicing your name. So be sure you answer to the name of “Obbaler” when you come out so that you don’t hurt their feelings.

Daddy and I are ready for the sleepless nights and for our world to be turned upside down. Because that means that you have arrived.

I can’t wait to meet you, son.

Mom

Thank you so much for reading! I enjoyed opening up my heart to my son, and to you as well. You can follow our family journey on Instagram @BethanyMPoteet.

-Bethany

3 Trendy Hair Styles for Fall 2016

This post is written in partnership with Megaphone Influence and Soapbox Insights + Influence on behalf of their client, Thermaluxe, by Remington. All opinions are 100% our own.

Hello Oak and Earth readers, it’s Bethany and Tera here, and we are getting so excited about the Fall season! What’s not to love? Pumpkin Spice Lattes (oh so typical), changing leaves, cooler weather, yummy candles, and new fashion. We want it to hurry up and get here already! All of us girls at Oak & Earth love Fall hair and fashion.

It’s always fun to see the newest Fall fashion trends, and we did our best to research and find some of the cutest Fall 2016 hair trends (before they overtake our Pinterest pages and our favorite magazines) so that we could share some of them with you! A big thank you to Thermaluxe, by Remington for aiding us in selecting some great hot tools to get #RemReady for these Fall looks!

Trendy hair styles for fall 2016

Pin this image!

← T E X T U R E D   S T Y L E →

Textured hair is in for Fall, and we couldn’t be happier about it. Whether it’s straight, wavy, short, or long, all hair types can be textured! Even better, this look takes almost no time at all. To achieve texture, you can use a small curling wand for short hair, and a larger wand or a straightener for longer hair! Lightly wave a few chunks or pieces and leave the others how they are naturally! Another fun way to create texture for medium to long hair is to keep the ends straight and blunt while tousling or waving the rest. The final touch for this look is to add some sea salt spray or dry shampoo. This creates tackiness to your hair so that you can kind of rough it up for your free style! For shorter hair, use a little bit of hair paste to create a fun, tousled look, and a finishing spray to make it last all day! Check out the captions to see what hot tools we used to create texture!

We used a 1” slim Thermaluxe straightener on Bethany’s mid length hair for blunt ends.

We used a 3/4”-1” Thermaluxe wand on Tera’s short hair to give it body.

← K N O T   I T   U P  →

Who doesn’t love a good knot in the Fall? This can be a top knot, mid knot, or even a half knot! If you wear your hair textured the day before, throw it up the next day into a knot of your choice! These knots pair amazingly with a big fall sweater and a scarf. A fun little Oak and Earth tip is to create the textured style on day one, do a half knot on day two, and a top knot on day three! This gives you three different looks, and only one day of using hot tools on your hair! Even better, all of these looks align with the Fall 2016 hair trends.

← B I G  W A V E S →

Big waves are on trend for a Fall look! You can use a curling wand or a straightener to create big waves. Because of the high heat, wands allow you to do a wrap-and-go technique. This gives you a loose and natural wave without having to rest your hair on a hot tool for an extended amount of time. Instead of curling it to perfection, run your fingers through it to give it a more natural wave! Short hair is so fun to play with on this look! You can create a soft, beachy wave for a more natural look, or create a bigger curl for a more dramatic ‘do’! Check out our captions to see which hot tools we used for our waves.

Tera and Bethany waved their hair with the 3/4”-1” barrel Thermaluxe curling wand. You can use the larger 1”-1 and ½” barrel for longer hair or bigger waves!

◊◊◊◊◊◊◊◊◊◊◊◊◊◊◊◊◊◊◊◊◊◊◊◊◊◊

What are our favorite brands and products to use to achieve each of these looks?

Since us girls of Oak and Earth are real women with very real budgets, every product we mention in this post can be purchased at Wal-Mart and on Walmart.com!

Texture Spray

Getting your hair to be tacky is imperative for your textured look! We both use Not Your Mother’s Sea Salt Spray. We love the texture it gives without weighing your hair down, and the bottle lasts such a long time! If you’re wanting that textured look, this is such an easy and inexpensive way to achieve it. For a pixie, a waxy hair paste is a great way to create the same tackiness that the sea salt spray makes, making it easy to use for almost every style. Here is a brand that has some great reviews!

Hot Tools

As mentioned before, we used a few hot tools to achieve these styles. If you’re going to use hot tools on your hair, we highly recommend products that focus on keeping the integrity of your hair! This is what we love about the Termaluxe tools. We loved that the tools were so smooth on our hair, making the styling process easy and quick! With the curling wand, the base of the iron is hotter than the tip. This keeps volume at the root of your hair where you need it without frying your ends! We also love that there are different sizes of each tool, giving variety for different hair type and length. Since the Thermaluxe tools reach high heat, you only have to do a one pass wave over your hair. The high heat also lets your style last longer and can be used fewer times throughout the week. Spray your day old waves with your favorite dry shampoo or texture spray, and your hair is just as trendy and cute as the day before!

Dry Shampoo

Not washing your hair every day helps retain hair health and moisture. But what about the excess oil and flat texture it leaves behind? Dry shampoo allows you to go a couple days without washing your hair, and also gives you root volume and texture! Since these particular Fall looks will be able to last a couple days, skipping a few washes also keeps down the damage! Here are a few dry shampoos that we have found work well for us: Dove, Refresh + Care Dry Shampoo and Not Your Mothers Dry Shampoo.

Which one of these Fall 2016 looks are you looking forward to the most?! If you try any of these looks, we want you to share it with us! Tag us on Instagram @OakAndEarth! We’ll be using the hashtags #OakAndEarthBlog and #RemReady for these posts, so be sure you’re following along on our social media accounts! You can find these on the side bar or in the footer. We would also love to see you following on our personal Instagram accounts at @BethanyMPoteet and @TeraPianalto. Now to go snatch a Pumpkin Spice Latte in hopes that drinking one will make the humidity drop and the cool weather roll in! Makes perfect sense, right?

Happy Fall, yall!

Bethany and Tera

photo-sep-14-6-25-05-pm


D.I.Y. No-Sew Pillow Covers

Hello Oak and Earth readers! It’s Bethany here on the blog this week. It’s been a crazy couple of weeks for us Oak and Earth gals. In the midst of all this craziness, Denver and I have been doing a few home projects (more on this later), and I have decided to show you one that I did recently!

This project came about because we had finally decided to purchase a real couch. Now, when I say real couch, I mean not a passed down (but very comfortable) love seat that we’ve had since we were married. In fact, almost all of our furniture has been passed down to us. We have been so thankful for it, but it’s time for a furniture face lift! Most of it we have been painting or re-inventing.

Ain’t nobody got money for all new furniture (except for Kimye).

A new couch, however, is something we have wanted for a long time and felt the investment was worth it. We found one that we love, and it came with throw pillows! The throw pillows weren’t awful, but they weren’t anything I would have chosen. Instead of tossing them or putting them in a garage sale, I decided to re-invent these too!

I had remembered seeing a video on how to do no-sew slip covers for pillows, and this sounded like a perfect project for a busy girl like me. I had two of these pillows, and I chose a different fabric for each. Why do this project? Simple — all (yes all) throw pillows are expensive, and the fabric I chose is not. I also love that if we change our style later down the road, all I have to do is go grab a new set of fabrics! Win and win. Let’s check it out.

pinterest2

Pin this image!

STEP 1: Pick out fabric for your pillows. I was covering two pillows and chose one yard of white fabric, and one yard of navy fabric with white arrows (as pictured). I found mine at Hobby Lobby.

STEP 2: Lay your fabric pattern face down, and measure it into a square. Fold up excess fabric.

STEP 3: Rotate your fabric into a diamond shape.
STEP 4:
Fold the bottom corner onto the pillow.

STEP 5: While holding the corner of fabric on the pillow (see above), roll the pillow into the middle of the fabric.
STEP 6:
Grab the top corner of the fabric.

STEP 7: Pull that corner over the pillow.
STEP 8: Tuck the corner under so that it makes a straight edge.

STEP 9: Tuck the edges of the fabric in like you’re wrapping a present. This just straightens the edges.
STEP 10: Pull the two sides together in preparation to tie them. As you do this, make sure your fabric is pulled tight and crisp.

STEP 11: Tie the edges into a double knot.
STEP 12: Tuck the excess fabric into the side folds to hide them.

Once these steps are done, you can either display the knotted side, or the flat side (both options are pictured below). The white pillow displayed below is also a cover done the exact same way!

I enjoy having these on my couch or on my bed. Let’s take a look!

nosewpillowcover7nosewpillowcover4nosewpillowcover011nosewpillowcover6

◊◊◊◊◊◊◊◊◊◊◊◊◊◊◊◊◊◊◊◊◊◊◊◊◊◊◊◊◊◊◊◊◊◊◊◊◊◊

This was a really quick and easy D.I.Y.! I am so glad I decided to keep the original pillows and turn them into something I can use in multiple rooms of my house. Being the D.I.Y. loving woman that I am, I can’t wait to experience (and possibly blog about) our next set of home projects! In the mean time, you can keep up with me on Instagram @bethanympoteet, and with our Oak and Earth accounts located in the side bar or footer.

Happy last couple weeks of summer!

❤ Bethany

DIY: Summer Popsicles

Hello, everyone! It’s Bethany here, and I can’t wait to dive into today’s blog post. Mostly because it has to do with two of my favorite things – summer and ice treats. Once again, Pinterest scrolling has inspired this week’s post (also a touch of pregnancy cravings). I’m not a huge dessert person, but I cannot resist icy treats! My mom used to pour lemonade into our ice trays and add a toothpick for frozen little popsicles. You know, the 90’s kid way. As a child, I just thought that was coolest thing. With my pregnancy, I have found myself thinking about those ice treats all the time!

Why not make my own?!

popsicle_pinterest.png

If you know me, you know my love of DIY’s. What I love about the making your own popsicles is knowing exactly what’s going in them! I found so many on Pinterest that I wanted to try. To narrow it down, I ended up trying one sweet and a one sour. They turned out so deliciously, and they definitely have my family’s stamp of approval!

Let’s take a look.

Lemon-Lime Popsicles:

Photo Jul 11, 5 40 50 PMPhoto Jul 11, 5 41 04 PMPhoto Jul 11, 5 40 44 PM

I found a lot of lemonade/mojito popsicle recipes on Pinterest, but I kind of wanted to scale it back for this one and nod to my mom’s classic little lemonade pops. This one is so simple and refreshing.

What you’ll need:

  • Popsicle molds **Note: I got my popsicle molds from Bed, Bath and Beyond. I researched what type of molds had good reviews. I also wanted to get the flat classic shape, so I went with these. They can be found HERE.
  • Lemonade
  • One lime
  • Mint leaves if desired

What to do:

I made a small batch of lemonade, and filled my popsicle molds half way. See my notes above to find out more about where I found my popsicle molds. I cut thin slices of lime (you can add mint leaves here if desired) and placed them in the middle of the molds. I then poured the rest of my lemonade into the molds, up to the fill line. The popsicle mold instructions said to freeze for 8 hours. I didn’t feel like mine were fully frozen, so I just left them in over night. Once they are frozen, run warm water over the molds for about 30 seconds. Then they are ready to eat!

Roasted Berry Greek Yogurt Popsicles:

Now that I had fulfilled my sour, I wanted to try some sweet! I absolutely love Greek Yogurt and berries! Why not try a recipe that incorporates both into a yummy frozen treat? I was so excited when I found this recipe, and it did NOT disappoint. I would rave about these all day long if I could! I found this recipe through Pinterest, and I couldn’t be happier with how mine turned out!

Photo Jul 11, 5 47 32 PMPhoto Jul 11, 5 47 55 PMPhoto Jul 11, 5 49 28 PM

Before I link this recipe, I want to note a few beginners tips.  Although the recipe says 4 hours for freezing time, mine took over night to freeze. This might be because of the materials of my molds (plastic). Be sure to run warm water over your molds for 30 seconds before taking the popsicles out.

What you need:

  • Popsicle molds
  • 16 oz vanilla Greek yogurt
  • 1 cup fresh blueberries
  • 1 cup fresh strawberries
  • 1 lemon

The recipe and cooking instructions are linked HERE . This recipe was created and written by the awesome food blogger, Sprinkled With Jules. You’ll have to check her out!

◊◊◊◊◊◊◊◊◊◊◊◊◊◊◊◊◊◊◊◊◊◊◊◊◊◊◊◊◊◊◊◊◊◊◊◊

Photo Jul 11, 5 50 55 PM

I absolutely loved both of these popsicles, and I already have materials to make them again. They were a hit with my family, and a few gasps and heart eye emojis came out when everyone tried the berry ones! Please let me know if you make these recipes, or if you have any questions at all! You can keep up with me on Instagram @bethanympoteet, and the rest of us Oak and Earth gals on our social media links in the side bar or footer.

Happy, summer!

Bethany ❤


Pinterest Project Fun: DIY Yarn Hangers

Pinterest_1

Hello, everyone! It’s Bethany here today, and I am so excited to be writing on Oak & Earth  as my favorite season has arrived – summer! During the warmer months, I find myself day dreaming and scrolling through my Pinterest page frequently. With so many fun project ideas available at my fingertips, I decided to take a risk and try one that I’ve been swooning over for a while. DIY Yarn Hangers!

While you can go on Etsy and snag something similar, I prefer DIY’s because you can add personal touches and really make it your own. I also found that the materials to make these hangers are very cost efficient. Once I gathered the materials, I threw on some music and simply tied the evening away. This would be a really fun project to do with some girlfriends!

I chose this yarn hanger DIY in particular because they fit the minimal vibe that I love, the metal rings added a fun touch I hadn’t seen in other yarn hangers, and I thought the user friendly instructions were perfect for a busy girl like me! It turns out, this project wasn’t a Pinterest fail at all (we’ve all had them). I’m absolutely in love, and I think they fit so well with my style and my home.

Here’s how they turned out!

diy4diy6Processed with VSCO with m5 preset

Making the Yarn Hangers

← P R E P A R E 

Because I wanted to hang my pieces in a wide blank space, I decided to make my yarn hangers a little larger than the measurements provided in the DIY. I simply multiplied the measurements to my liking. I found every single material item at Hobby Lobby! Remember that you can choose your own color of yarn, length, texture, tying styles, etc., and that personal choices are part of the fun of doing a DIY!

← M A T E R I A L S →

  • Yarn of choice
  • Scissors
  • Ruler or tape measure
  • Cardboard piece at least 14”
  • Metal rings **Note: The size of ring depends on how large you would like your hanging pieces. The DIY demonstration calls for 1.5” and 3” rings, while I upped the size a touch. There are many sizes to choose from at Hobby Lobby. 
  • Krazy glue
  • Round wood dowel **Note: DIY instructions called for 7. 5″, I chose 12”

← C R A F T →

I followed the instructions in the DIY Yarn Hanger post found HERE. This DIY project was created by the wonderful blogger, Amy, of HomeyOhMy. Her blog is great for minimal and modern home décor ideas and projects, so be sure to check her out!


We are so excited to share all the fun recipes, DIYS, and experiences that we have planned this summer! Please let us know if you try this project, and be sure to suggest some posts you would like to see in the future! You can keep up with me on Instagram @bethanympoteet, as well as our Oak & Earth social media links located in our side bar or footer.

Happy summer, and happy pinning!

Bethany

diy7

Tea Pots and Deep Talks: The Power of Female Fellowship

In the midst of an absolutely crazy month, I sat on the floor and poured myself some tea. Before you get too worried about my stability, I was not alone. After reminiscing about how much fun tea parties were when we were little girls, our 20 something women’s devotional group decided to have a little tea party of our own.

While our plan was to set up a spot outside in the beautiful spring sun, what we got was a large dose of rain and cold. Thankfully we all know how to roll with the Arkansas weather, and we set up our own little version inside on the floor! I would be lying if I said I wasn’t in little girl heaven. Floral dresses and lace tops, vintage tea cups and pink lemonade, mini quiche and sweet treats, patterned quilts and a lot of laughter, it was a breath of fresh (indoor) air.

tea6

This is what I determined: God gives you little gifts wrapped in peculiar packages. While I knew this would be a fun memory for us, I wasn’t expecting sitting around with women in their mid-twenties drinking tea to be a spiritual gift. Who knew that a moment to pause, laugh, and indulge in sugary treats was exactly what the Good Lord ordered?

As I drove home from our tea party, I wanted to dissect the power of female fellowship and why it has impacted my life as much as it has in the last year!

I had been spiritually starving myself of fellowship, and I didn’t even know it.


Why female fellowship is so important.

“Two are better than one, because they have a good reward for their toil. For if they fall, one will lift up his fellow.” Ecclesiastes 4:9

The Bible says that when two or more are gathered in His name, He will be there too. When Jesus walked the earth, He loved to gather people together to laugh and dance and enjoy one another’s company. Jesus knew what He was doing when He gathered people together. Having people around you means someone is there to listen. To relate to your pain. To share in your joys. To sharpen you. Notice this blog post isn’t about fellowship in general. It’s about female driven fellowship. While it is beneficial to have fellowship in all forms, positive women are important to have around you! Find a group of women who understand your personal struggles. This particular team of women know of my horrible flaws, my embarrassing stories, and what I struggle with on a daily basis. Even so, talking it out with other women who have been through similar struggles is one of the best feelings in the world! They’ll never know the impact each of them has had on me or how this time set aside during the month refreshes me when I need it most. I encourage you to find a group of women you feel  you can confide in.

How do you find time to fellowship?

“You are the light of the world. A city set on a hill cannot be hidden. Nor do people light a lamp and put it under a basket, but on a stand, and it gives light to all in the house. In the same way, let your light shine before others, so that they may see your good works and give glory to your Father who is in heaven.” Matthew 5:14-16

All of us ladies have excruciatingly busy lives. But carving out specific time in the week just to be with others and relish in daily joys is so incredibly important! We often call it our little getaway. That being said, I haven’t always had a group like this. Although most weeks we gather on the couch and go over our devotional, fellowship can happen anytime and anywhere if you invite Him to join. You can fellowship over coffee, at each other’s house, during a walk etc., however you can find the time. Often times, us girls of Oak and Earth cram into my Prius after our devotional group and talk up to an hour or more. We discuss what crazy thing happened that week, what we can pray over each other, and how we can offer each other encouragement. I consider even this little moment in time to be one of my favorite times of fellowship!  Once you make the time, it will be easy to understand why it is so important (especially as young women).

tea029tea013


How is your story an important asset to other women ?

“Iron sharpens iron, so one person sharpens another” Proverbs 27:17

Often times I don’t feel worthy of helping others. Yet for all the dirty parts of your past, there is also God’s unwavering grace to meet you in the present! As I have gotten older, I have learned how important it is to lift one another up. I was terrible about this in years past. Be it due to insecurity, self-doubt, anxiety, depression, or whatever you might be going through, remember your unique beauty and talents over any negative thoughts or phrases. Seeking God and building relationships with people who speak positivity over you is a complete life changer. You never know how your story might help someone who is struggling! Can you think of a way you’ve sharpened a fellow female? What about someone who has sharpened you? Every story is important. You are an asset to this world.

♦◊♦♦◊♦♦◊♦♦◊♦♦◊♦♦◊♦♦◊♦♦◊♦♦◊♦♦◊♦♦◊♦♦◊♦♦◊♦♦◊♦♦◊♦♦◊♦♦◊♦♦◊♦♦◊♦♦◊♦♦◊♦♦◊♦♦

tea026.jpg

As much as I enjoyed our little garden party,  I have enjoyed getting to know these beautiful and strong women over the past year even more (including my girls of Oak and Earth). Even when we are just telling funny stories, ranting about our busy schedules, or sitting down to sip some tea, I know that God placed this group in my life for a very specific reason. When you’re around positive people, you can’t help but want to do better. I encourage everyone to find some wonderful women to fellowship with. Have you had a time that women’s ministry has impacted your life? Is there a way we can be praying for you? We would love to hear your thoughts! You can find us on social media @OakAndEarth, or you can comment below to keep the conversation going. You can also find me personally (Bethany) on Instagram @BethanyMPoteet. If you’re wondering who this Life Group is through, us girls of Oak and Earth go to New Life Church at the Fayetteville location. If you’re in the area, feel free to check it out!

“By this we know love, that he laid down his life for us, and we ought to lay down our lives for the brothers.” 1st John 3:16

Thanks for reading!

-Bethany

HERBventure is Out There: Starting an Indoor Herb Garden

Hello, readers. It’s Bethany here on Oak and Earth today, and I’m so excited to be writing during a time as wonderful as this—Spring.

Being 25 years old, I’ve been living in various apartments and duplexes for about seven years now. While I am completely enamored by the idea of owning my own home, I don’t hate living in an apartment or duplex either! I mean, simple spaces, low utility bills, convenient amenities at your fingertips etc., there’s really a lot to love. But there’s one thing that is always keeping my apartment from having that homey vibe I long for—not having my own garden! When I was little, Spring time meant dirt on my knees, tilling the soil, and eating grapes with my mom as we showered the garden bed with colorful flowers. I even grew my own corn! I miss this so much. If I were to walk outside of my place right now and grow a little garden, the lawn service would mow over it in five minutes flat. Not ideal.

As I have spent years sulking because I can’t grow a full garden, I had never thought about growing one indoors! Thank you, Pinterest, for giving me gardening hope. Instead of waiting for that perfect little starter home, I decided to start one right in my little duplex window sill! I love cooking with fresh herbs, especially in the spring and summer, so I have been thrilled at the thought of my own little indoor herb garden.

Herb2Below, I have listed some questions that I found to be helpful while starting this process:

Purchasing
»
What herbs will I use regularly?
»How many herbs am I comfortable starting out with?
»How obtainable are these herbs for beginners?
»Where can I purchase these herbs and my gardening tools?
»What kind of container will I need for proper growth?

Care
»
How much light do they need?
»Do I have the proper windows for this light? (South facing)
»What type of soil will I need?
»How often do I water them?

Harvesting
»
How will I know when to harvest?
»How do I prep them for cooking?

I found many sites and blogs that answered many of these questions and more, but here are a few sites that I found particularly helpful in my research:

← H E R B V E N T U R E →

I have never planted herbs before, so this herb-venture is completely new to me, and I am fully aware that I could kill them. Whether they thrive or die, I thought we could go on this journey together!

Choosing My Herbs

Prior to purchasing my herbs, I did a lot of thorough research. Besides the links above, I also asked my girls of Oak and Earth about their experiences! We all have been in a planting mood lately, so it’s been really fun chatting about what works and what doesn’t. Instead of starting from seeds, which can be very challenging, I decided to get the herbs from the garden section at Lowe’s. I chose to plant Italian Oregano, Spearmint, and Cilantro. Cilantro in my fresh salsa, mint in that refreshing Mojito, and oregano in a tossed summer pasta? That’s the goal! If you’re not sure what herbs to start with, both of the sites I linked above give a great list of herbs that are able to thrive indoors!

Potting My Herbs

Finding the proper pots is imperative to growth, and I wanted to make sure mine had a good draining hole (be sure to read up on this). They’re going to be a part of your home, so you also want to make sure they fit your style profile! There are a ton of ideas for different potting, shelving, and re-purposing indoor plants on Pinterest. Should they do well, I’m excited to try some of them. I wanted to keep it simple to start out, so I decided to paint my own terracotta pots! Painting them allows you to add your personal touch, and it made for a really fun project. I really love how they turned out, and they fit perfectly in my South facing window.

As I watered them today, I was wondering what their story will be this summer. Do they flourish? Do they die? Do they almost die but I swoop in to nurse them back to health? My hope is that they flourish enough to harvest! I have eaten my home grown corn on the cob as a child, and I am more than excited to cook with my fresh herbs as an adult. Either way, I am just giddy at the thought of taking care of my little herb babies.

Come summer, I’ll be sure to do an updated post about my herbs (dead or alive). I really hope that this gives you fellow apartment-living folk some great ideas! If you enjoyed reading this, you might also want to check out Shelby’s beginners guide to planting succulents here. Please feel free to keep up with our stories a little bit easier by following us on social media! You can follow me on Instagram @BethanyMPoteet. If you like the “Let Your Love Grow Tall” banner in the background of my photos, I got it from our friend Sarah’s shop @PinAndThreadCo. You should definitely check her out, she has some adorable home decor! We have a lot of fun Spring-themed posts in store, so be sure to keep visiting Oak and Earth! In a home big or small, gardening is for all. Thanks for reading!

Happy Spring!

-Bethany

Chasing Our Purpose


For me, and I feel for many of you who might be reading this, knowing our purpose and feeling like we are fulfilling that purpose can be something of a struggle. There are many days when I am sitting at home with my daughter, that I let my mind wander to all of the things I think God may have for my future: my purpose. My dream of running a children’s bookstore (I blame Meg Ryan and Tom Hanks for this), my passion for women’s ministry, my love for writing…I wonder if someday, one of these dreams will be where my purpose is fulfilled. I wonder if the plan God had made for me even before I was born will come to be in another 10 years from now, 15 years, 5?

I believe that while these may all be great things, there is a danger in waiting around for our moment. It is a skewed perspective and mind set to think that the purpose God has called us to is something that we work toward, and then one day we’ve arrived. I’m not saying that God doesn’t want or allow our dreams to come to fruition, or that if we work hard at something, we won’t be blessed with the fruits of our harvest! What I feel the danger is, is going about our day to day feeling as if there is no real purpose if it isn’t our ultimate purpose, and consequently, often times finding a lack of joy in our lives–especially when we are in a season that is less than joyful.

It’s easy to get in this rut! I’ve been there, many times, and I have to remind myself that there is such a meaningful purpose in every season I go through. As a stay at home mom, the schedule can feel a bit mundane at times, the days can feel doubly long at times, and it can be totally exhausting. Though Norah brings my heart so much joy and I truly love being able to stay home with her, these are the times when it is easy to feel like I am not doing enough; that maybe God has another hat for me to add to my collection (as if I’d really have the time). I lose sight of the great importance my purpose today holds with being a mother, even and especially in the mundane.

Sometimes, if we haven’t landed our dream job, or we’re working our way through college and are unsure about our major, or we haven’t met the one, or we’re a stay at home parent, we can get caught up in this rut. We compare our lives to a standard in our own heads, and when it doesn’t measure up, we start to wonder what our purpose really is. “What am I really supposed to be doing? When will I feel unstuck?”

Your eyes saw me when I was inside the womb. All the days ordained for me were recorded in your scroll before one of them came into existence.” Psalm 139:16 (NET)

IMG_7066

When my flesh is tempted to feel this way, this verse reminds me that not one of my days here on earth is unknown to the Lord. That God created every hour of my life with a purpose. I may never have a distinct moment of arrival for my purpose, because my purpose is stitched into each new day, and in every season of life I am in. Sometimes His purpose for me may be a waiting period, so He can stretch my faith and grow me before He unveils a plan with greater responsibility. Sometimes it’s to teach me, sometimes it is to let my heart heal, sometimes it’s to take me out of my comfort zone, sometimes it’s a time of preparation of my mind and spirit- (the list could go on).

I truly believe that God’s purpose for us today (yes, even in that place we feel is a rut) is just as important and imperative as His purpose for us tomorrow and the next day. There is purpose and reason for every circumstance! Whether we are waiting for a new job opportunity, or whether we are discovering our passions and chucking our way through school (one all-nighter at a time), or whether we’re at home with our little ones, where the days can seem so long at times–there is purpose. Shifting our focus from “chasing our purpose” to making God our purpose and our center, wherever we are at, allows us to see how He’s using each season to teach us and prepare us for the next season. Waiting for our “arrival” to our life’s purpose is a never-ending road; you’ve arrived already! Live out each day knowing that God has distinct purpose and importance within it!

“So, whether you eat or drink, or whatever you do, do all to the glory of God.” 1 Cor. 10:31 (ESV)

IMG_7062

Peace and Love!

-Tera, xo