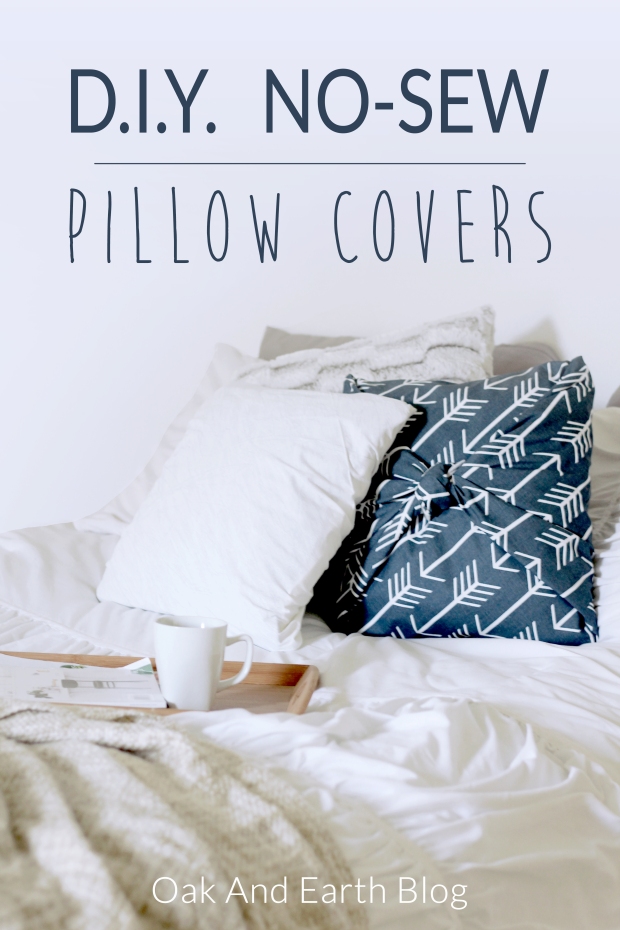
D.I.Y. No-Sew Pillow Covers

Hello Oak and Earth readers! It’s Bethany here on the blog this week. It’s been a crazy couple of weeks for us Oak and Earth gals. In the midst of all this craziness, Denver and I have been doing a few home projects (more on this later), and I have decided to show you one that I did recently!

This project came about because we had finally decided to purchase a real couch. Now, when I say real couch, I mean not a passed down (but very comfortable) love seat that we’ve had since we were married. In fact, almost all of our furniture has been passed down to us. We have been so thankful for it, but it’s time for a furniture face lift! Most of it we have been painting or re-inventing.

Ain’t nobody got money for all new furniture (except for Kimye).

A new couch, however, is something we have wanted for a long time and felt the investment was worth it. We found one that we love, and it came with throw pillows! The throw pillows weren’t awful, but they weren’t anything I would have chosen. Instead of tossing them or putting them in a garage sale, I decided to re-invent these too!

I had remembered seeing a video on how to do no-sew slip covers for pillows, and this sounded like a perfect project for a busy girl like me. I had two of these pillows, and I chose a different fabric for each. Why do this project? Simple — all (yes all) throw pillows are expensive, and the fabric I chose is not. I also love that if we change our style later down the road, all I have to do is go grab a new set of fabrics! Win and win. Let’s check it out.

pinterest2

Pin this image!

STEP 1: Pick out fabric for your pillows. I was covering two pillows and chose one yard of white fabric, and one yard of navy fabric with white arrows (as pictured). I found mine at Hobby Lobby.

STEP 2: Lay your fabric pattern face down, and measure it into a square. Fold up excess fabric.

STEP 3: Rotate your fabric into a diamond shape.
STEP 4:
Fold the bottom corner onto the pillow.

STEP 5: While holding the corner of fabric on the pillow (see above), roll the pillow into the middle of the fabric.
STEP 6:
Grab the top corner of the fabric.

STEP 7: Pull that corner over the pillow.
STEP 8: Tuck the corner under so that it makes a straight edge.

STEP 9: Tuck the edges of the fabric in like you’re wrapping a present. This just straightens the edges.
STEP 10: Pull the two sides together in preparation to tie them. As you do this, make sure your fabric is pulled tight and crisp.

STEP 11: Tie the edges into a double knot.
STEP 12: Tuck the excess fabric into the side folds to hide them.

Once these steps are done, you can either display the knotted side, or the flat side (both options are pictured below). The white pillow displayed below is also a cover done the exact same way!

I enjoy having these on my couch or on my bed. Let’s take a look!

nosewpillowcover7nosewpillowcover4nosewpillowcover011nosewpillowcover6

◊◊◊◊◊◊◊◊◊◊◊◊◊◊◊◊◊◊◊◊◊◊◊◊◊◊◊◊◊◊◊◊◊◊◊◊◊◊

This was a really quick and easy D.I.Y.! I am so glad I decided to keep the original pillows and turn them into something I can use in multiple rooms of my house. Being the D.I.Y. loving woman that I am, I can’t wait to experience (and possibly blog about) our next set of home projects! In the mean time, you can keep up with me on Instagram @bethanympoteet, and with our Oak and Earth accounts located in the side bar or footer.

Happy last couple weeks of summer!

❤ Bethany

Whole 30 Approved Sweet Potato Toast

How would you like a Whole30 sweet potato toast or two?

SP toast pin (1)

Pin this image!

Hello Oak and Earthers. So nice to meet you! I’m Lyndi, and I work with the wonderful Shelby who invited me to stop by and say hi.

Hi.

Like any good guest, I thought it only proper I bring along a treat or two. It had to be extra special since this is an extra special site. Their photos and stories are inspiring, aren’t they? And… to be honest… a little bit intimidating. I follow their Instagram feed religiously and swoon over the gorgeous photos and the mood that is set. No way could I just bring you a bowl of eggs or a regular old cup of java.

No way. Today I wanted to do something extra special for you and for the Oak and Earth gals.

So, two things.

One, have you heard about the sweet potato toast craze? I’m seeing it all over the internet. Which really means Pinterest.

Two, did you know that the Oak and Earth gals are going #whole30 this month?

If you have been intrigued by either of these two areas, I can help with the first one. And I can actually help with the second one since these recipes for sweet potato toasts are both #whole30 compliant.

Please help me in deciding which one tastes better. I am at a loss. They are both over-the-top INSANELY DELICIOUS and I may or may not have taken bites back and forth trying to decide. Help, please?

sweet potato toast - sweet (c)nwafoodie

Sweet??

SWEET POTATO TOAST = SWEET STYLE

Makes 2 slices

Ingredients:

  • 1 medium sweet potato
  • 10 pistachios, coarsely crushed
  • 3 cardamom pods
  • ½ teaspoon coconut oil
  • 1 tablespoon almond butter
  • ½ banana
  • pinch of ground cinnamon
  • pinch of sea salt flakes

Instructions

  1. Cut sweet potato ¼” thick. If you go with a large sweet potato, you will have enough slices for both this sweet version and the savory version.
  2. Bake sweet potato in a 350 degree oven for 15 minutes.
  3. Toast the sweet potatoes in a toaster oven or toaster on next to highest level to brown the toast.
  4. Remove cardamom shell and crush seeds to a medium-fine consistency and set aside.sweet potato toast - cardamon crush
  5. Remove toast from oven and butter two slices with coconut oil.
  6. Spread almond butter over toast.
  7. Slice banana and place on almond butter.
  8. Sprinkle toast with cinnamon, cardamom, pistachios, and sea salt flakes.
  9. Serve and enjoy!

sweet potato toast - savory (c)nwafoodie

Or Savory???

SWEET POTATO TOAST = SAVORY STYLE

Makes 2 slices

Ingredients:

  • 1 medium sweet potato
  • 1 avocado
  • lime juice
  • ½ garlic, minced
  • pinch of ground cumin
  • pinch of dried cilantro
  • ½ teaspoon extra virgin olive oil
  • pinch of crushed red pepper flakes
  • pinch of sea salt flakes

Instructions:

  1. Cut sweet potato ¼” thick. If you go with a large sweet potato, you will have enough slices for both this sweet version and the savory version.
  2. Bake sweet potato in a 350 degree oven for 15 minutes.
  3. Toast the sweet potatoes in a toaster oven or toaster on next to highest level to brown the toast.
  4. Remove the meat from the avocado and mash coarsely with a fork.
  5. Remove toast from oven and spread avocado mash.
  6. Lightly sprinkle lime juice and evenly spread out minced garlic over avocado.
  7. Sprinkle toast with cumin and cilantro.
  8. Drizzle olive oil over toast and top with crushed pepper and sea salt flakes.
  9. Serve and enjoy!

So what do you think? Sweet or Savory? Let me know in the comments below, and thanks for reading!

Eat well, my friends.

Lyndi Fultz


Arkansas Women Blogger member Lyndi Fultz writes about living and eating well inspired by life in beautiful Northwest Arkansas at nwafoodie. Much of her blogging inspiration comes from this gem of a place, which she refers to as the proverbial land of milk-and-honey. She doesn’t think you have to live in the big city to be a foodie. All you have to do is explore your own backyard. Light-hearted and approachable, nwafoodie is conversational with a healthy and simplistic approach to eating well. You can also find her on Instagram.


http://nwafoodie.com


D.I.Y. Pom Sandals

Hey, readers! I hope you’ve all been enjoying the warm summer sunshine! My family and I have had a crazy busy few weeks, but we’ve managed to hit the water park a couple of times, and we’ve indulged in quite a few milkshake nights…it’s how we like to roll. If you follow my personal instagram or Oak and Earth’s instagram page, you may have seen that us girls of O&E have recently started participating in the Whole 30 meal plan (basically a diet eliminating grains, dairy, and legumes and of course any processed foods). We plan to share with you guys how each of our Whole 30 experience goes, but so far I can tell you it’s been a challenge on my end! I am keeping some dairy and tiny bit of grain in for pregnancy purposes, but for the most part, those things are not in my diet. I’m a lover of bread and pasta and cheese, so this has not been an easy feat! Aside from this lifestyle change, we have some big house news going on that I’ll share after things settle down a bit, AND not to mention we are on the homeward stretch to meeting baby girl (10 weeks left) EEK! Starting to feel a little bit of stress and a lot a bit of crazy, but we are trucking through. Nothing a fun little DIY project can’t distract me from for a bit anyway!

I’ve been so excited to share this post with you because I really love how these sandals turned out! It’s such a fun accessory to add to your summer wardrobe. These pom sandals are super trendy this season and they’re all over Pinterest and Etsy. It plays up any outfit, so you can be comfy in your boyfriend shorts and a tank, and slap these puppies on, and BAM! You’ve gone from comfy casual to super adorable in .5 seconds! The best part? If you go online to buy these pom sandals, you’ll see that many of them are selling for $100+…I was able to buy my supplies and shoes all for around $30! You can look super cute and trendy without it costing you an arm and a leg, which is always my kind of style!

These did take me a full day to whip up, mostly because it’s a bit of trial and error–especially for the first sandal you assemble. So this makes a perfect summer weekend DIY where you can either spend a Saturday creating them, or split it up over two days!

IMG_8005

Okay, now for the fun part! To make your own pom sandals, you’ll need:

  • Sandals  (Here are some similar ones to mine)
  • Pom Poms
  • Wooden Beads
  • Mini Tassels (if wanted)
  • Thread/Needle*
  • Scissors

* I chose to stitch my materials on to the sandals to make them a little sturdier, but there are some great Pinterest DIY’s for these that just use a hot glue gun!

IMG_8036

To assemble these, I started with trying the sandals on in front of a mirror and placing poms (with a sewing pin) in the desired areas. This part took some trial and error to get them where I wanted them! You can leave sewing pins in place or just make tiny marks with a pen to remember where you want them. Once you have an idea of where you want your poms, unlace the sandals and before making the poms permanently attached, string the wood beads along the sandal straps in desired places. I tried my sandals on during this process a few times to see where I wanted beads once the sandals were actually wrapped around my leg. It helps to do this so that you can see where the pom poms are, and where you’ll have some naked space on the straps! Here is a photo of mine about midway through my second sandal: (You can see I had the beads strung in place and the poms are temporarily pinned with sewing pins)

IMG_8028

After the beads are placed along the straps, then you can begin stitching or gluing your poms into their permanent place! I just did a couple simple stitches to secure them to the sandal, and voila! It was the easiest part of the process. For the strap around the toes, I bought some pom pom trim (from Hobby Lobby), measured across, cut, and stitched. Other than figuring out placement for the poms and beads, it was the most time consuming part of the project. I think hot gluing would do just fine for this part and would save you a good chunk of time!

The last thing I did was assemble the mini tassels to the ends of the straps for a cute added touch. I just looped them on the end of the strap and stitched them to make sure they were secured.

After this was done, I had some super adorable and colorful sandals! They look super cute gladiator style, which is how I wore them here, but they also looked super cute wrapped and bunched closer together! I deemed this to be a very successful DIY and can’t wait to wear them around town!

This was such a fun and cute DIY for summertime, and for the steal of a price, I’d do it all over again! I’m obsessed over this look right now!! We can’t wait to hear what you all think of these pom sandals!

Keep up with us by following our social media pages, and stay up to date with all Oak and Earth happenings! Until our next summery post, stay cool and eat ice cream!


Peace and Love,

Tera -xo

DIY: Summer Popsicles

Hello, everyone! It’s Bethany here, and I can’t wait to dive into today’s blog post. Mostly because it has to do with two of my favorite things – summer and ice treats. Once again, Pinterest scrolling has inspired this week’s post (also a touch of pregnancy cravings). I’m not a huge dessert person, but I cannot resist icy treats! My mom used to pour lemonade into our ice trays and add a toothpick for frozen little popsicles. You know, the 90’s kid way. As a child, I just thought that was coolest thing. With my pregnancy, I have found myself thinking about those ice treats all the time!

Why not make my own?!

popsicle_pinterest.png

If you know me, you know my love of DIY’s. What I love about the making your own popsicles is knowing exactly what’s going in them! I found so many on Pinterest that I wanted to try. To narrow it down, I ended up trying one sweet and a one sour. They turned out so deliciously, and they definitely have my family’s stamp of approval!

Let’s take a look.

Lemon-Lime Popsicles:

Photo Jul 11, 5 40 50 PMPhoto Jul 11, 5 41 04 PMPhoto Jul 11, 5 40 44 PM

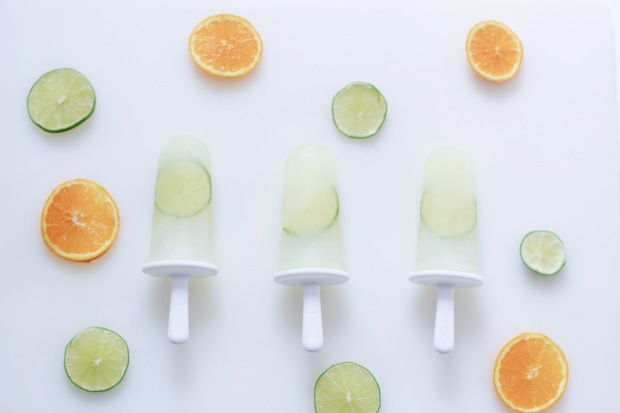
I found a lot of lemonade/mojito popsicle recipes on Pinterest, but I kind of wanted to scale it back for this one and nod to my mom’s classic little lemonade pops. This one is so simple and refreshing.

What you’ll need:

  • Popsicle molds **Note: I got my popsicle molds from Bed, Bath and Beyond. I researched what type of molds had good reviews. I also wanted to get the flat classic shape, so I went with these. They can be found HERE.
  • Lemonade
  • One lime
  • Mint leaves if desired

What to do:

I made a small batch of lemonade, and filled my popsicle molds half way. See my notes above to find out more about where I found my popsicle molds. I cut thin slices of lime (you can add mint leaves here if desired) and placed them in the middle of the molds. I then poured the rest of my lemonade into the molds, up to the fill line. The popsicle mold instructions said to freeze for 8 hours. I didn’t feel like mine were fully frozen, so I just left them in over night. Once they are frozen, run warm water over the molds for about 30 seconds. Then they are ready to eat!

Roasted Berry Greek Yogurt Popsicles:

Now that I had fulfilled my sour, I wanted to try some sweet! I absolutely love Greek Yogurt and berries! Why not try a recipe that incorporates both into a yummy frozen treat? I was so excited when I found this recipe, and it did NOT disappoint. I would rave about these all day long if I could! I found this recipe through Pinterest, and I couldn’t be happier with how mine turned out!

Photo Jul 11, 5 47 32 PMPhoto Jul 11, 5 47 55 PMPhoto Jul 11, 5 49 28 PM

Before I link this recipe, I want to note a few beginners tips.  Although the recipe says 4 hours for freezing time, mine took over night to freeze. This might be because of the materials of my molds (plastic). Be sure to run warm water over your molds for 30 seconds before taking the popsicles out.

What you need:

  • Popsicle molds
  • 16 oz vanilla Greek yogurt
  • 1 cup fresh blueberries
  • 1 cup fresh strawberries
  • 1 lemon

The recipe and cooking instructions are linked HERE . This recipe was created and written by the awesome food blogger, Sprinkled With Jules. You’ll have to check her out!

◊◊◊◊◊◊◊◊◊◊◊◊◊◊◊◊◊◊◊◊◊◊◊◊◊◊◊◊◊◊◊◊◊◊◊◊

Photo Jul 11, 5 50 55 PM

I absolutely loved both of these popsicles, and I already have materials to make them again. They were a hit with my family, and a few gasps and heart eye emojis came out when everyone tried the berry ones! Please let me know if you make these recipes, or if you have any questions at all! You can keep up with me on Instagram @bethanympoteet, and the rest of us Oak and Earth gals on our social media links in the side bar or footer.

Happy, summer!

Bethany ❤


Berry Delicious Summer Treats: Ps – They’re Gluten Free!

With temperatures reaching closer and closer to the triple digits, it is finally, truly, feeling like summer. And what goes better with summer than perfectly sun-ripened berries? Answer: nothing.

If you have Celiac Disease, or are gluten intolerant, baked goods can seem like a far-off dream, and gluten-free desserts can often leave something to be desired, but it doesn’t have to be that way! So grab a fork, put on a pot of coffee, and prepare to dig in to these berry delicious, gluten-free, summer treats!

berry delicious

Pin this image!


Mixed Berry Cobbler

This recipe is originally from Bake or Break, but it wasn’t originally gluten-free. However, it was delicious! I had picked a bunch of fresh blackberries from my garden and wanted to make a cobbler, but couldn’t find a gluten-free one to suit me. I modified this recipe by using gluten-free all purpose King Arthur flour, and a little bit of extra butter, because gluten-free flour tends to be crumbly and drier than regular varieties. It turned out wonderfully!

I used a combination of blackberries, strawberries, and blueberries, but you can make it with any combination that suits your fancy! (Next time I’m adding raspberries!)


Prep Time: 15 minutes

Bake Time: 30 minutes

Yield: 4 to 5 servings

Ingredients:

  • 3 cups assorted berries
  • 1/2 tablespoon lemon juice
  • 1 cup all-purpose, gluten-free flour
  • 1/2 teaspoon baking powder
  • 1/2 teaspoon salt
  • 1/2 cup unsalted butter, softened 
  • 3/4 cup packed light brown sugar
    1 teaspoon vanilla extract

Directions:

  1. Preheat oven to 375°F. Grease a 9”x 6” rectangular or 8” round baking dish.
  2. Place the berries in prepared pan. Drizzle with the lemon juice.
  3. Whisk together the flour, baking powder, and salt. Set aside.
  4. In a medium bowl, beat the butter, brown sugar, and vanilla until well-blended. Mix in the dry ingredients until mixture resembles crumbs. Drop the dough evenly on top of berries.
  5. Bake for 30 minutes, or until the top is lightly browned and fruit is bubbly.

Notes:

If you use any larger berries, such as strawberries, I recommend chopping them to blueberry-sized pieces.

For feeding a crowd, this recipe is easily doubled to be made in a 9”x 13” dish.

CR77K0B3GO


Strawberry Shortcake

For some reason, I always feel like having strawberry shortcake on the 4th of July. The two are just inextricably linked to my mind. I guess it helps that strawberries are my absolute favorite fruit.

This recipe from King Arthur Flour was an easy way to satisfy my craving, and was already gluten-free, but unfortunately when I made it I didn’t happen to have any King Arthur Flour on hand! I couldn’t wait the 30 minutes it would have required to run to the store and back, so I substituted with Better Body gluten-free organic coconut flour! I have an obsession with all things coconut (any guesses what my next post is about?) so naturally I loved how this turned out; it complimented the strawberries perfectly! And coconut just seems summery, doesn’t it?

If you do use coconut flour, just remember to add a little coconut milk to balance the dryness I mentioned above.


Prep Time: 5 mins.

Bake Time: 10 mins. to 12 mins.

Yield: 8 to 10 shortcakes

Ingredients:
  • 1 1/2 cups King Arthur Gluten-Free Multi-Purpose Flour, OR Coconut Flour 
  • 2 3/4 teaspoons baking powder
  • 1/4 teaspoon salt
  • 2 tablespoons sugar
  • 3/4 cup heavy or whipping cream
  • 1 large egg

Directions:

  1. Preheat the oven to 450°F. Line a baking sheet with parchment paper and set it aside.
  2. Mix the flour, baking powder, salt, and sugar together in a large bowl.
  3. In a separate bowl, beat together the cream and egg. Pour the wet ingredients into the dry ingredients and mix to form a cohesive dough.
  4. Scoop the dough in 1 1/2-ounce balls onto the baking sheet. Use the palm of your hand to gently flatten each to about 2″ to 2 1/2″ diameter.
  5. Brush the tops of the shortcakes with cream, and sprinkle with coarse white sparkling sugar.
  6. Bake the shortcakes for 10 to 12 minutes, until they’re risen and baked all the way through; break one open to make sure.
  7. Remove the shortcakes from the oven, split, and top with berries and whipped cream. Store, well-wrapped, at room temperature for several days; freeze for longer storage.

Notes:

This took me quite a bit longer than expected; approximately 30-45 minutes.

Don’t forget to add extra liquid, such as coconut milk, to balance with the coconut flour.


Processed with VSCO with a6 preset

Yum! Homemade whipped cream is the best!


What are some of your favorite summer treats? We want to hear about them, as well as what you guys have been up to this summer.  We would love for you to be apart of this Oak & Earth community.

Join us on our social media for more of our adventures in the kitchen, in the community, abroad, and everywhere in between.

Processed with VSCO with a6 preset

Fresh from the garden…

As always, live healthy, and love hard.

-Shelby


Pinterest Project Fun: DIY Yarn Hangers

Pinterest_1

Hello, everyone! It’s Bethany here today, and I am so excited to be writing on Oak & Earth  as my favorite season has arrived – summer! During the warmer months, I find myself day dreaming and scrolling through my Pinterest page frequently. With so many fun project ideas available at my fingertips, I decided to take a risk and try one that I’ve been swooning over for a while. DIY Yarn Hangers!

While you can go on Etsy and snag something similar, I prefer DIY’s because you can add personal touches and really make it your own. I also found that the materials to make these hangers are very cost efficient. Once I gathered the materials, I threw on some music and simply tied the evening away. This would be a really fun project to do with some girlfriends!

I chose this yarn hanger DIY in particular because they fit the minimal vibe that I love, the metal rings added a fun touch I hadn’t seen in other yarn hangers, and I thought the user friendly instructions were perfect for a busy girl like me! It turns out, this project wasn’t a Pinterest fail at all (we’ve all had them). I’m absolutely in love, and I think they fit so well with my style and my home.

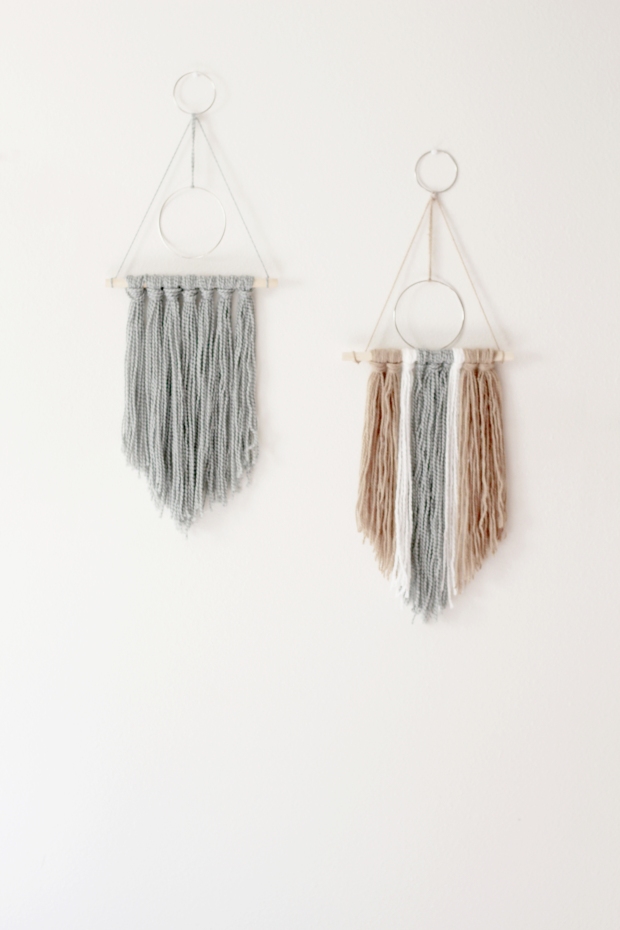
Here’s how they turned out!

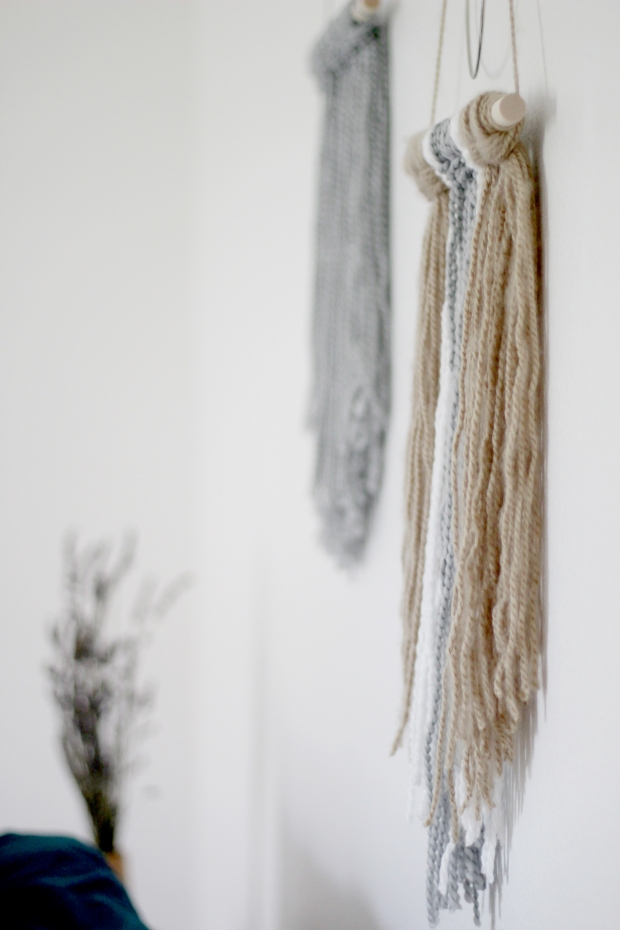
diy4diy6Processed with VSCO with m5 preset

Making the Yarn Hangers

← P R E P A R E 

Because I wanted to hang my pieces in a wide blank space, I decided to make my yarn hangers a little larger than the measurements provided in the DIY. I simply multiplied the measurements to my liking. I found every single material item at Hobby Lobby! Remember that you can choose your own color of yarn, length, texture, tying styles, etc., and that personal choices are part of the fun of doing a DIY!

← M A T E R I A L S →

  • Yarn of choice
  • Scissors
  • Ruler or tape measure
  • Cardboard piece at least 14”
  • Metal rings **Note: The size of ring depends on how large you would like your hanging pieces. The DIY demonstration calls for 1.5” and 3” rings, while I upped the size a touch. There are many sizes to choose from at Hobby Lobby. 
  • Krazy glue
  • Round wood dowel **Note: DIY instructions called for 7. 5″, I chose 12”

← C R A F T →

I followed the instructions in the DIY Yarn Hanger post found HERE. This DIY project was created by the wonderful blogger, Amy, of HomeyOhMy. Her blog is great for minimal and modern home décor ideas and projects, so be sure to check her out!


We are so excited to share all the fun recipes, DIYS, and experiences that we have planned this summer! Please let us know if you try this project, and be sure to suggest some posts you would like to see in the future! You can keep up with me on Instagram @bethanympoteet, as well as our Oak & Earth social media links located in our side bar or footer.

Happy summer, and happy pinning!

Bethany

diy7

D.I.Y. Fourth of July Top

Hello again readers! It’s Bethany here, and I am bringing you a fun D.I.Y. project just before Independence Day! I have done quite a few D.I.Y. tank tops in the past, so I thought it would fun to try a different one for this special holiday. I am really happy with how it turned out!

July7

What I like about this dip dye project is that you can make personal choices along the way. This can be done on a tank, t-shirt, or a do it  yourself crop. I chose a t-shirt turned crop top! Let’s get started!

Materials:

  • White t-shirt or tank (make sure to check out my helpful hints for the best fabrics to dye)
  • Latex or cleaning gloves
  • Scissors
  • Rubber band
  • Tulip Powder Fabric Dye [Red]
  • Tulip Powder Fabric Dye [Royal Blue]
  • Salt
  • Access to stainless steel double sink OR two cleaning buckets (make sure the sink is stainless steel, otherwise you have the possibility of staining your sink).

INSTRUCTIONS:

Step 1) Pick a top

You will need to determine what kind of top you would like to dye. This year I wanted to do a modest t-shirt crop top with high wasted jean shorts. If you have a white shirt on hand you can use that, just be sure to check out my list of best dye-able materials below. I chose to buy a new white shirt so that I could form it to my liking. I bought a white cotton scoop neck t-shirt from Wal-Mart for $3.88.

Blog1

Choosing Fabrics:

  • 100% cotton, linen, silk, wool, ramie
  • Synthetics such as rayon and nylon
  •  Fiber blends with at least 60% cotton or other dye-able fiber (blends will tint evenly but will not achieve full color)
  • DO NOT use pure polyester, acrylic, nylon, or fabric with special finishes

Step 2) Cropping

Making a crop top from a t-shirt is very simple. To get the desired length,  I always put the shirt on and fold or measure it to where I feel most comfortable cropping it. Eye balling it on the floor or just hanging in front of you is not always the best idea, because it often comes out too short or not cropped enough. Once you have your desired length, cut along that line. On this top I decided to also cut the collar a bit wider.

Blog2Blog3

3) Prepare to dye! *draws sword*

For this step, you will need to decide where you want your stripes:

  • Vertical stripes: With options of red on left or red on right
  • Horizontal Stripes: With options of red on top or red on bottom

I chose to do vertical stripes with red on the left and blue on the right. Deciding where you want your color will determine how you role your shirt to dye it. If you want vertical stripes like I had, then you want to role your shirt starting with the collar and role down to the bottom of the shirt. If you want horizontal stripes, you will want to roll it from the right sleeve to left sleeve. Once you have rolled it like the picture on the left, go ahead and grab your rubber band. Gather it in the middle and rubber band it. This will leave you a white space in the center of your shirt.

Blog4Blog5

4) Dye

For this particular shirt, I used Tulip Fabric Dye (powder) of Royal Blue and Red. I found these in the craft section at my local Wal-Mart. These dye packets come with step by step instructions on the back, and I did not deviate at all. These are the steps on the back of the package:

  1. Fill bucket/stainless steel sink with one gallon of STEAMING HOT water.
  2. Stir in 1/4 cup (4 tbsp) salt
  3. Pour in dye packet and stir until dissolved.
  4. Submerge fabric in dye mixture
  5. Stir continually for 15 minutes, and then occasionally for 45 minutes.

Submerge each side in the sink or shallow bucket for almost an hour. Remember to make sure each side is dipped into the color you want for that part of the shirt.

Blog7Blog8

Blog9Blog010

5) Rinse, Wash, and Dry

Rinse fabric in cold water. The instructions on the dye package say to machine wash warm; dry per laundry instructions. So that any excess dye wouldn’t stain any surrounding clothes in the wash, I decided to hand wash mine in the bath tub with detergent. This was quick and effective. I then put it in the dryer with other clothes I had going.

Blog012Blog011

7) Work it! 

At this point, my shirt had turned out just as I had wanted it to! I love simple Fourth of July tops, and I am so excited to celebrate in my own style!

Blog013July7

July1

July6 July9

Now go out and make your own! This process was really simple and fun. Please do not hesitate to ask questions and comment! Feel free to keep up with me on Instagram at Bethno13. We hashtag all our posts with #OakAndEarthBlog and our travel adventures with #OakAndEarthRoutes. This is an easy way to keep up with our posts, and as always we love talking to you all! Happy Independence Day!

Peace, love, and Rocketships.

-Bethany

5 Heatless Spring and Summer Hairstyles

“For me, hair is an accouterment. Hair is jewelry. It’s an accessory.”  –Jill Scott


IMG_1641

Happy Spring everyone! It’s Bethany here.  I’ve gotten a lot of compliments on my crown braid lately, so it inspired me to do a tutorial  blog this week! The tutorial is done by video, but I will also provide pictures of each look and their accompanied name below.

The first day of June was sunny, warm, and filled with ice cream cones and laughter. I have been getting so stoked on summer drawing near. While the excitement builds, so does the volume of my hair! Humidity is no joke. Spring and summer should be care free, and we want to use the least amount of product and heat on our hair that we possibly can. How do we do this without sacrificing style?

I’m providing you with 5 Spring and Summer heatless hairstyles that are both functional and adorable. These styles keep your bangs out of your face, and they can all be worn down or in a ponytail or bun. These looks can be done on short, medium, or long hair. With a recent haircut of 7 inches (holy cow), I was still able to do all of these hair styles. This hair tutorial video provides step by step instructions for each of the five styles. I also provided pictures of each look below the video so that you can see the end product. Go ahead and click play!

1. Faux Fishtail Headband 

Bethany1 Shelby3

2. Braid Thread Headband

Bethany3 Shelby4

3. Gatsby Headband Wrap

Bethany4 Shelby1 Shelby2 IMG_1615


4. Twisted Crown

Bethany5 Bethany7 Shelby6 Shelby5

5. Crown Braid

Bethany9 Bethany010 Shelby011 Shelby7


I hope you enjoyed learning these summer looks! To keep updated with our weekly posts, you can follow me on Instagram with the handle @Bethno13. You can easily keep up with our posts by checking out the hashtag #OakAndEarthBlog. As always, feel free to leave suggestions for posts you would like to see in the future. Now go swoop up those bangs and enjoy Spring!

Peace, love, and Rocketships.

-Bethany

Mama’s Mocktail Party

Hello, it’s Tera again! This week I thought I would create a post that used more of my creative side. The girls and I brainstormed together, and we came up with the idea for me to create a few “mocktail” recipes, and I am really excited to share them with you!

This was inspired by remembering back to my pregnant days. The girls and I would go out to dinner, and they would order their cocktails, and I, my water. They would give me free smells of their fruity concoctions and some extra pretzel bread, but really, I just wanted someone to bring me a drink that tasted as good as a mojito or margarita without the alcohol in it! Thus, the idea was spurred.

Being a mom to a young one, this post is written especially with the mama’s (and mama’s to be) in mind, but don’t worry, you don’t have to be a mom to enjoy these tasty treats. Sometimes we just need a ‘lil pick me up during the day, ya know? These drinks are perfect for summertime, and are surely as good as the real deal!

Let’s get to the fun part, shall we?

Naptime Blues Colada (for when you are berry ready for nap time, but baby is not.)

Blog014 Blog011

First up, is my spin off a colada! I decided to forego the usual pineapple flavor, and created a combo of fruity and “coconutty” that I think is super refreshing and perfect for a late morning brunch with some friends! This drink is so yummy, you and your friends won’t miss the alcohol at all, not to mention the fact that it is super fast and easy to whip up!

To make this drink, you’ll need: (this makes about 2 servings, perfect for you and a friend, or multiply for larger groups, or seconds, or thirds, or…so on)

  • 1 Cup of blueberry pomegranate juice (I used Tropicana)
  • 1 lime, squeezed
  • 1 tablespoon lemon juice
  • (about) ½ Cup of Cream of Coconut (sidenote: this is sweet, but you can add more or less depending on how coconutty you want it!)
  • 2 sliced strawberries
  • 2 drops of coconut extract

Start by mixing all ingredients into a blender, and add about a cup of ice (you can add more ice like we did to get a frozen drink). When you have mixed your desired texture, pour into some cute serving glasses, and garnish with a lime wedge! If you want to take it to the next level, sprinkle some local bee pollen on top as a pretty garnish and also fight those stubborn allergies at the same time! Refer back to Christiana’s post on bee pollen and all its perks here: Don’t BEE miserable during spring

We love how this “colada mocktail” turned out, and we hope you do too! If you wanted to add something to enjoy a real cocktail drink, we think some rum (to taste) would be a good addition!

Mama’s Front Porch Mojito

Blog015 Blog017

This drink has got to be my new go-to summer refresher. It’s my take on a mojito, and I think it tastes just as good, or better! I was extra picky on this one, because mojitos are my favorite, and I really wanted the taste to remind me of one! I think we nailed it and it’s just the perfect summertime drink for parties, family picnics, or just sittin’ and sippin’ on the front porch.

For this drink you will need: (again, this will make a couple of servings, so multiply for desired number of servings)

  • 2 Cups of lemonade- tip: if you make a whole batch of lemonade, you can multiply other ingredients to match and make several more mojitos! I used this lemonade recipe, on a smaller scale: Pioneer Woman’s Lemonade
  • 1 Cup club soda
  • 10 mint leaves
  • 6 lime wedges, squeezed
  • 2 teaspoons sweetened lime juice
  • 2-3 sliced strawberries

You’ll have to begin this drink by making your lemonade. I chose a homemade recipe because I wanted to use as many fresh ingredients as I could, and I think the taste is so much better! A little humor and helpful tip: When making your own lemonade, it’s best to make sure you’re using sugar instead of salt. It definitely does not taste the same, and is beyond repair once its done.

Blog3 Blog8 Blog4 Blog1

See above pic ^^ that’s salt, folks. Try to avoid this misstep, otherwise you’ll be set back a bit like we were, and there will be laughing at your expense. [Okay, Beth and Chris, it’s funny now] REMEMBER: tiny grains= salt, small grains (but not tiny)= sugar. Another helpful tip: use your teething babies to help you peel some lemon zest! *wink wink*

Re-routing back to the drink now. After your lemonade is done, the rest is pretty easy. Measure out the lemonade (remember, 2 cups for this serving size), and add the club soda, squeezed lime wedges, sweetened lime juice and fresh mint leaves (ours came straight from the garden, courtesy of Christiana). Top the serving dispenser with strawberry slices, and it’s ready to be served! (tip: it is helpful to let the mint leaves seep into the drink before serving, but not required) Pour into a glass, add some ice and garnish with a pretty strawberry slice! I will be making this drink all summer long. I just wish I had this recipe handy when I was pregnant! Perfect mojito mocktail that all the mama’s (and even the not-a-mama’s) will love.

(If you do want to include a little alcohol for a party with friends, try adding a little rum or some amaretto and grenadine to taste!)

Lazy Lavender Bedtime Tea

Blog019 Blog018

This last drink isn’t really a mocktail, but we thought it would be fun to include a recipe that is perfect for when the kids are in bed, and you’re ready to kick back and relax for some “me” time, or maybe even enjoy a bubble bath for yourself. This is probably the most no-brainer recipe and has very few steps, so it requires little brainwork after yours has been fried from a day of a thousand “what’s that?”, “are we there yet?”, “mama, can I have this?” questions and the constant errand runs, cleaning, cooking, and working you’ve been doing!

For the Lazy Lavender, you’ll simply need:

  • Lavender honey tea bag (I used Yogi brand)
  • About 2 tablespoons (give or take a little) of Silk Coconut Almond Milk [unsweetened]
  • 1 teaspoon of agave (or fresh honey)
  • ½ tsp lemon zest, a small basil leaf, and orange slice for garnishing

Boil some water either over the stove top or in a microwave, add the tea bag and let it steep for about 5 minutes. Once the tea bag’s flavor is rich, add the milk (you can steam the milk or add it cold), the agave, lemon zest and basil. Garnish with a pretty orange slice, and enjoy a few quiet hours to yourself! I am usually not a big fan of hot tea, but I really liked the taste of this one, and could see myself drinking this for a little relaxation time!

These mocktail recipes are sure to be a big hit with your friends and family this summer, and they’re great pick-me-ups that will refresh you, rejuvenate you, and give you the energy for all of the fun summertime projects you’ve been meaning tackle all year! We hope you enjoy making them, and enjoy drinking them even more! Be sure to keep up with Oak and Earth weekly, as we have some really fun posts planned for the summer! Also keep up to date with me through my instagram feed @terapianalto, and hashtag your Oak and Earth pics  #OakandEarthblog!

Blog026 Blog024

Live healthy, love hard, root deep! Cheers!

xo- Tera

Blog021-2

Local Flavor: Oak and Earth Does the Dogwood Festival

It’s Bethany comin’ at ya for this post!

Funnel cake, hot pavement, trees blooming, music, and a bunch of people you vaguely know but don’t want to talk to. Must be a small town festival! Holy festivals, Batman! I’ve experienced all kinds of festivals and fairs in my lifetime. My favorite is still claimed by none other than the Dogwood Festival. I feel like every town has an annual festival that they are super proud of, and this is ours. In this post you’ll find a video of me chatting it up with festival goers, you will discover OakandEarth’s Dogwood Festival musts, and share in Dogwood experiences that were new to me this year!

I felt compelled to write about the festival because this festival celebrates OakAndEarth’s common roots! Our tagline for our blog is Common Roots, Different Routes. Our common roots are planted in Siloam Springs, Arkansas. Siloam Springs is a charming town of about 15,000 people. We have beautiful parks, a downtown with coffee shops and antiques, and dogwood trees (ahhh, now you’re getting it, right?). At a typical Dogwood Festival there are a ton of booths with handmade goodies, fair food, live bluegrass music, and an awesome kid section that I find myself mindlessly wandering into each year. (I wonder what this says about me).

When I wandered into the kid section this year, I found a ton of happy families. I’m throwing it back to the early 1990’s for a second. After my family’s first trip to the festival, my older brother left in tears. Sugary treats, warm weather, music, why was he crying?? Simply put, he thought the Dogwood Festival would have dogs. “There weren’t any dogs!!!”. A clear rookie mistake that could happen to anyone. Names are not always as literal as we wish them to be.

Denver and I spent Saturday being slightly creepy, and asking random festival goers what they enjoy the most. Let’s take a look at the festival this weekend and what people think about it!

OakandEarth Dogwood Favorites:

–CHRISTIANA–

We caught up with Christiana at the festival, and she said her festival musts are the Kettle Corn and the book sale at the local library! She also bought some honey and a few other treats that she will discuss next week!
Dogwood2 Dogwood3 Dogwood4

–BETHANY–

My favorite treat will forever and always be the Tigers Blood snow cone. I get one every year, and this year was no exception! Tigers Blood is a mixture of watermelon, strawberry, and coconut. Good for a hot day, and also good if you desire an obnoxiously red mouth.

Dogwood022IMG_0004

Something I had never noticed at the fair before was a food truck that sold roasted corn on the cob! Okay, readers. If you’re going to learn anything about me, it is that I have 3 loves (listed in no particular order)– stew, corn on the cob, and Denver (my husband). At the festival, I got two of those fixes! The third will be relieved in few hours when I make homemade stew. But I digress. This corn on the cob is one food item that could make me shout a curse word to the high heavens. Thankfully I have some restraint (in public). For now, just enjoy pictures of me in what can only be referred to as  corn heaven.

Dogwood021 IMG_0098

 –TERA–

Tera was in Colorado this year! But she was with us in Dogwood spirit! She said her favorite part of the Dogwood is the atmosphere, and the Funnel Cake. Since she could not partake, Denver  stepped in a did the difficult task of consuming a funnel cake for her! Poor, Denver. *sarcasm*

Dogwood06 Dogwood07

 –SHELBY–

I met up with Shelby and her boyfriend Jeff in the later part of the day. Shelby is fun to go with, because she hops along to each booth with great intention. She snagged some honey, beautiful succulents, and some food! Her favorite treats are the Kettle Corn and Lemonade! How southern are we?

Dogwood015 Dogwood016 Dogwood017 Dogwood018

New to me!

While these are our  festival musts, I saw a few surprises this year! One being the corn booth (have I talked about corn enough?), another being a neat home made guitar booth! We also walked right up to a kids’ martial arts show in the midst of them breaking boards (see video for that goodness). As many years as I have gone, it’s neat to experience new booths.

Dogwood09 Dogwood010 Dogwood011 Dogwood013


Although the Dogwood may be a stereotypical small town festival, I like to think that it’s special in it’s own right. And I will keep going as long as it comes around. I hope you enjoyed getting to know a small part of our Common Roots as we bring in the spring season! I have some great ideas for my next post, and I look forward to connecting with you all again. As always if you have any suggestions or questions for us, please feel free! Christiana has a pretty neat spring themed blog coming at you next week, so be sure to look for it!

Peace, love, and Rocketships,

Bethany